
The Wood Mouse Workshop
@mouse_workshop
Furniture restoration and upcycling.
You might like


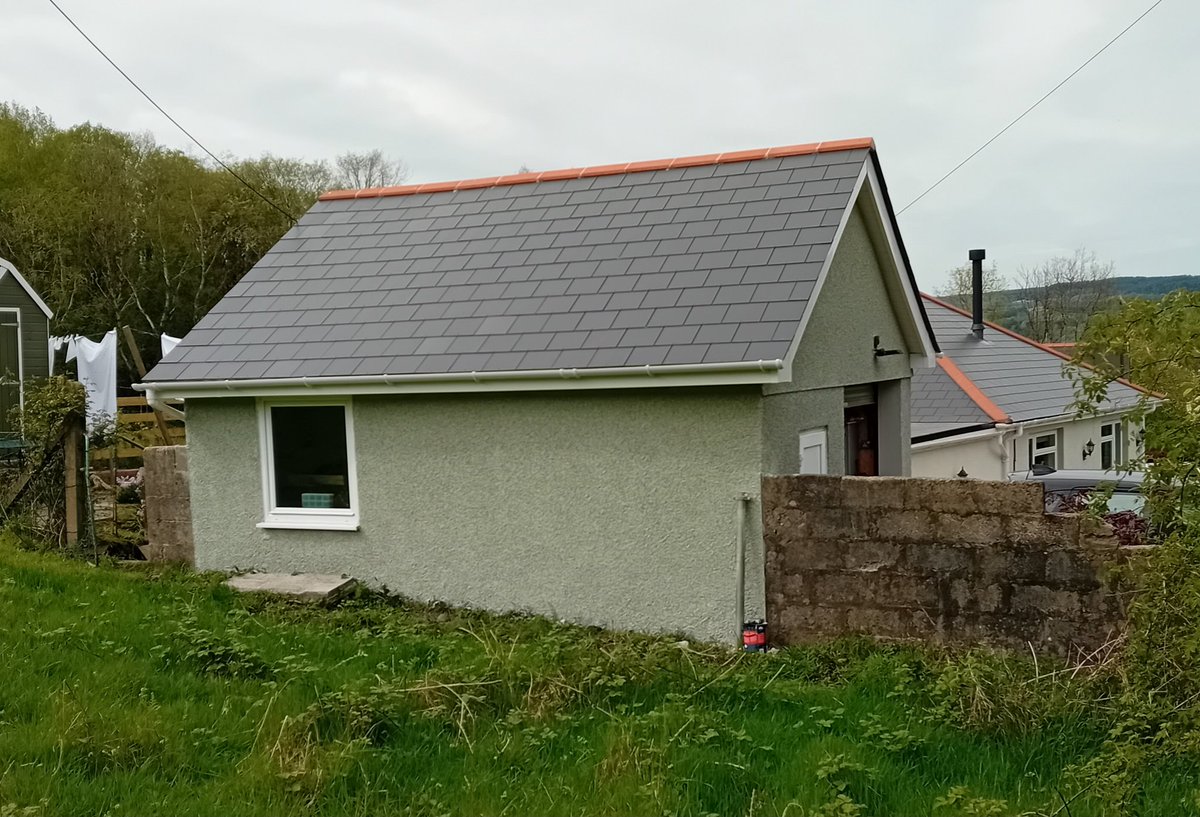
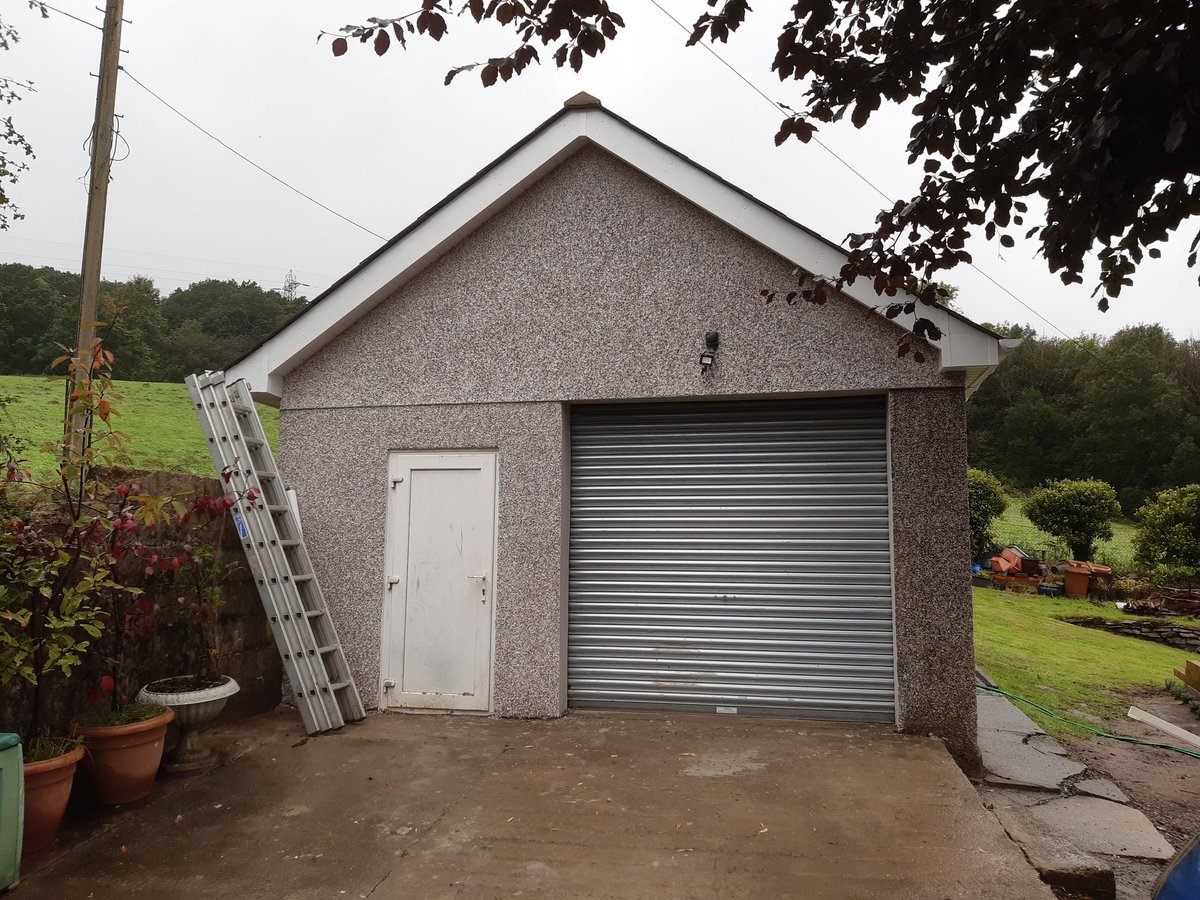
I dreaded painting the garage workshop as I hate painting pebbledash but this time I used a paint sprayer. What a difference! The garage was done in no time and is transformed. #diy #×workshop

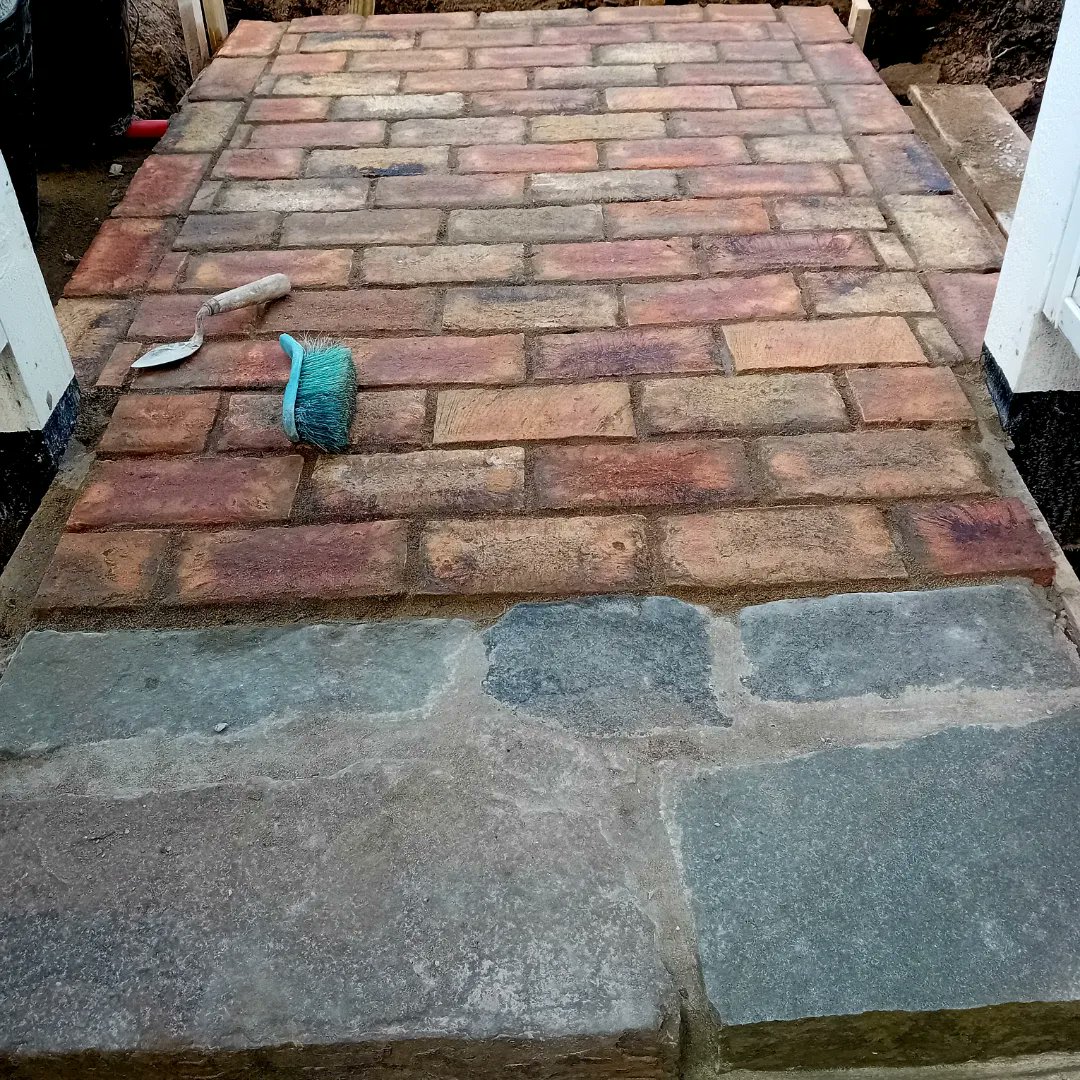
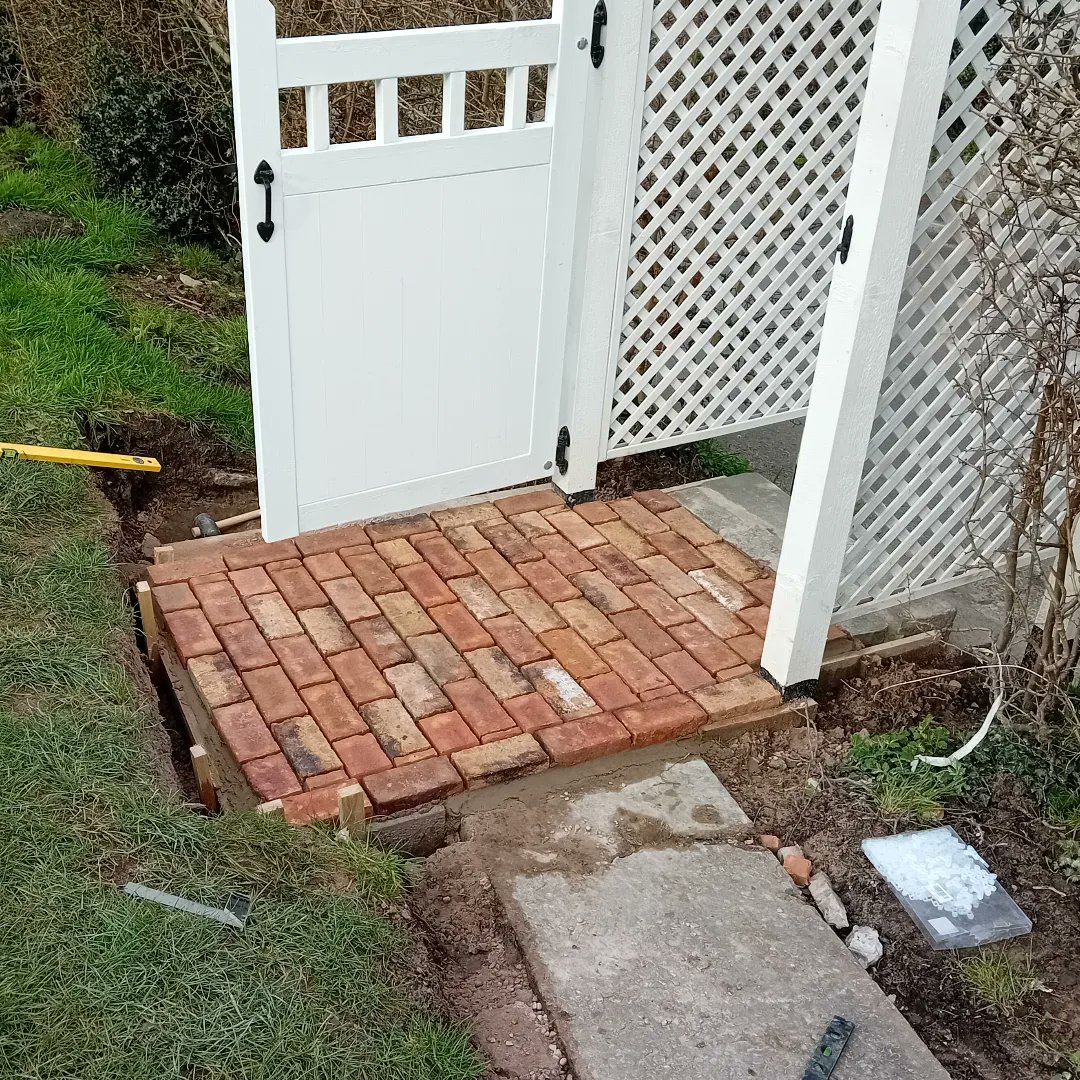
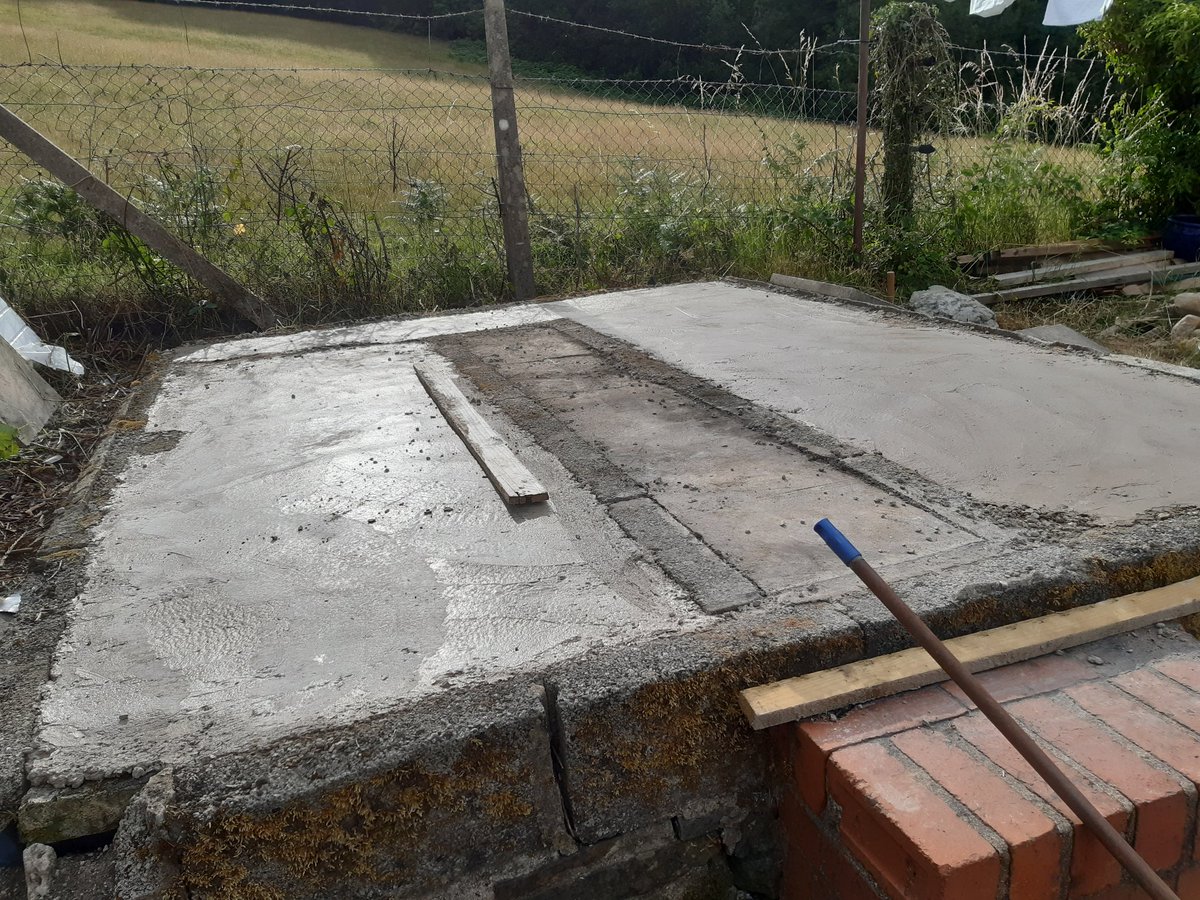
Continuing with the garden renovation, I put down a brick entrance by the gate. I started by levelling the ground and pouring a concrete base. I need to enclose the bricks with a low sleeper wall and then onto the rest of the path! #gardenrestoration #brickpath
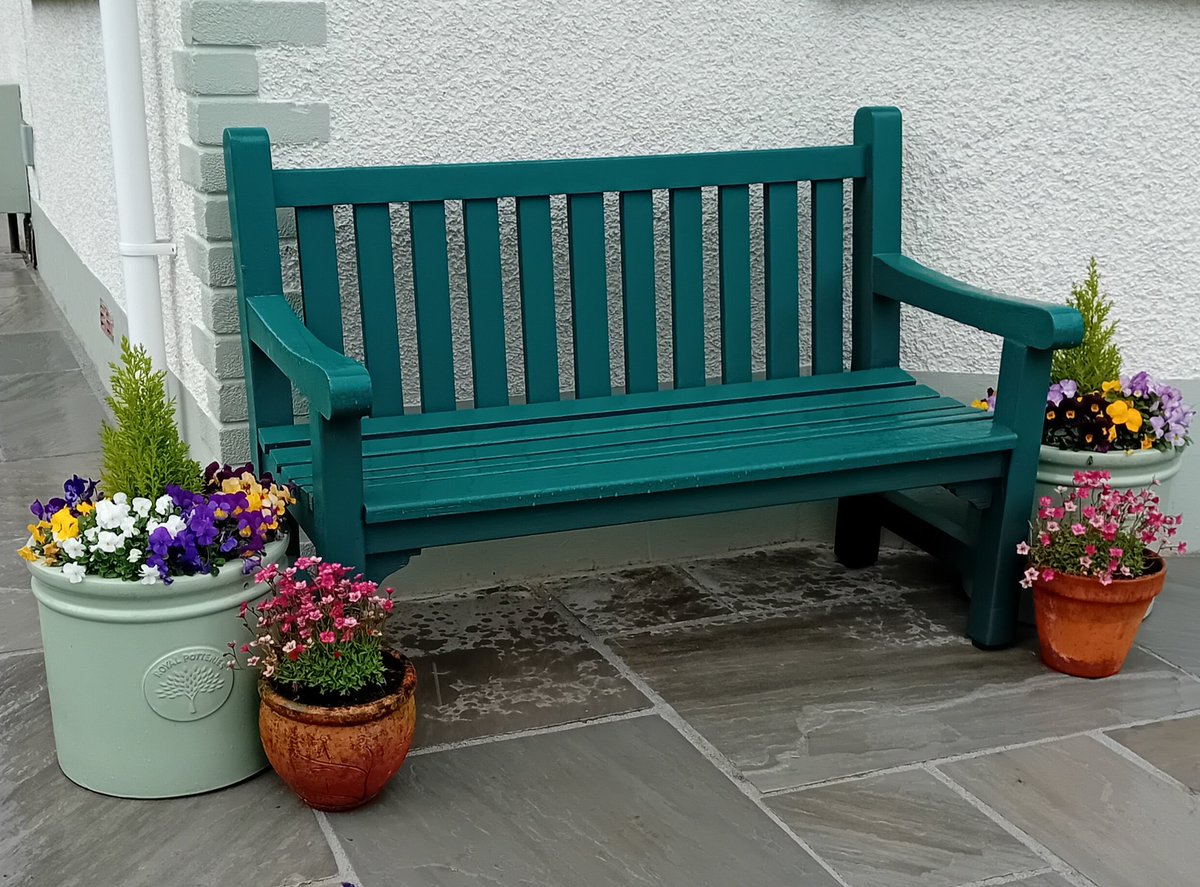
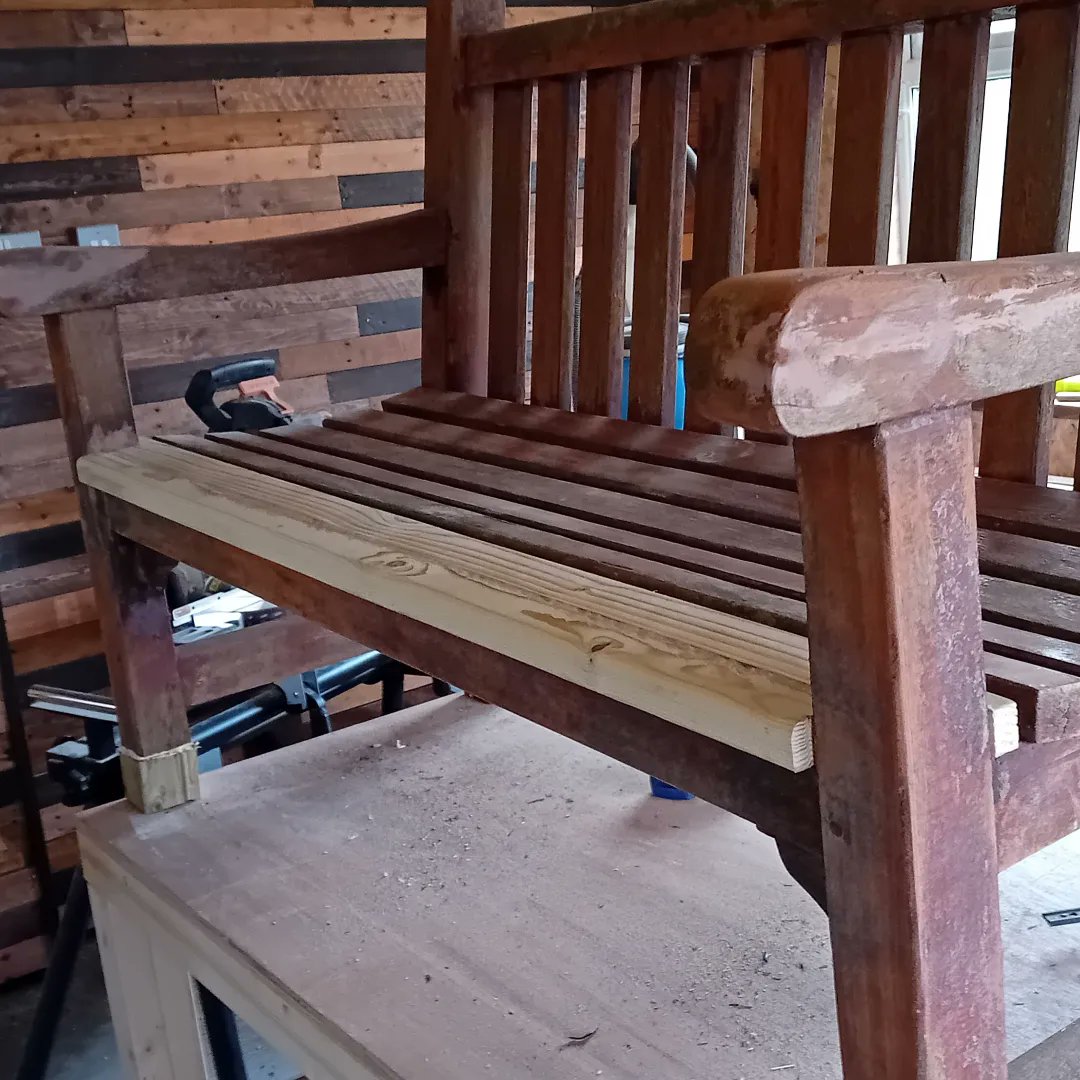
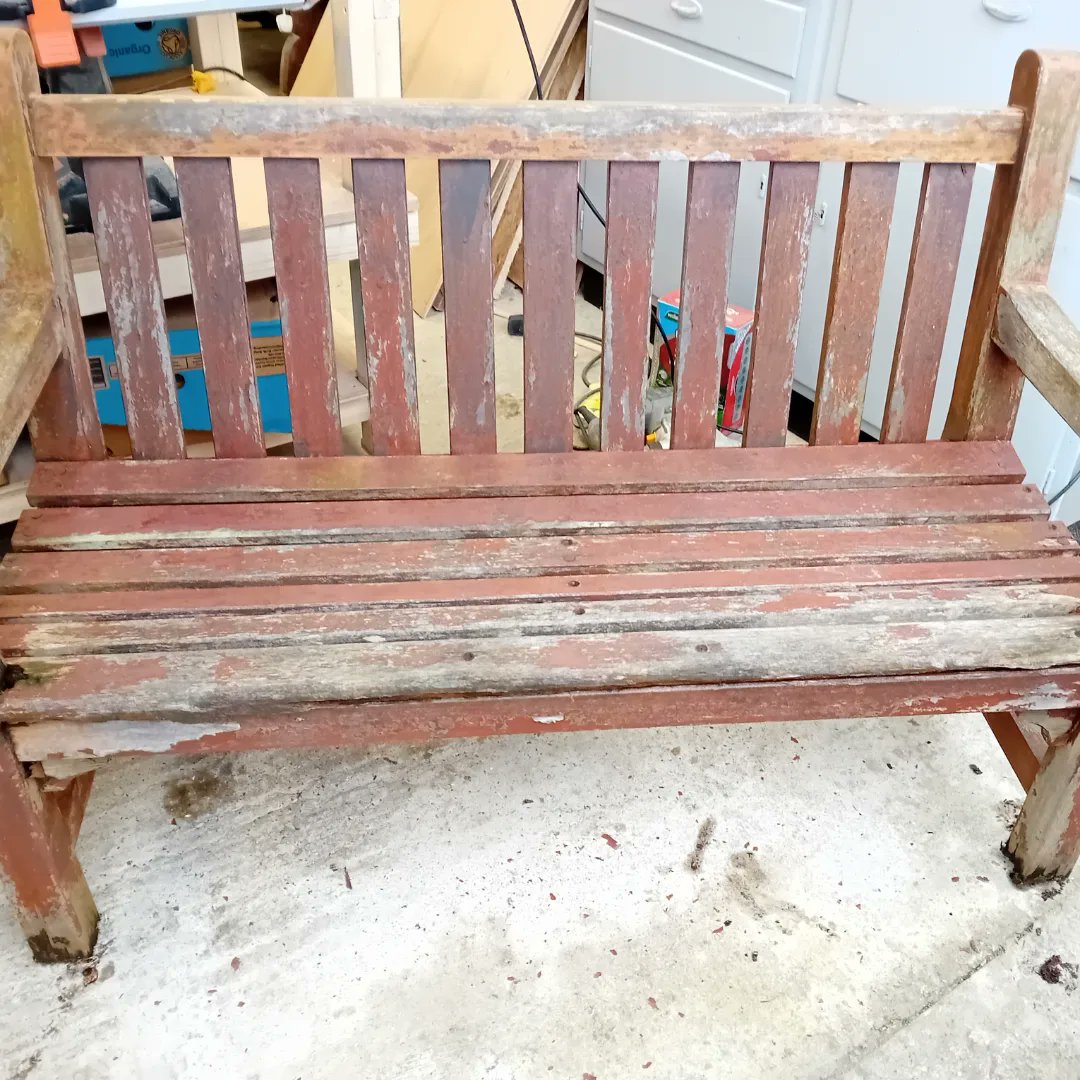
This old bench was in the garden when we bought the house. It had been left out and untreated for years, so had areas of rot but was otherwise a good quality bench. I replaced the rotten wood. Painted using Curprinol "Sage" green. #gardenrestoration #gardenbench

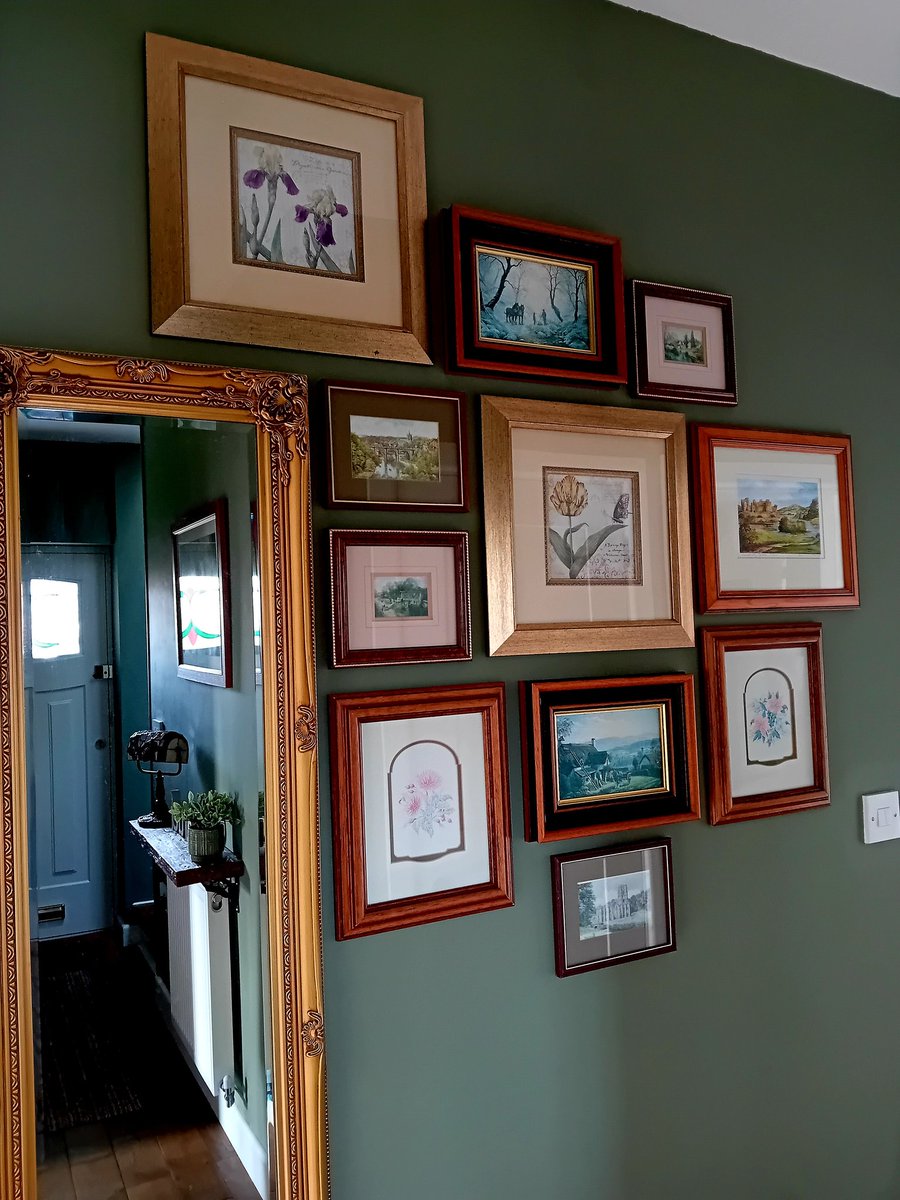
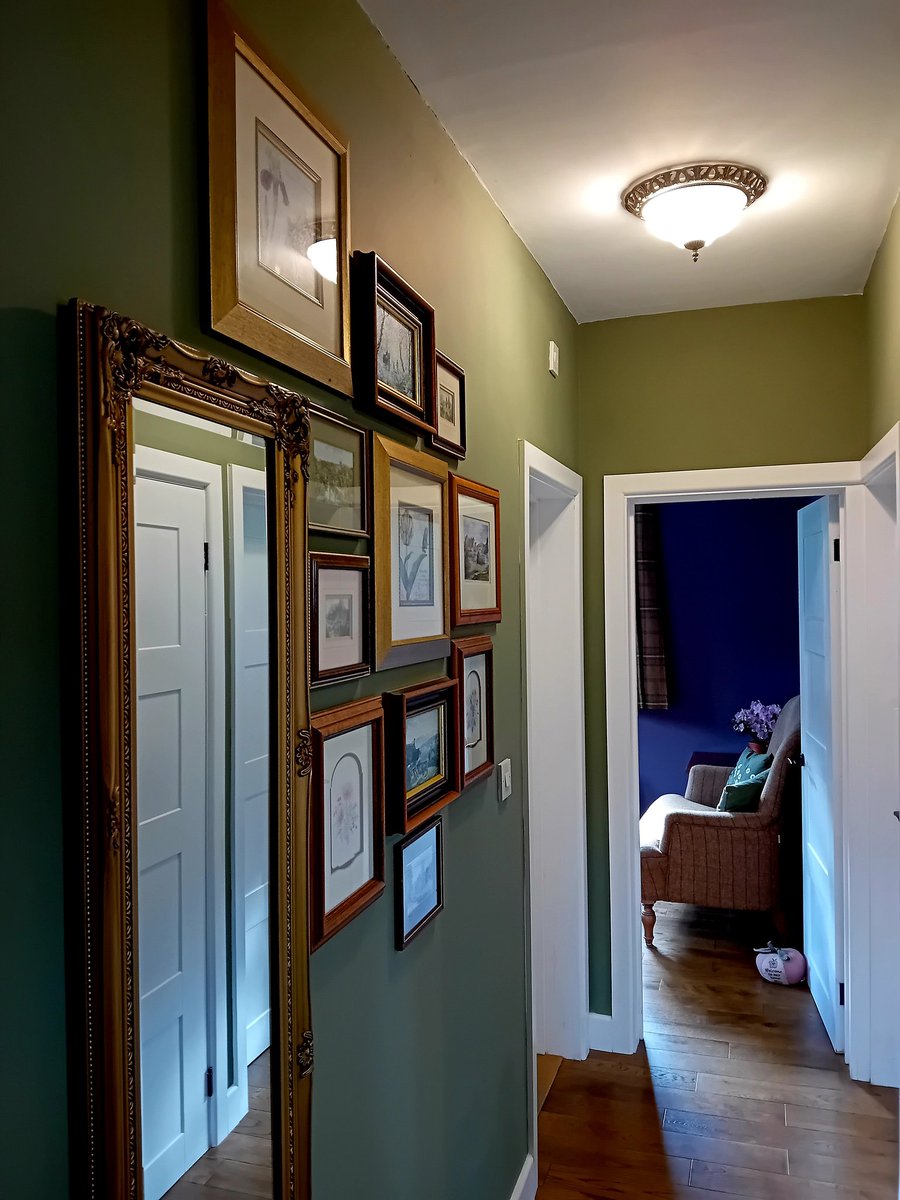
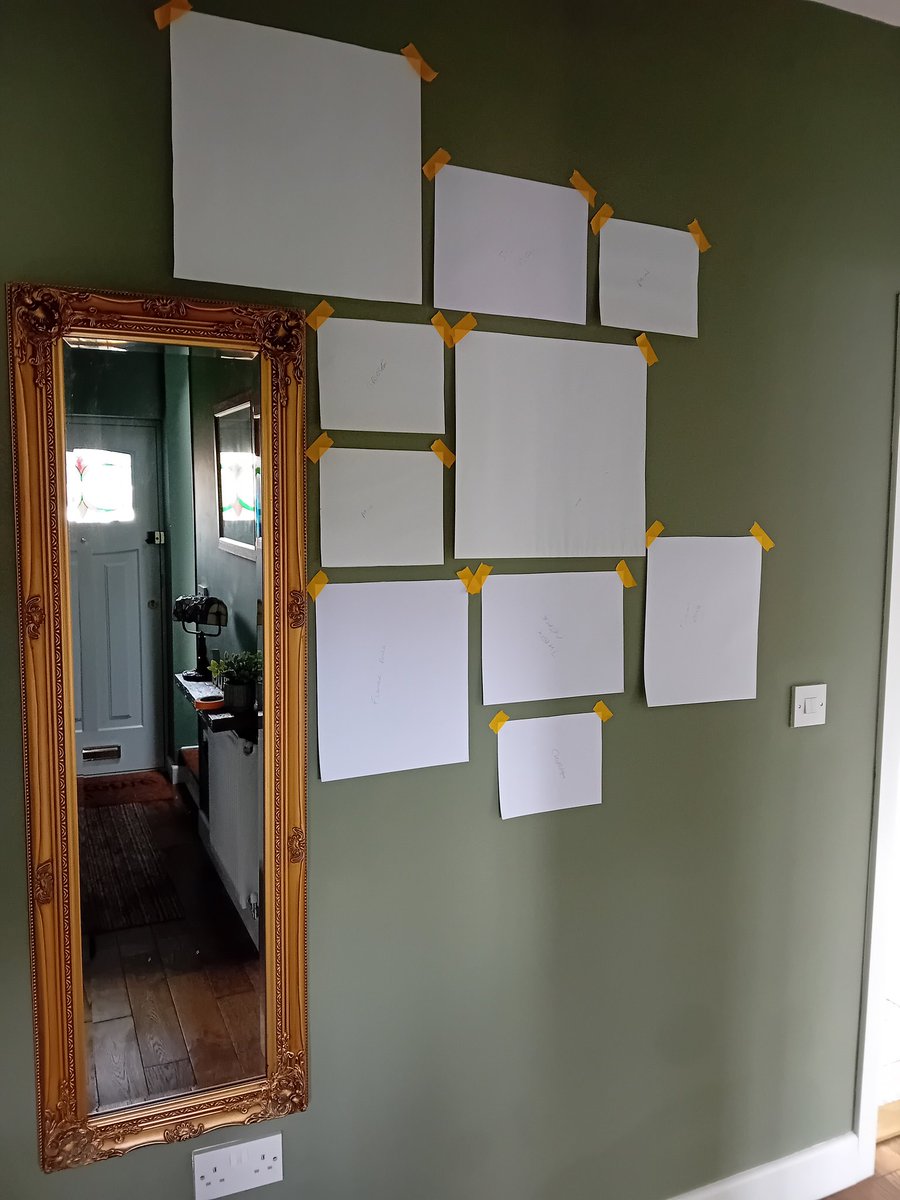
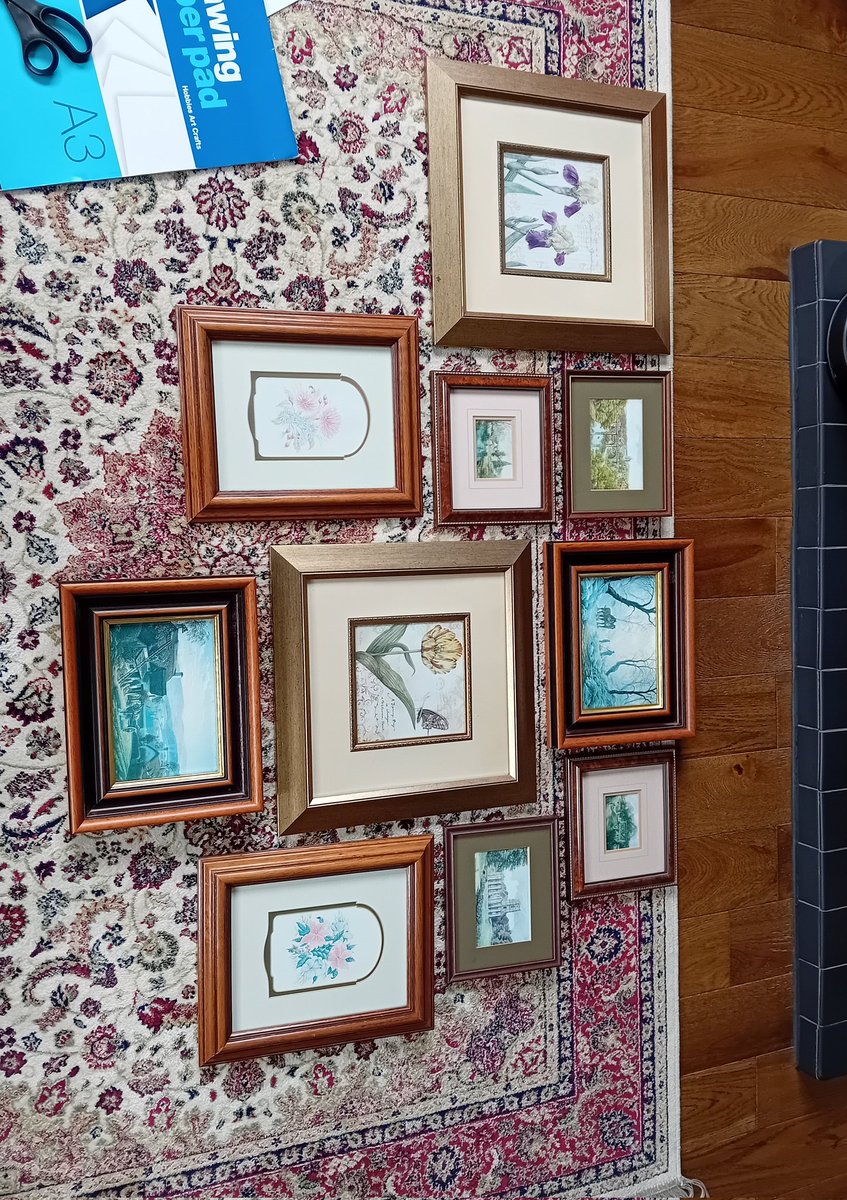
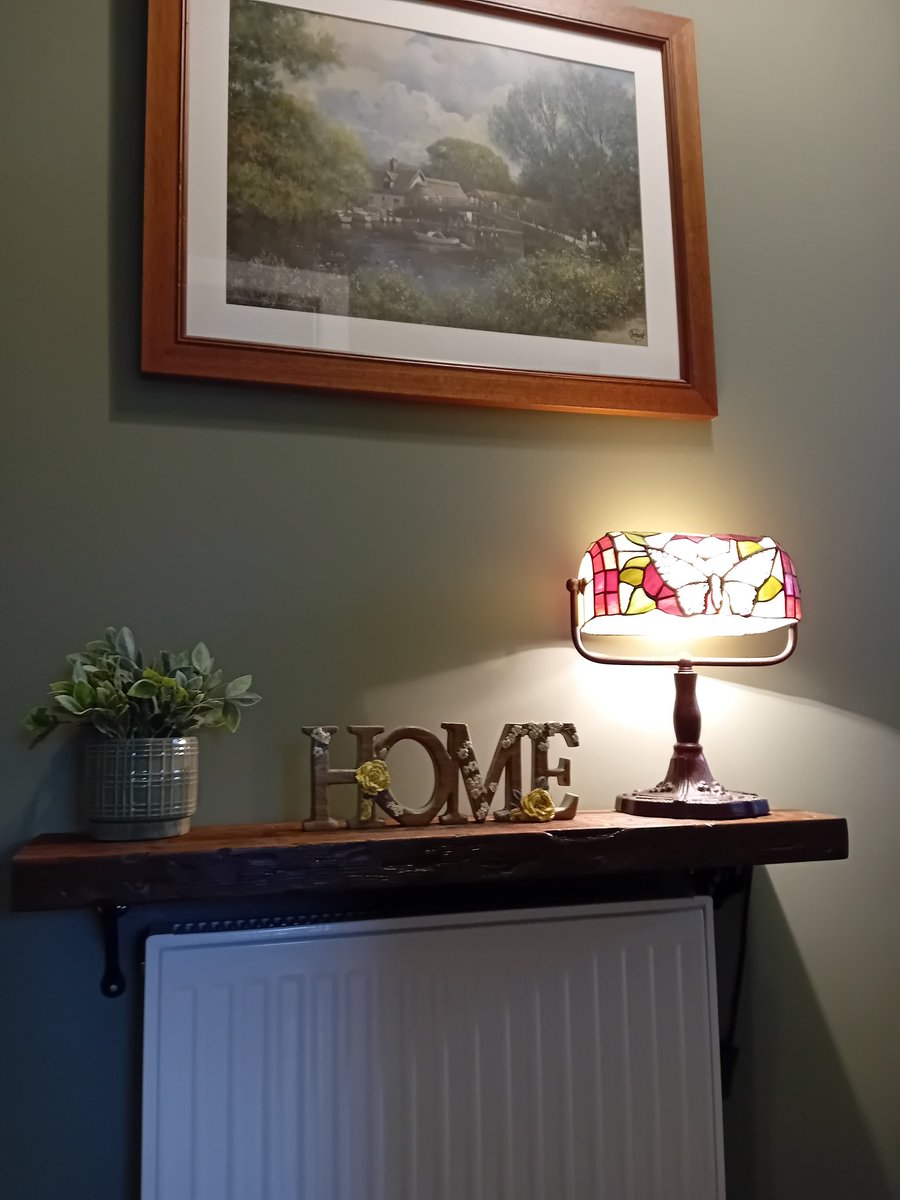
After the renovation, the house lacked some character, so we decided to try a gallery wall in the hallway. I'm not sure how successful it turned out, but at least it's more interesting than before. #gallerywall #diy
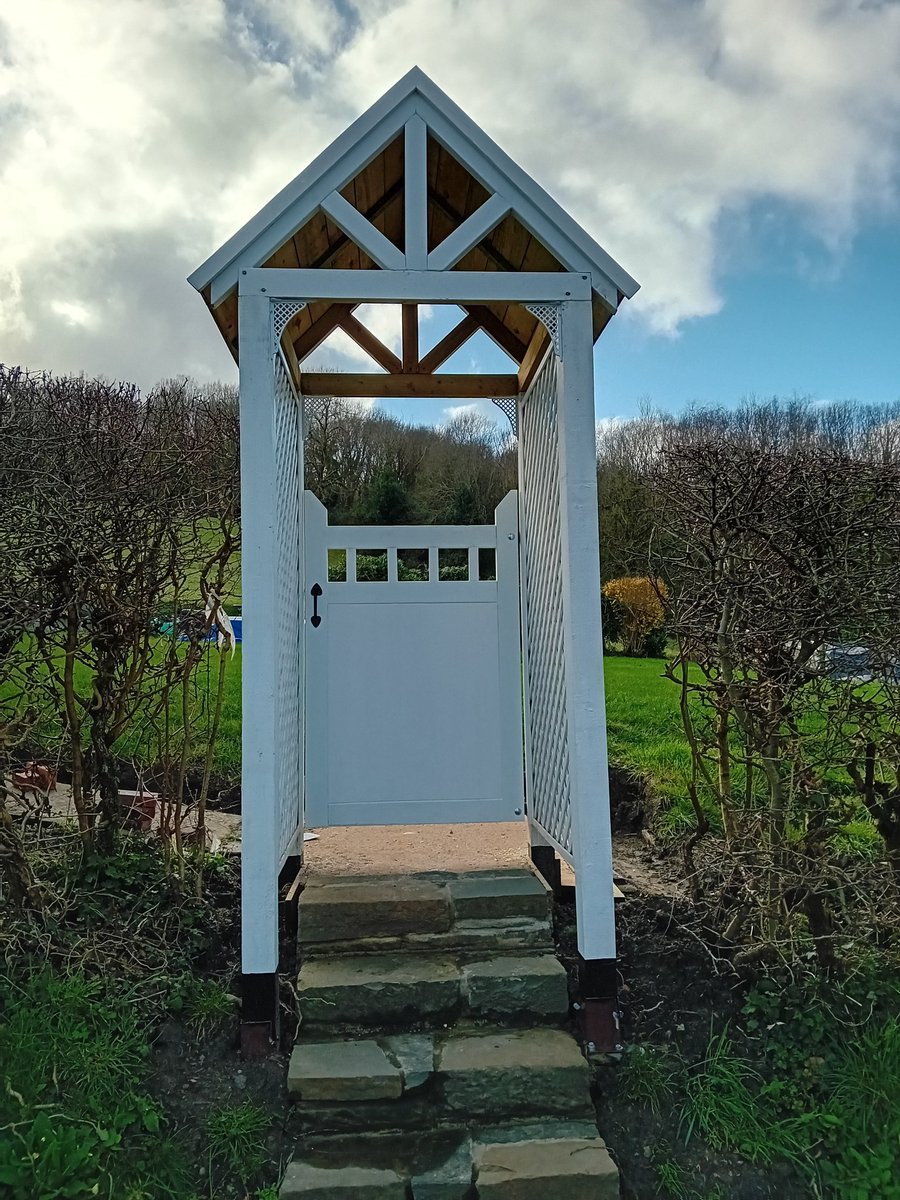
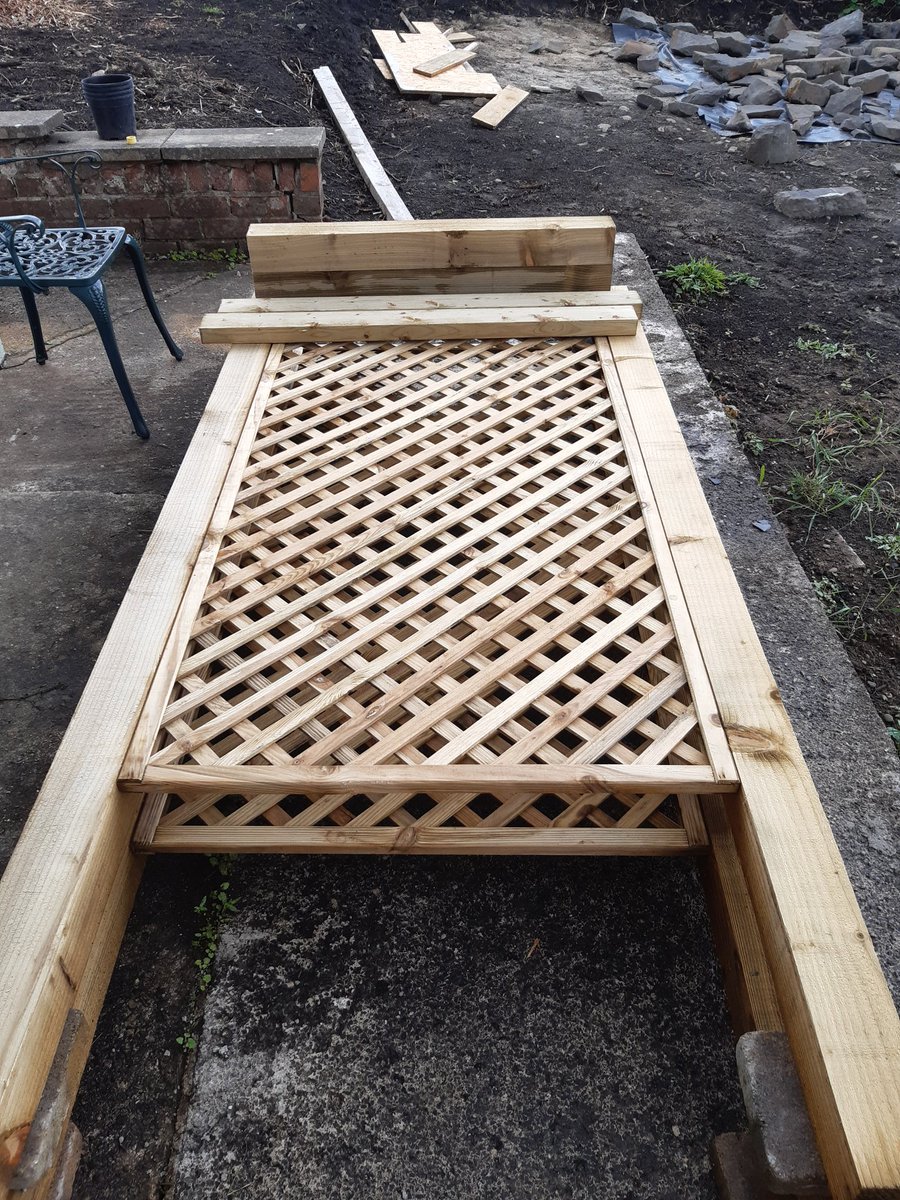
Put the workshop to good use and made a gate for the arbour entrance. Made using treated 4x2, lap joints, pocket screws and finished in "Daisy White" to match the arbour. Hopefully the hedge will now grow around the arbour to blend it in #woodworking #gardengate
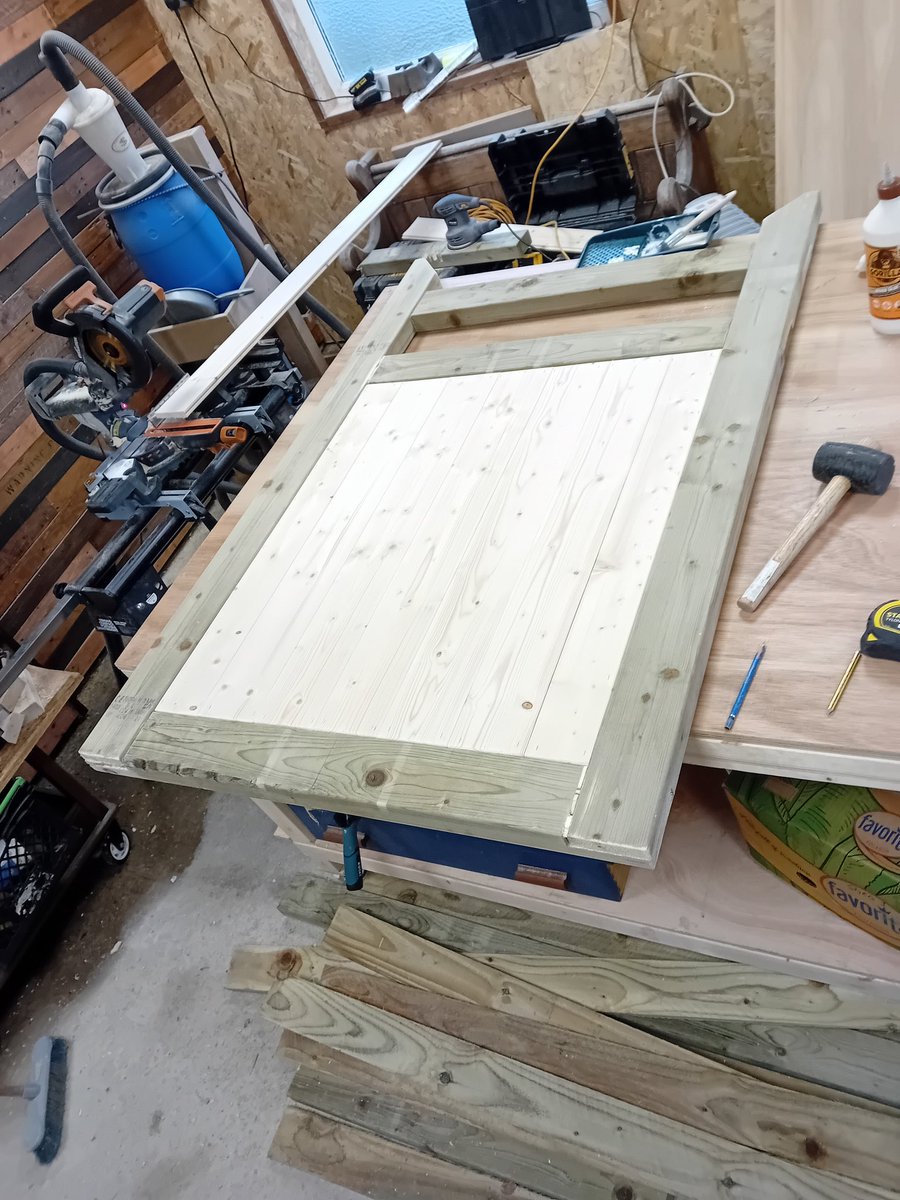
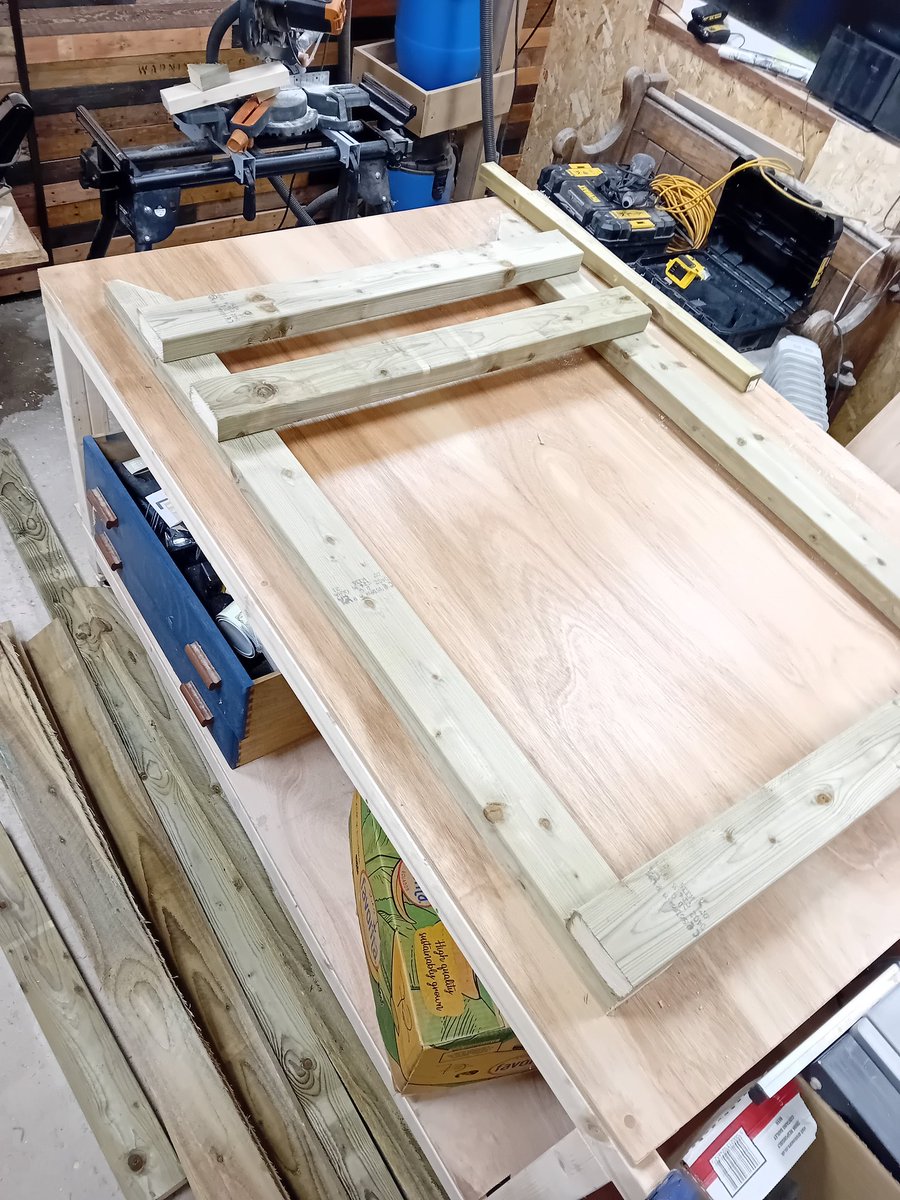
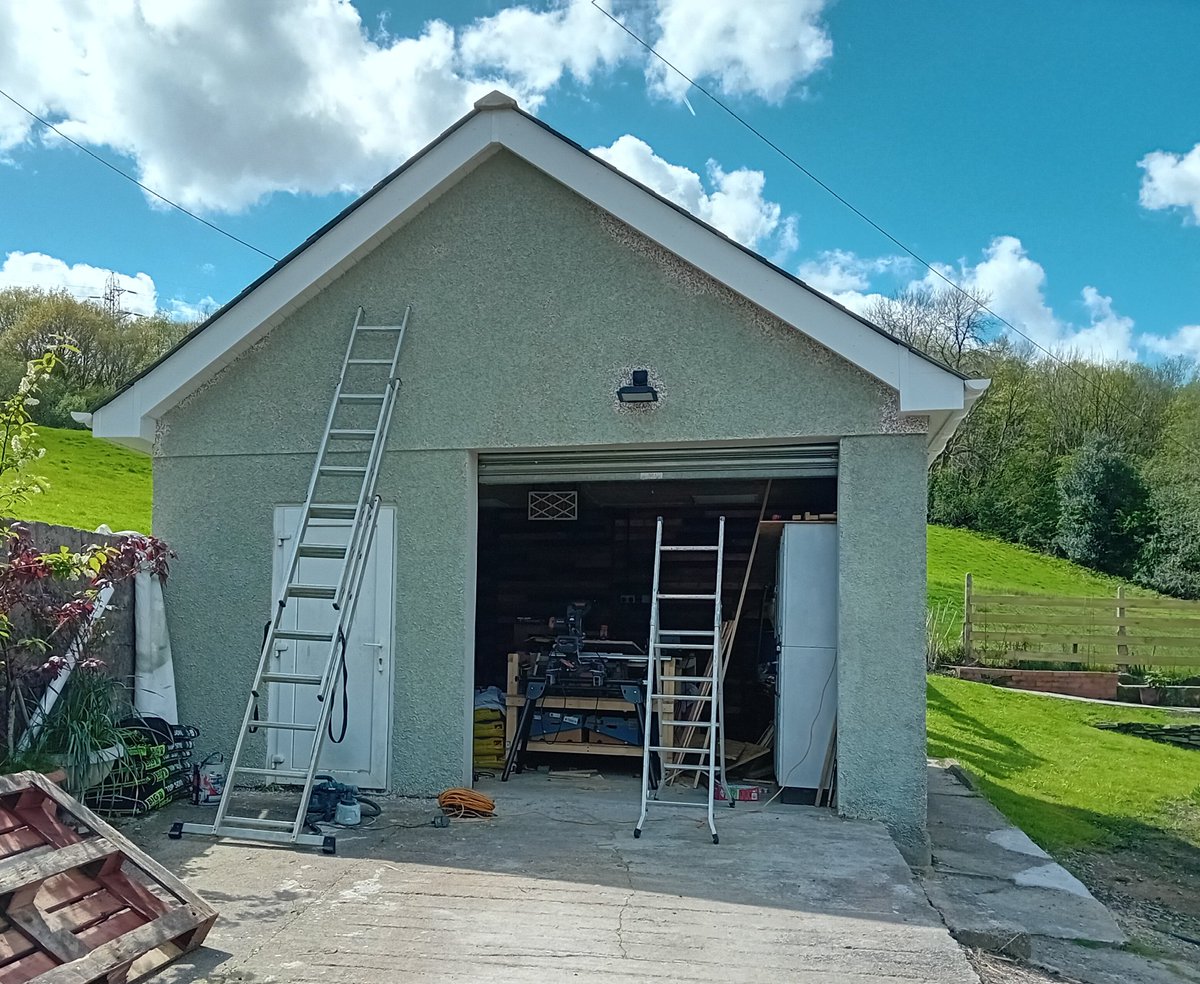
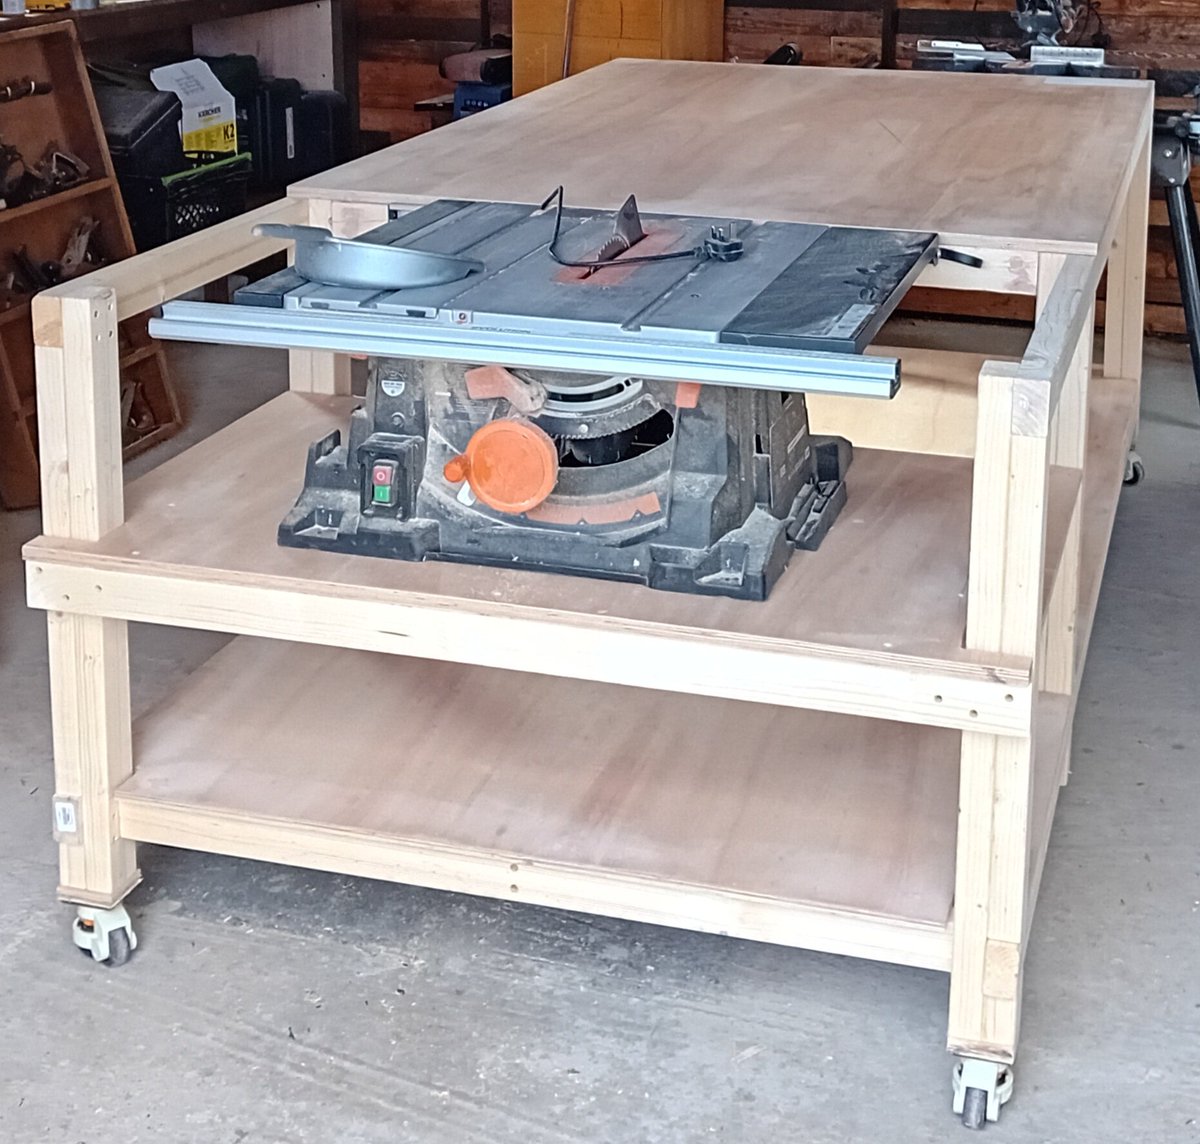
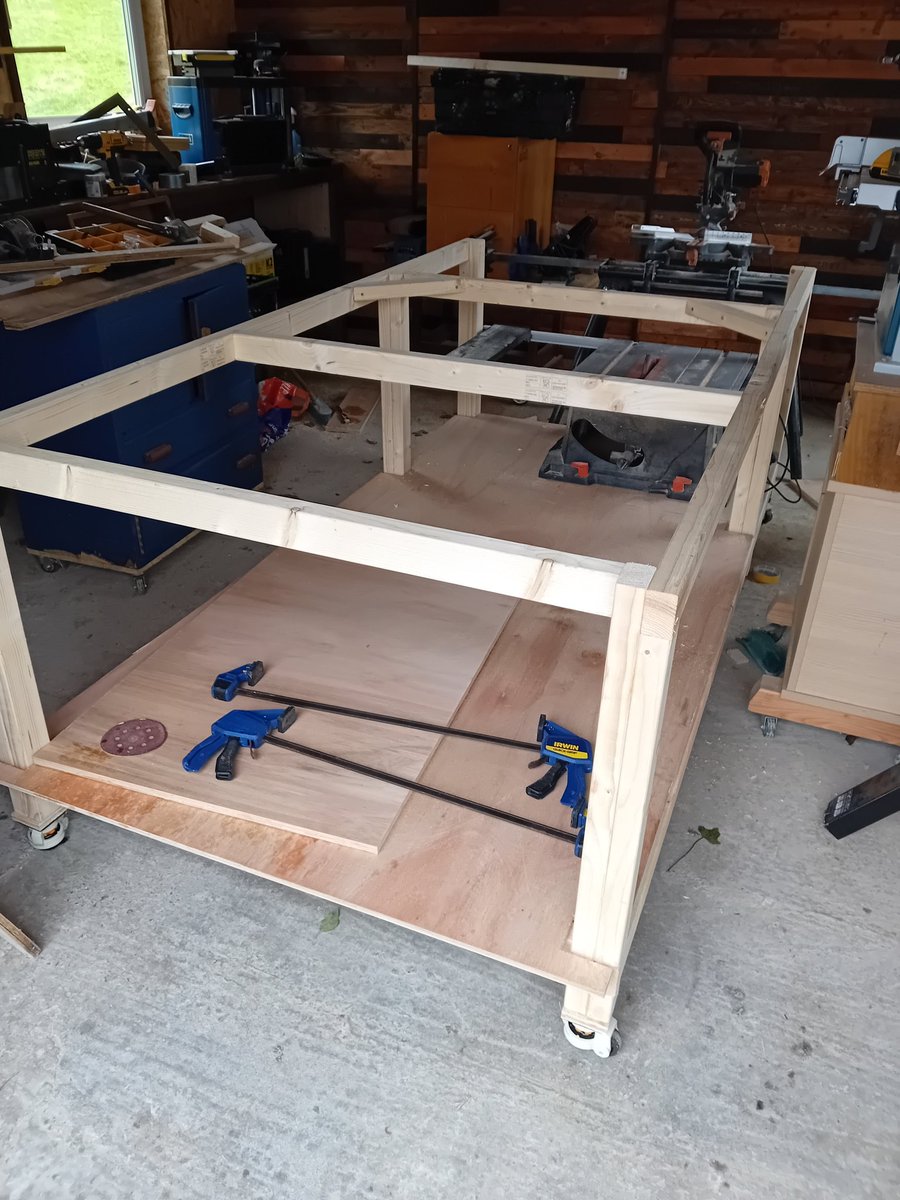
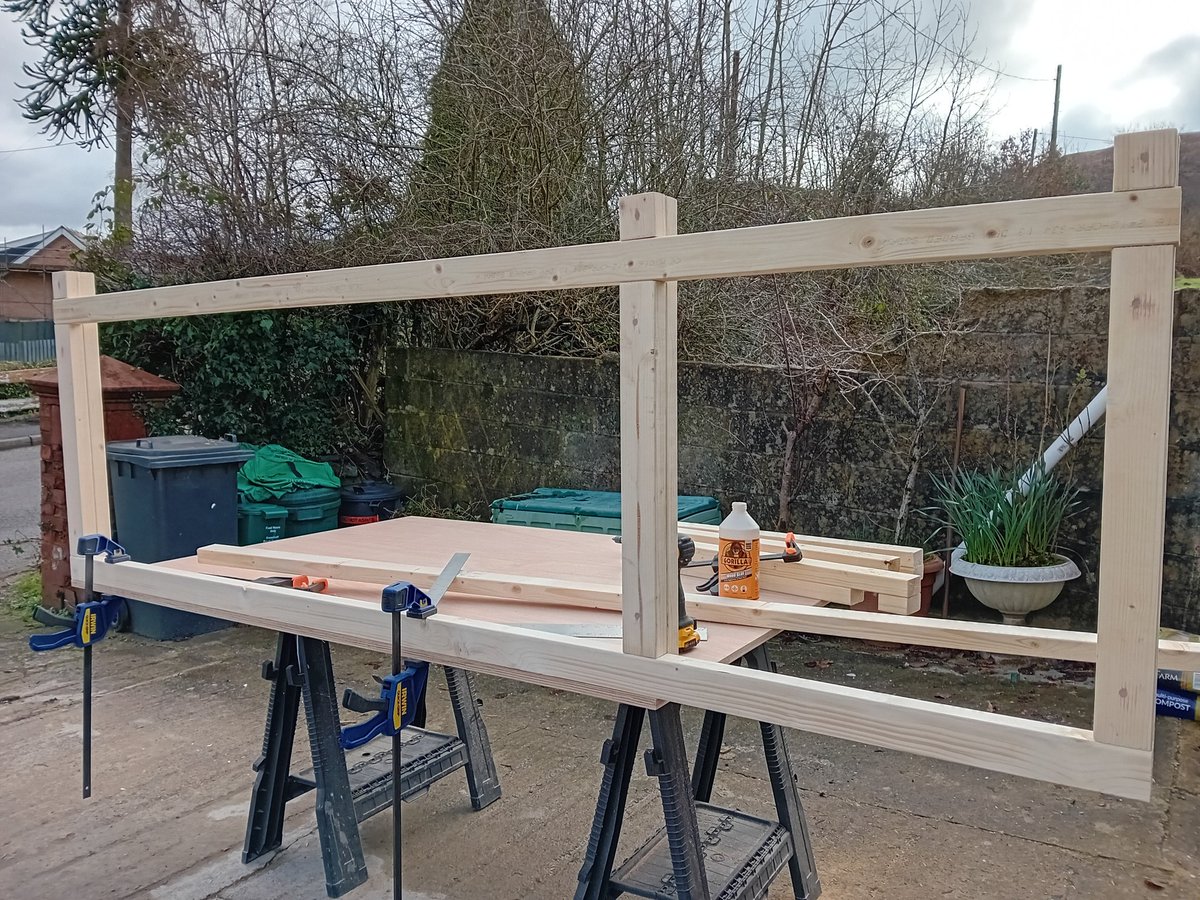
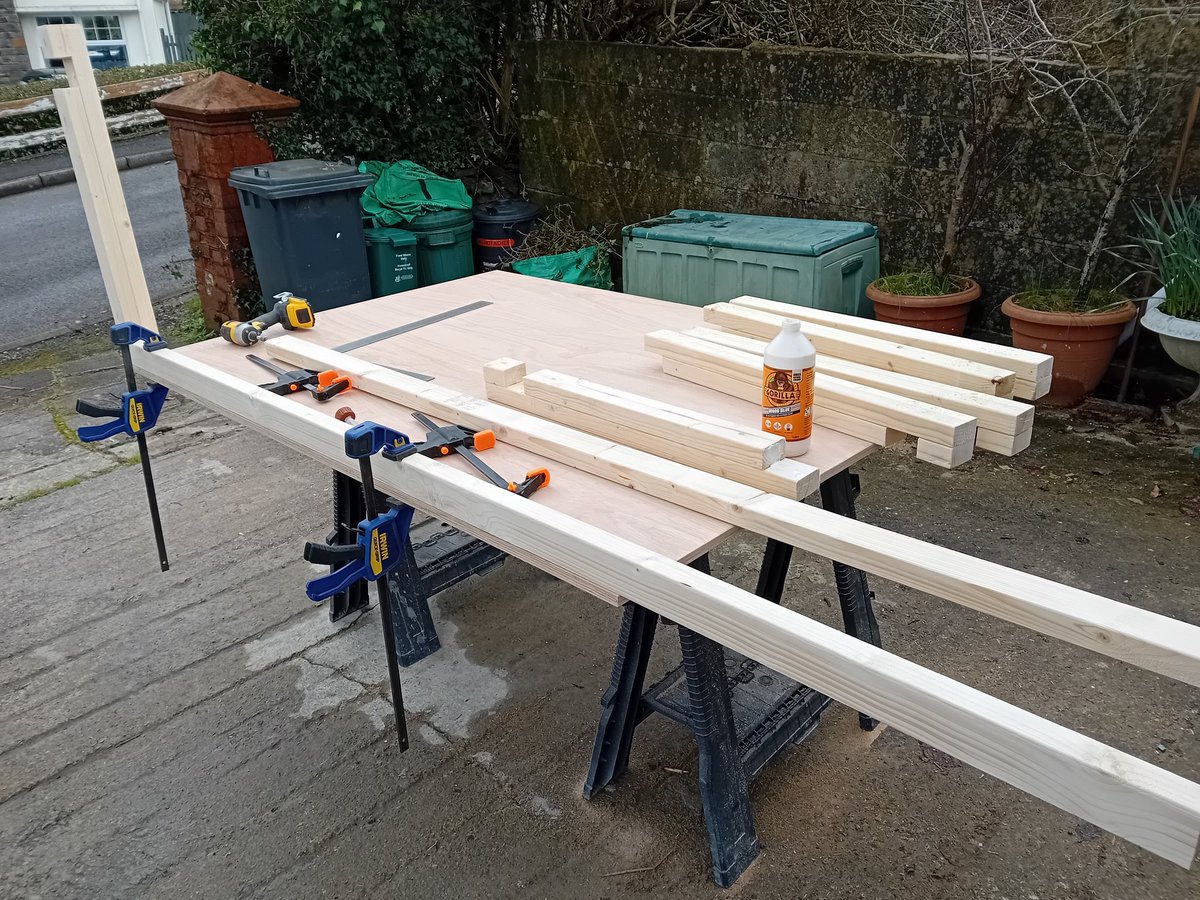
Last bit of work for my workshop was to build a workbench that would house my tablesaw. It's not really finished as but good enough to all me to get on with other projects. #workbench #workshop #woodworking
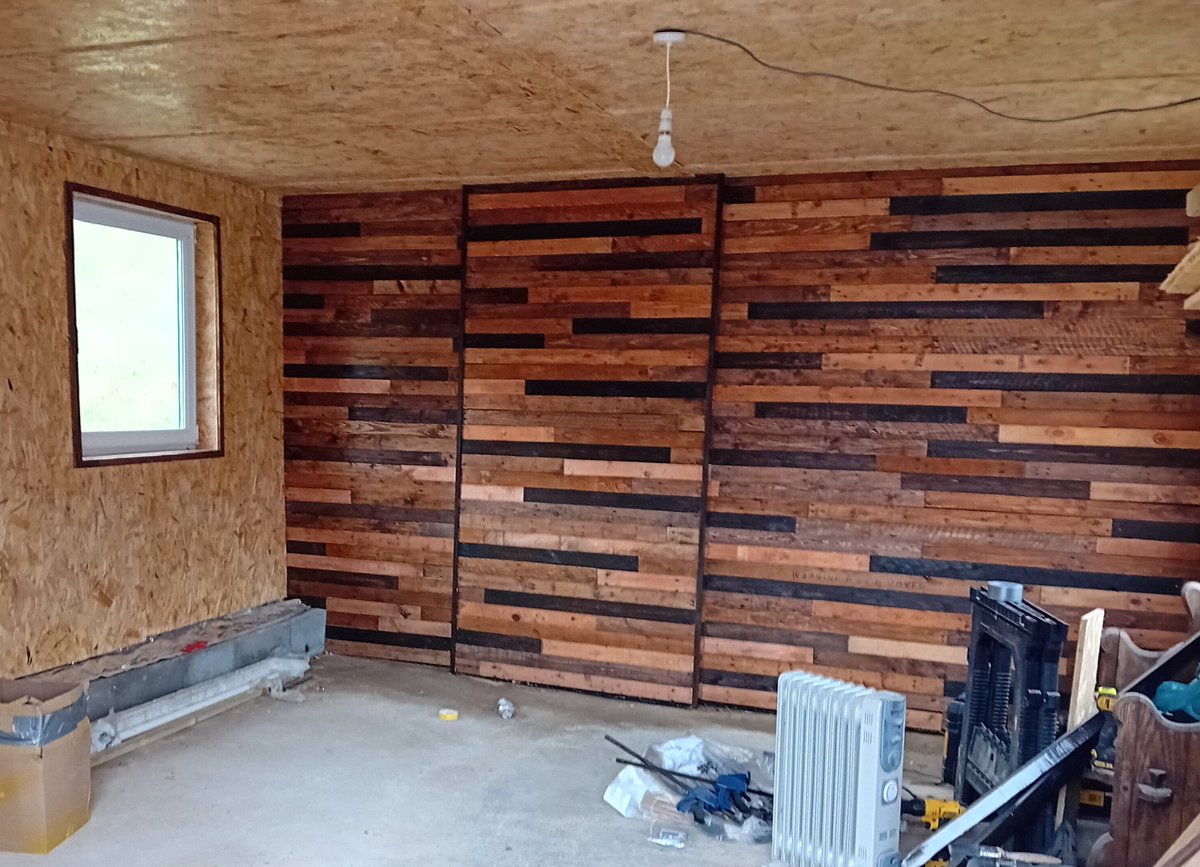
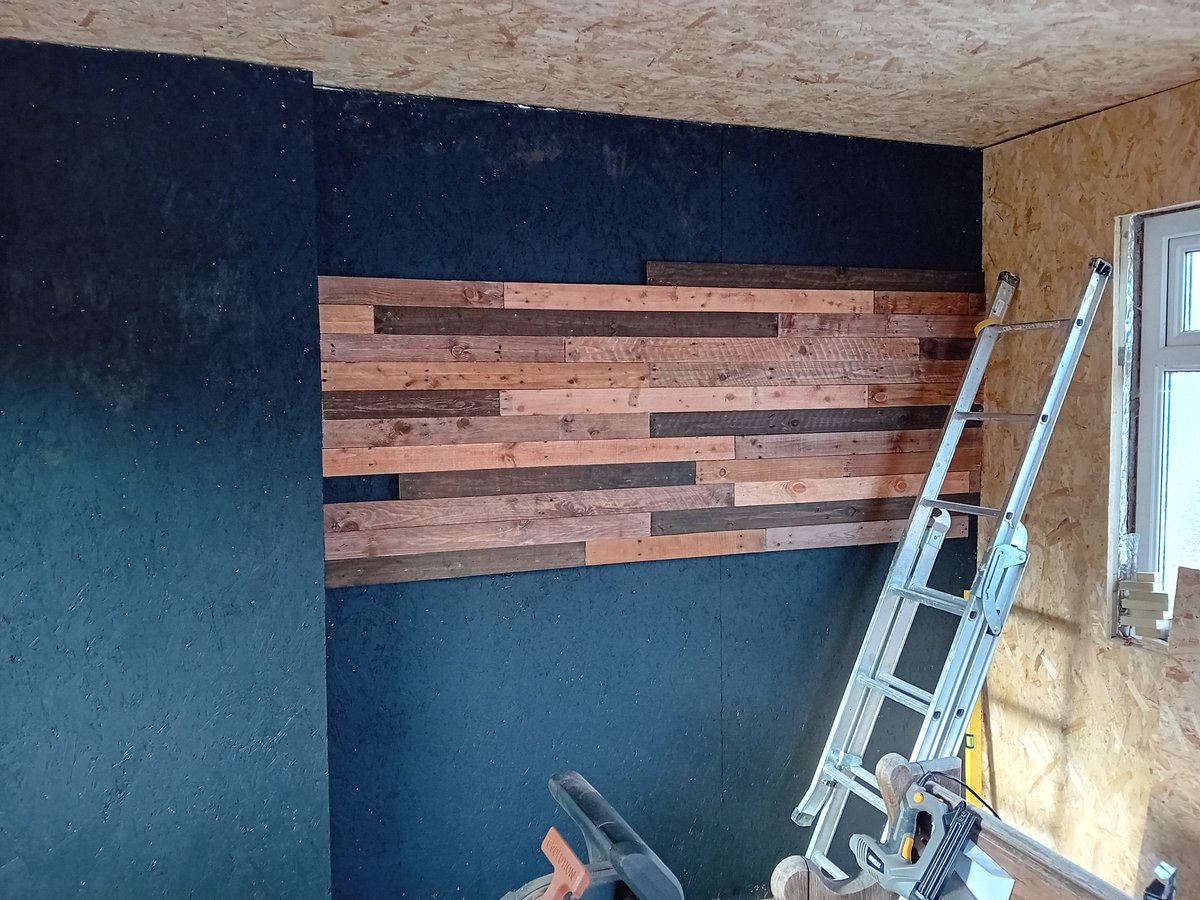
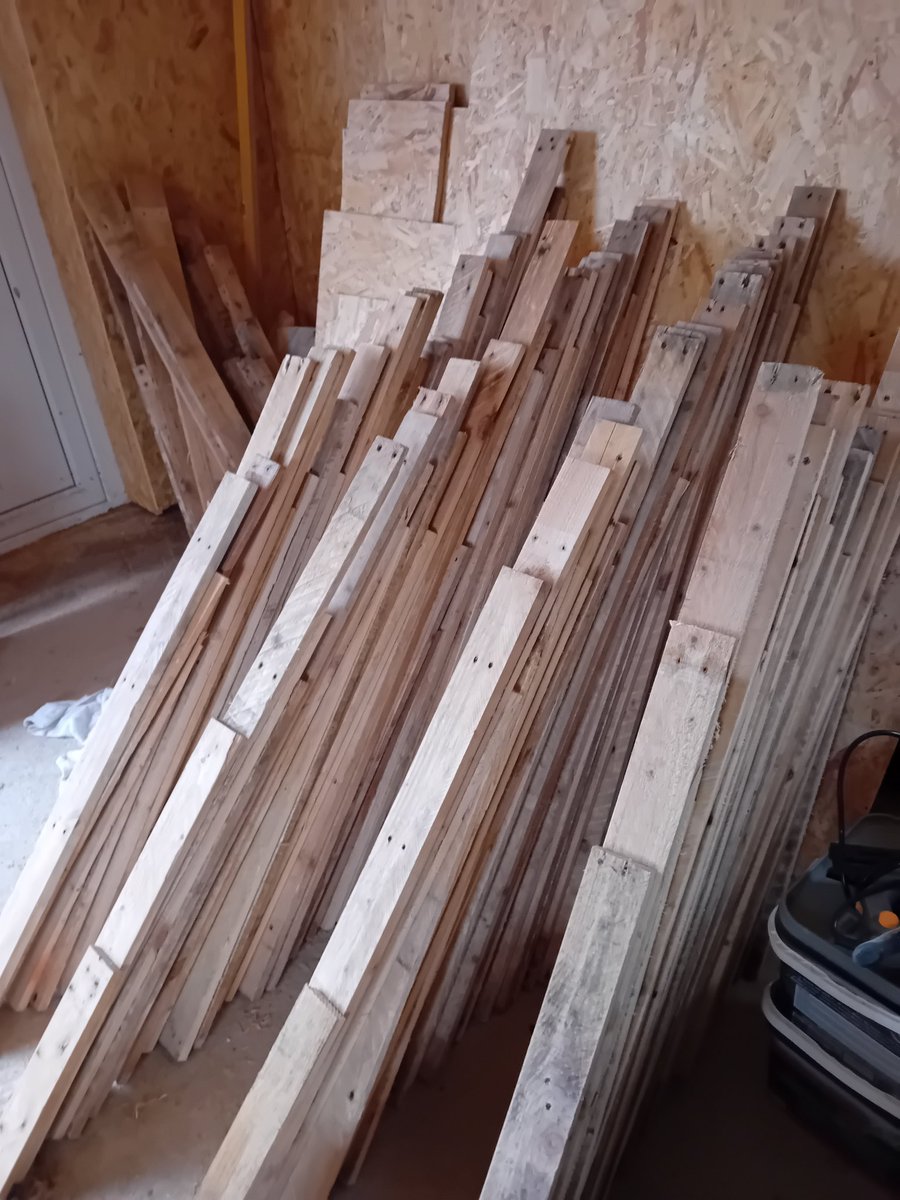
I wanted to make a feature wall in the workshop, so I went for a pallet wood wall. I painted the OSB black behind the wall to help hide any gaps. I varied wood stains and then gave three coats of satin varnish. #workshop #palletwood

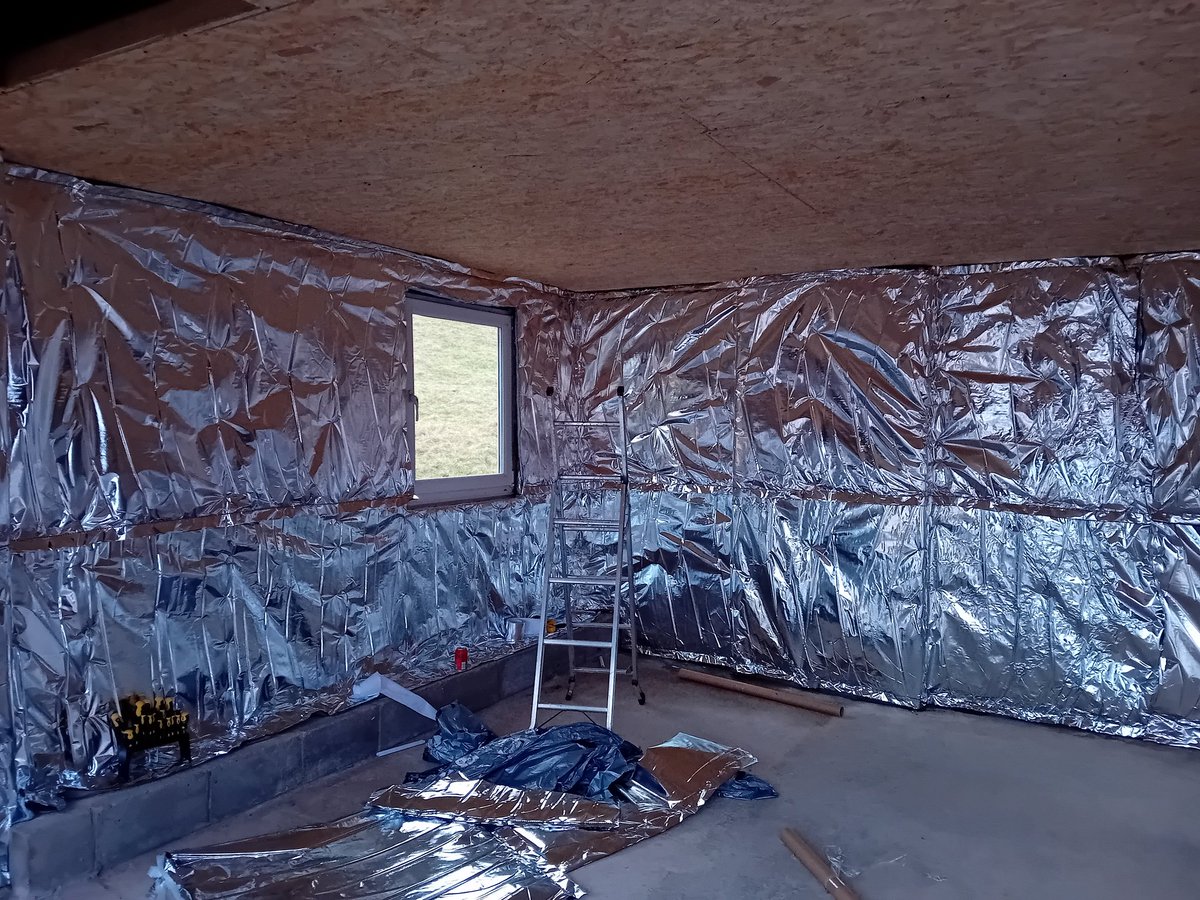
Insulating and panelling the workshop using foil Insulation for the walls, PIR for the ceiling and 18mm OSB. Hard work, but will be worthwhile. #workshop

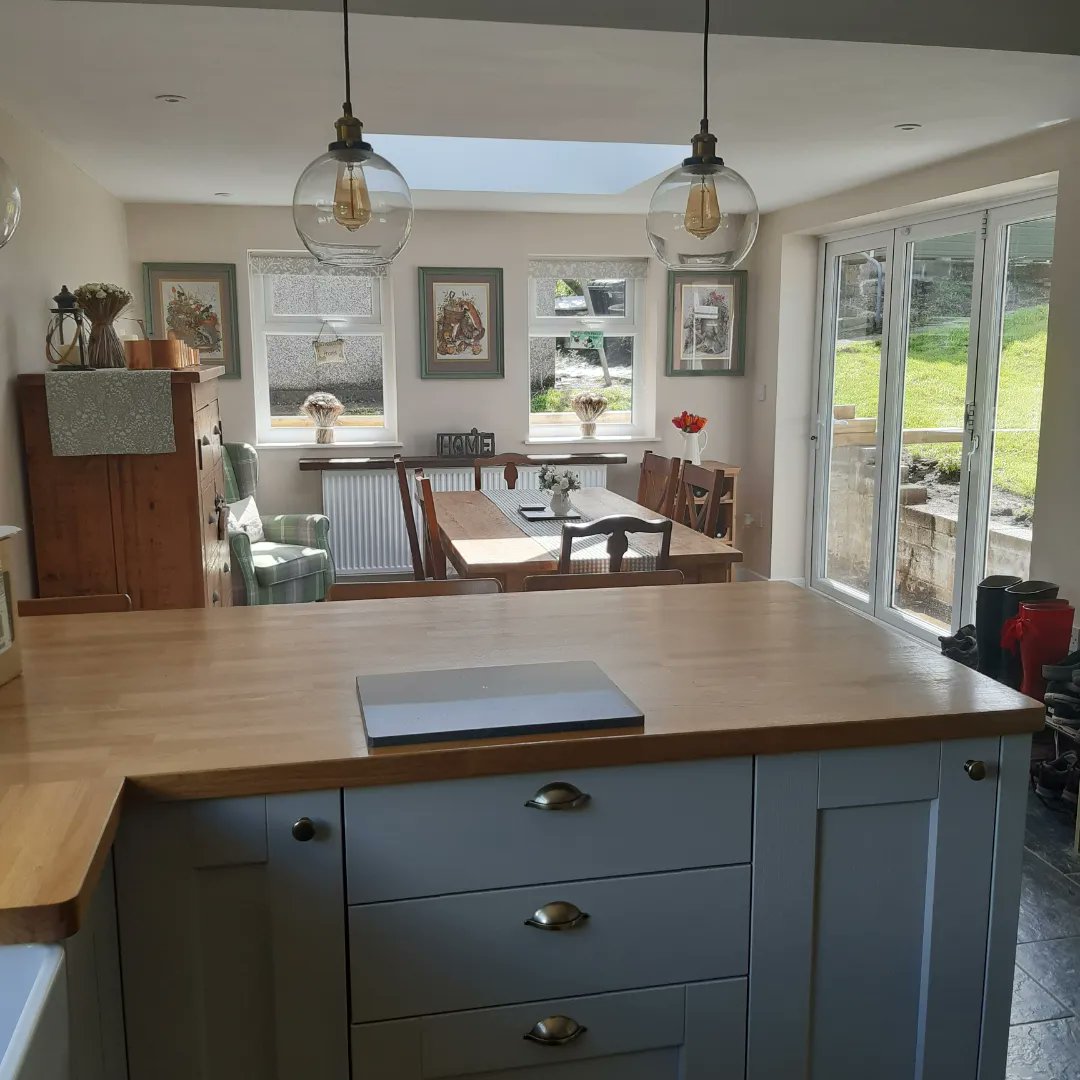
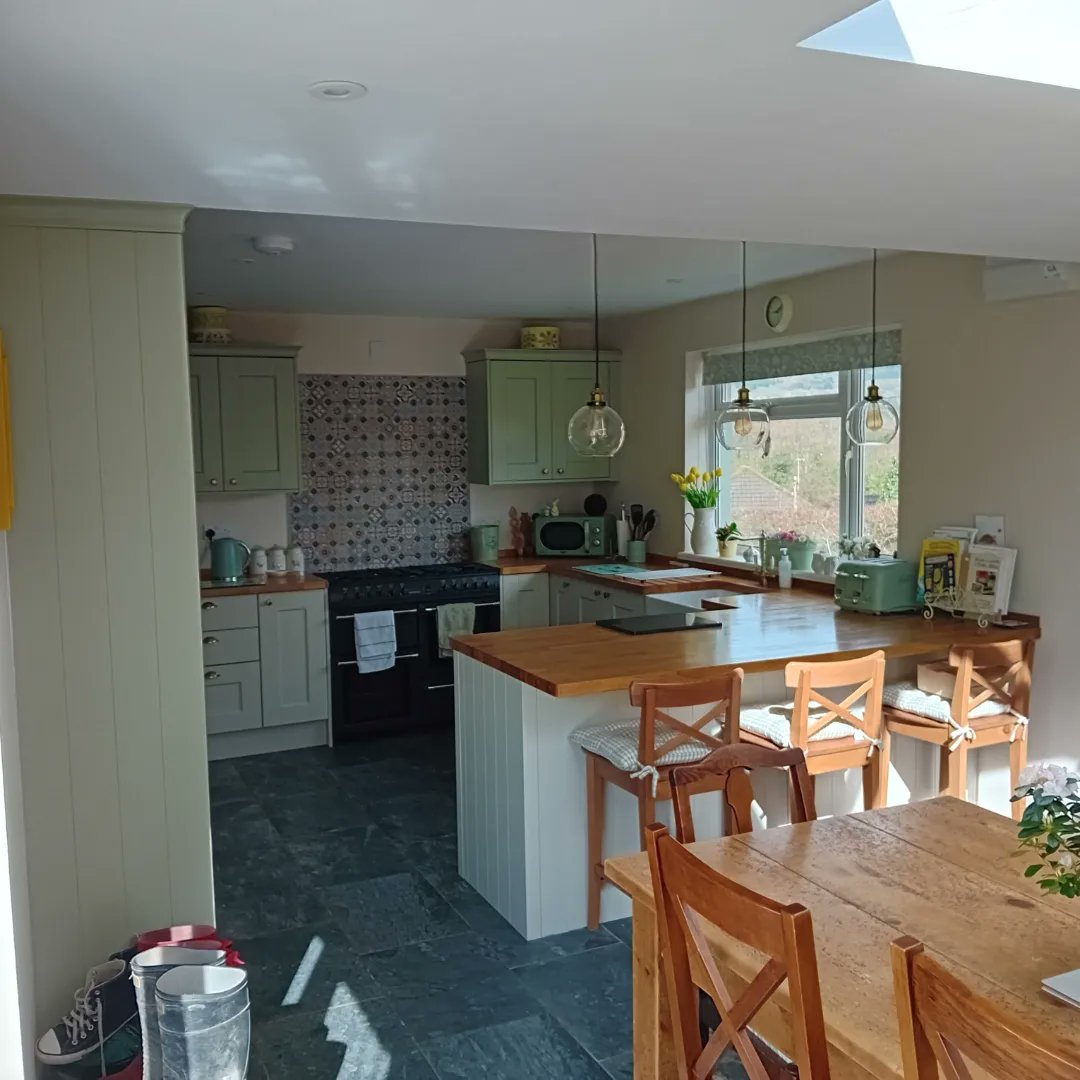
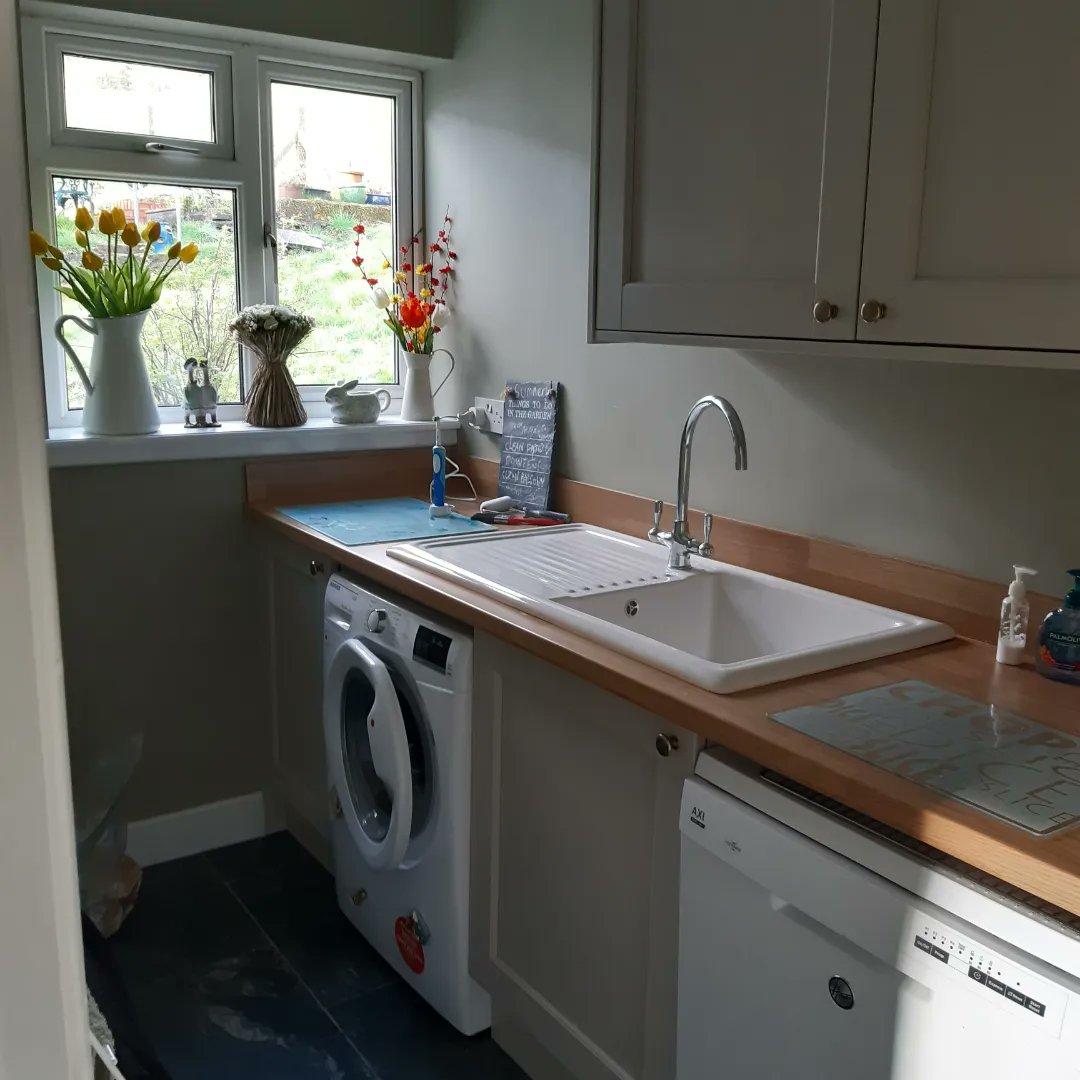
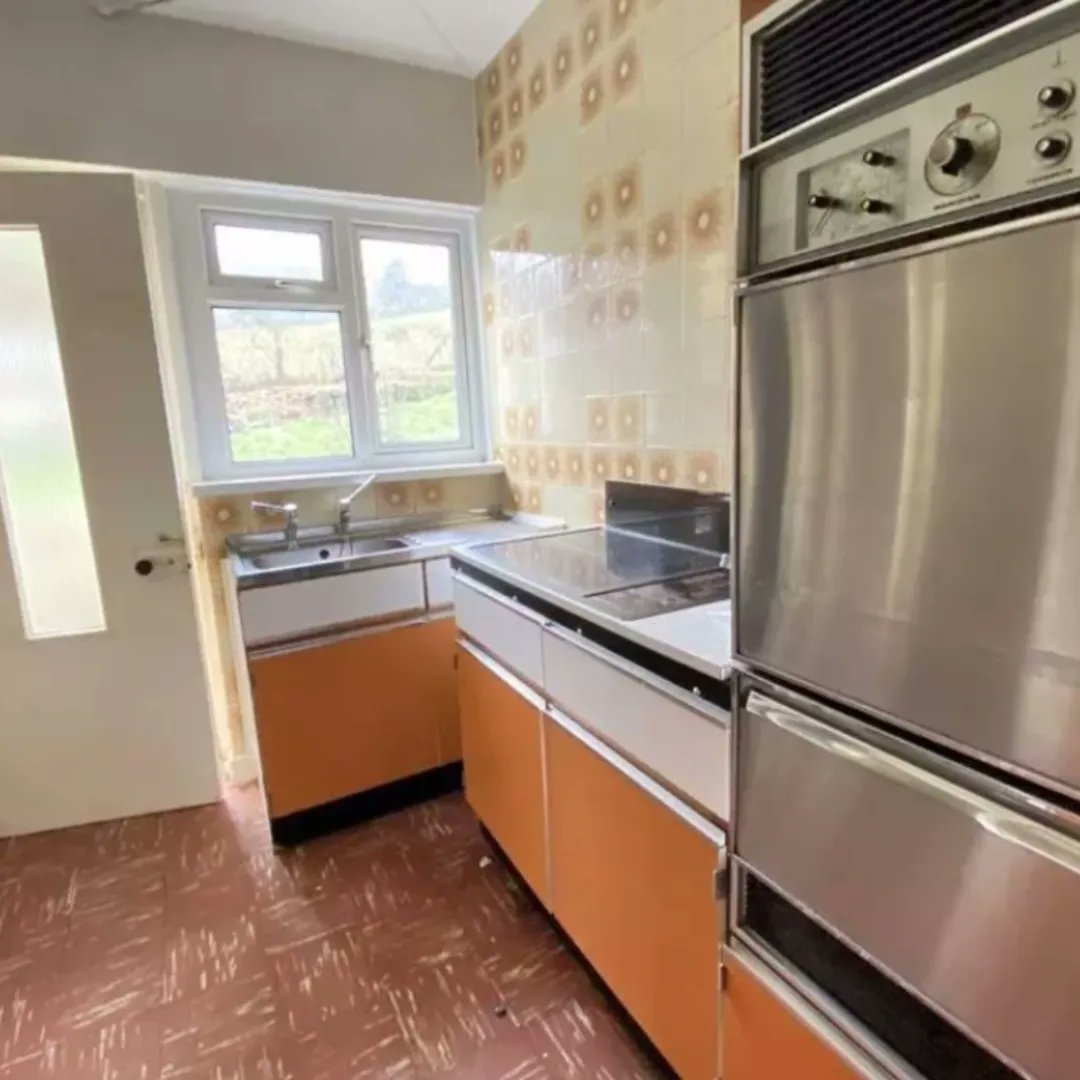
Showing the progress of the kitchen and utility room renovation. A small extension was built where there was a lean-to and the wall removed. The original kitchen is now where the utility room is (yes, it was THAT small). Still a little work to do but almost there! #renovation
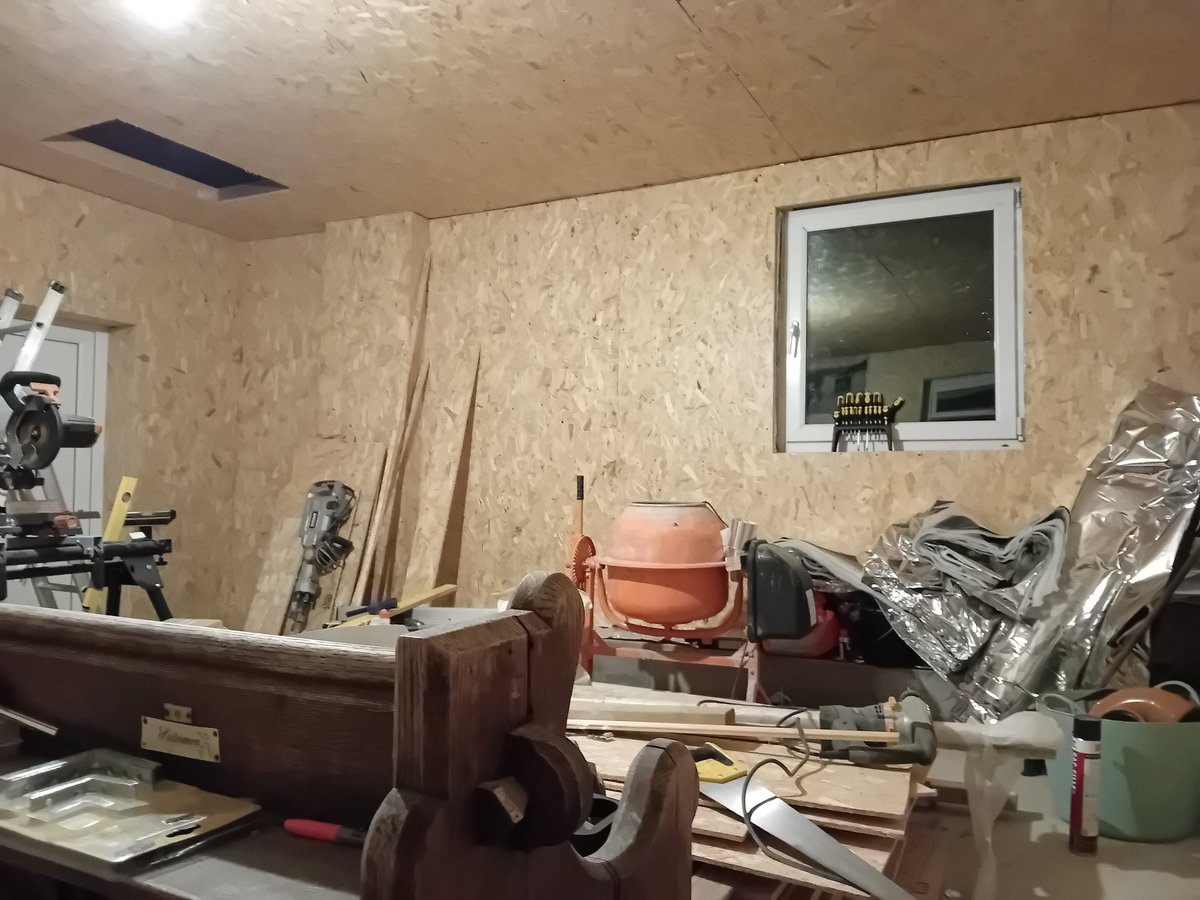
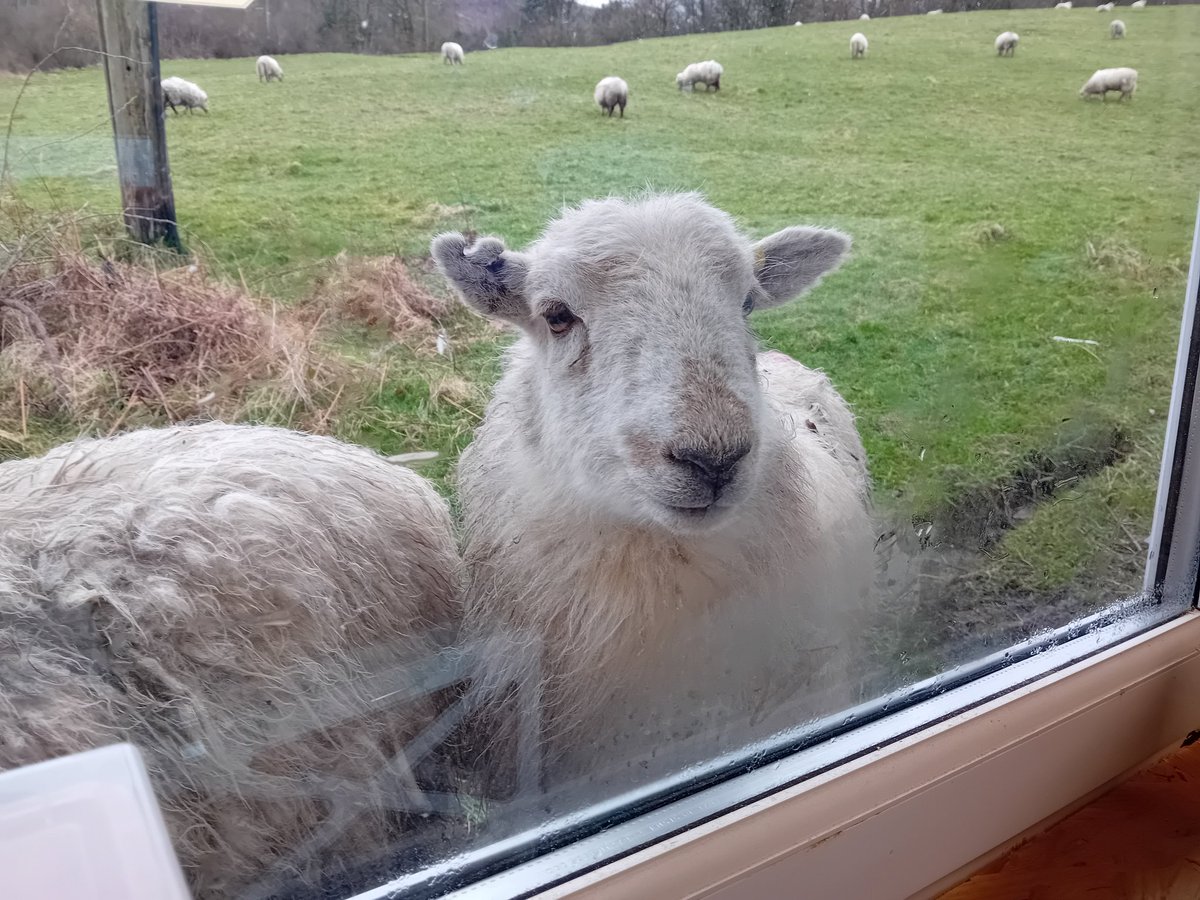
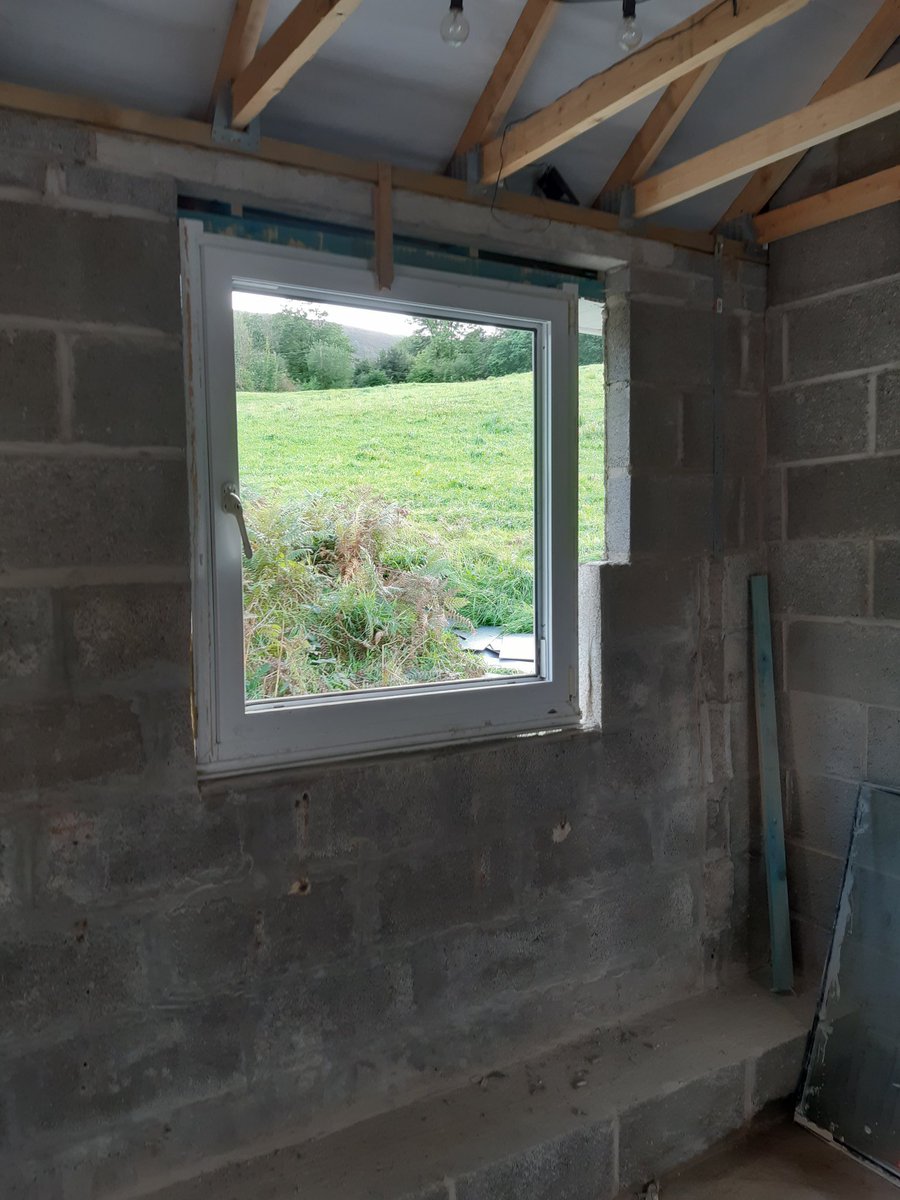
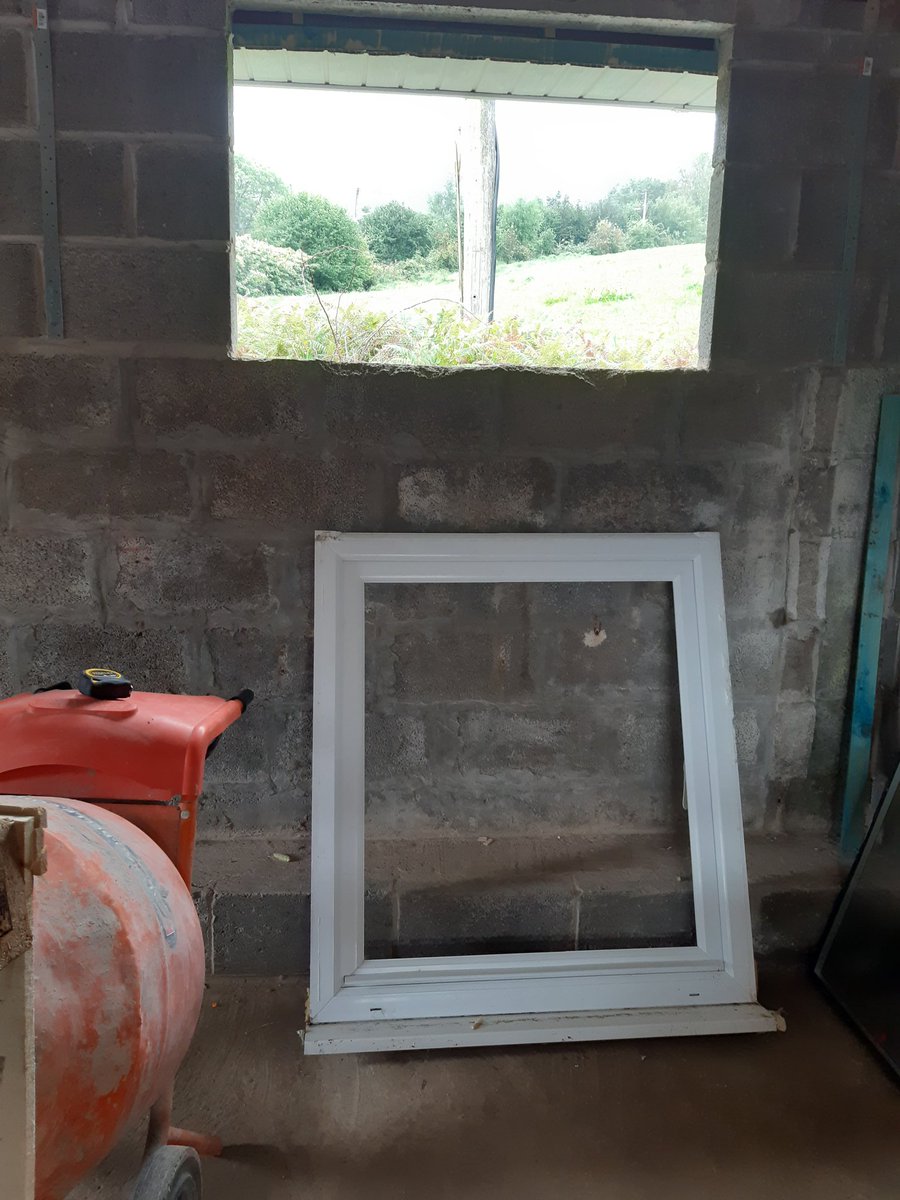
To bring light to the workshop, I decided to add a window. To keep costs down, I bought a window from Facebook Marketplace for £20 but it clearly didn't fit, so out came the disc cutter! I just didn't realise the neighbours would be so nosey!!🐑 #workshop
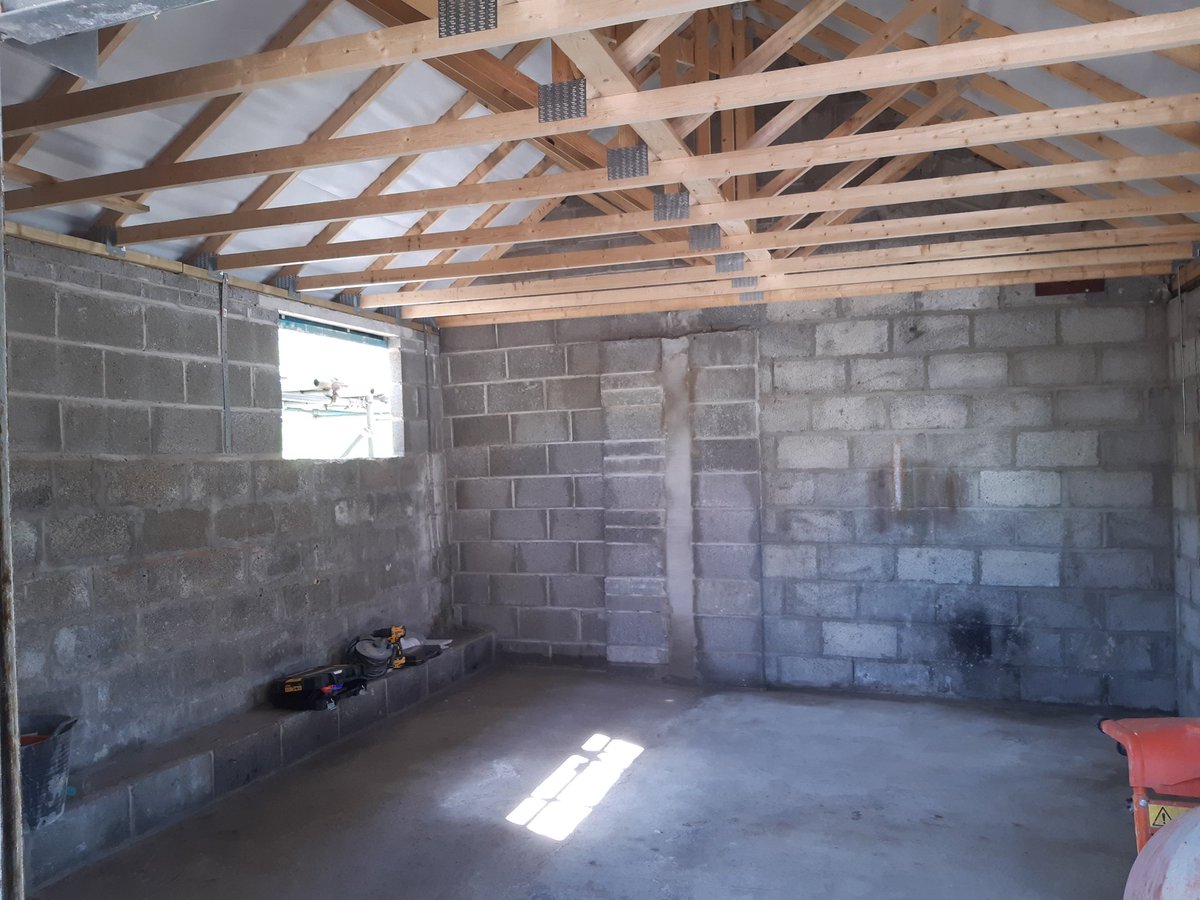
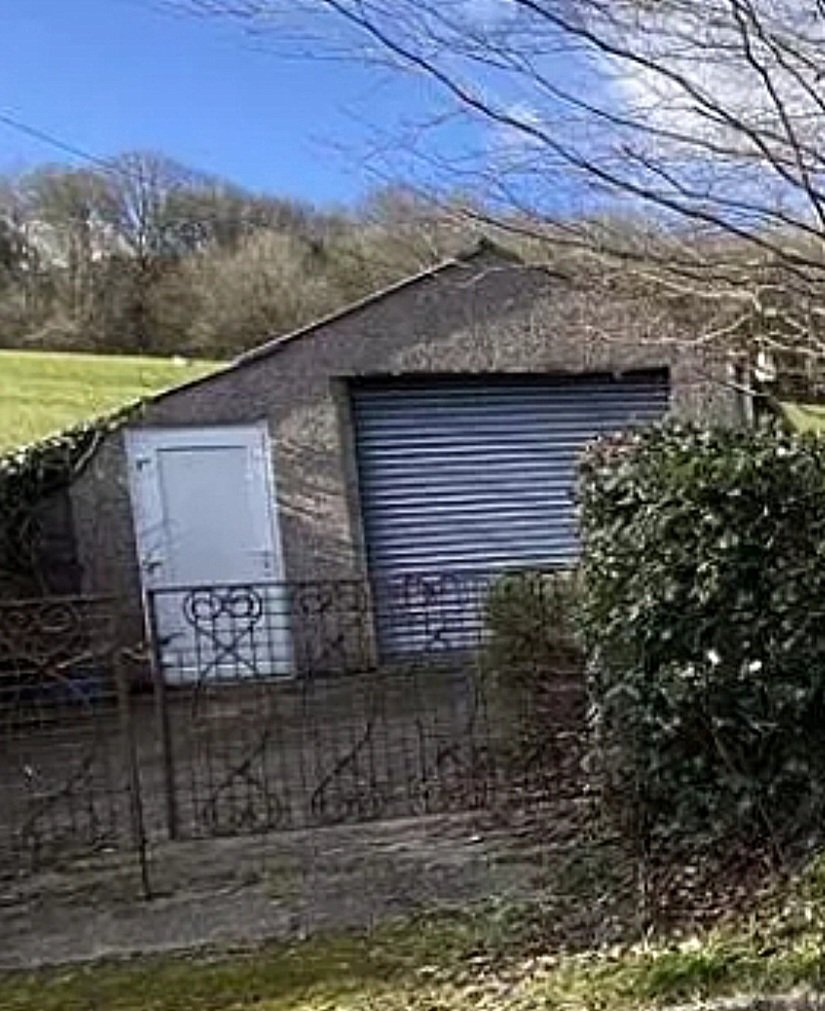
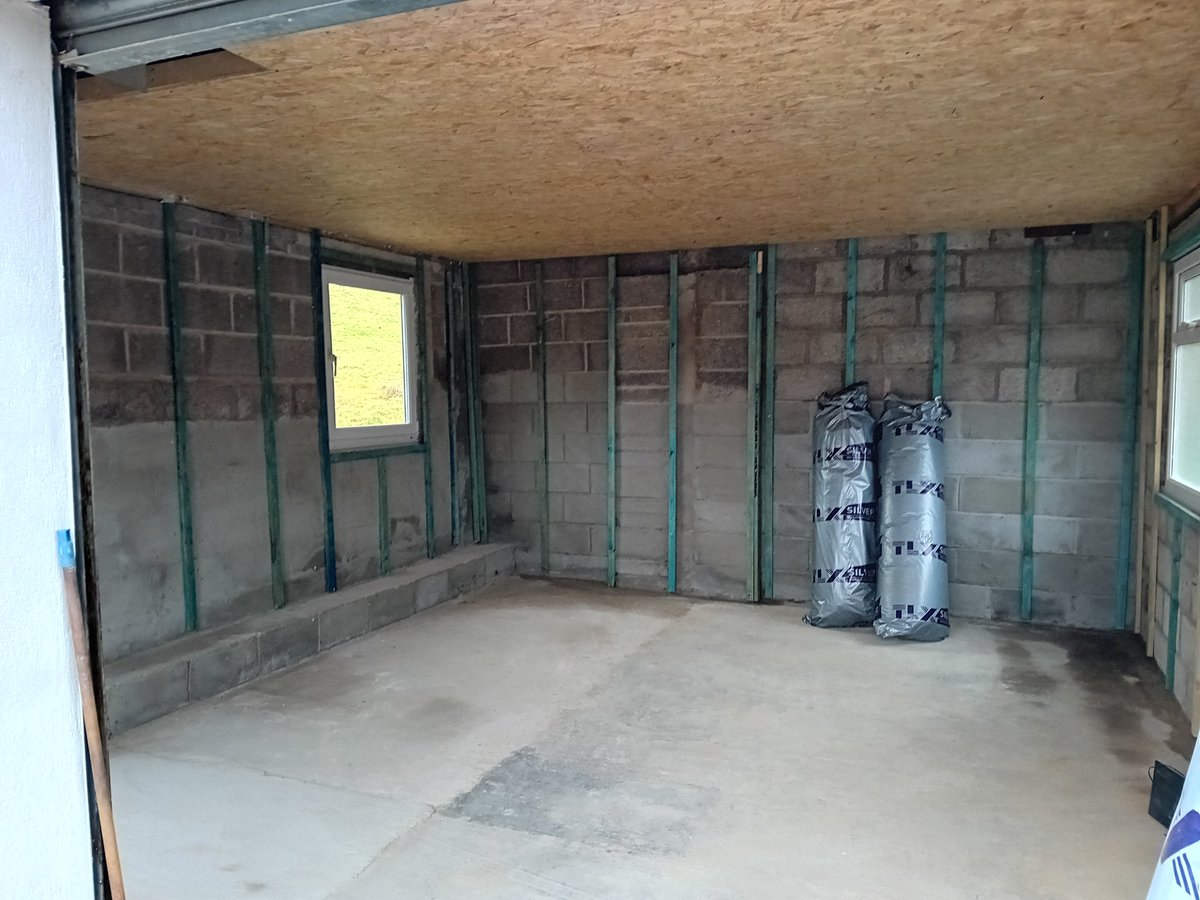
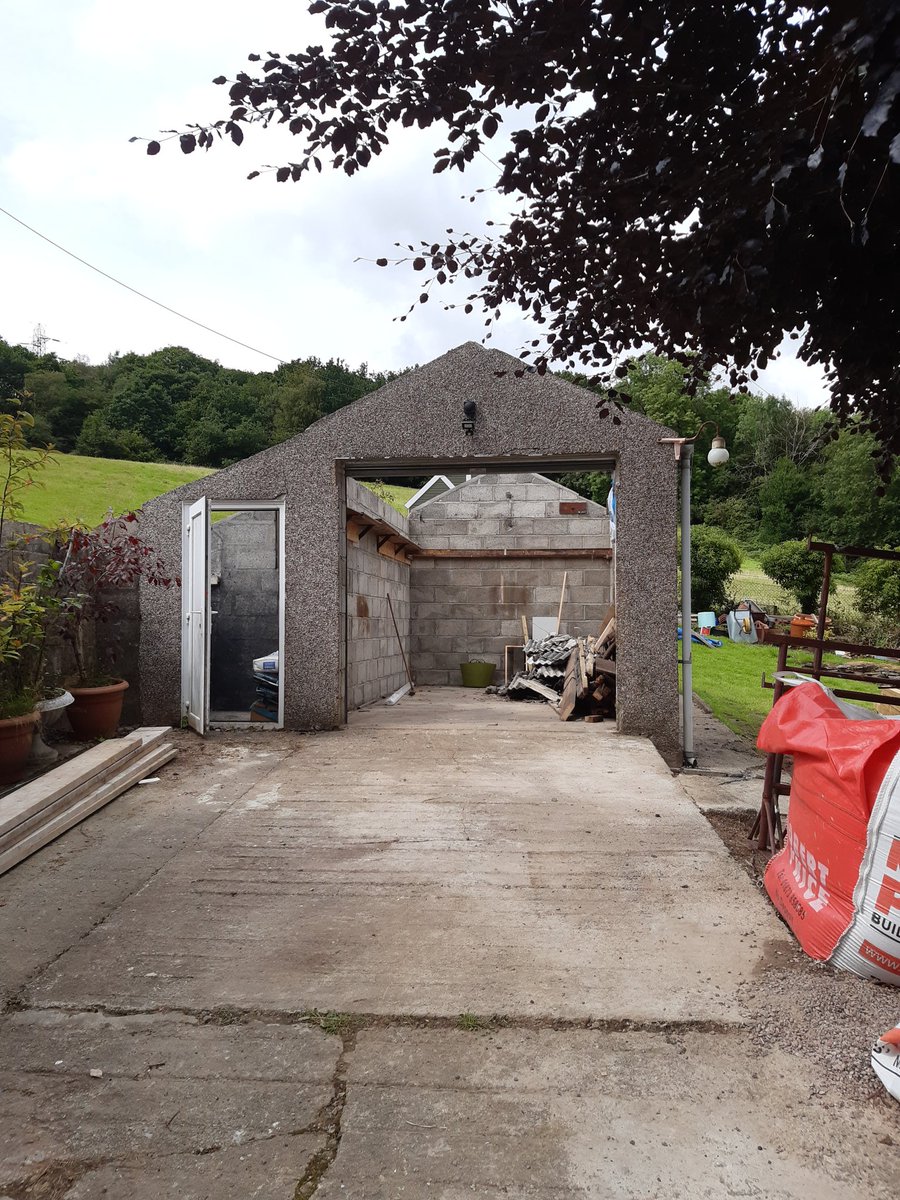
Since moving to my new home, I've been missing a workshop. The garage was small with three rooms squeezed inside. It also had a low asbestos roof. This post will be the first in a series showing the garage being turned into my workshop. We'll start with the structural changes!


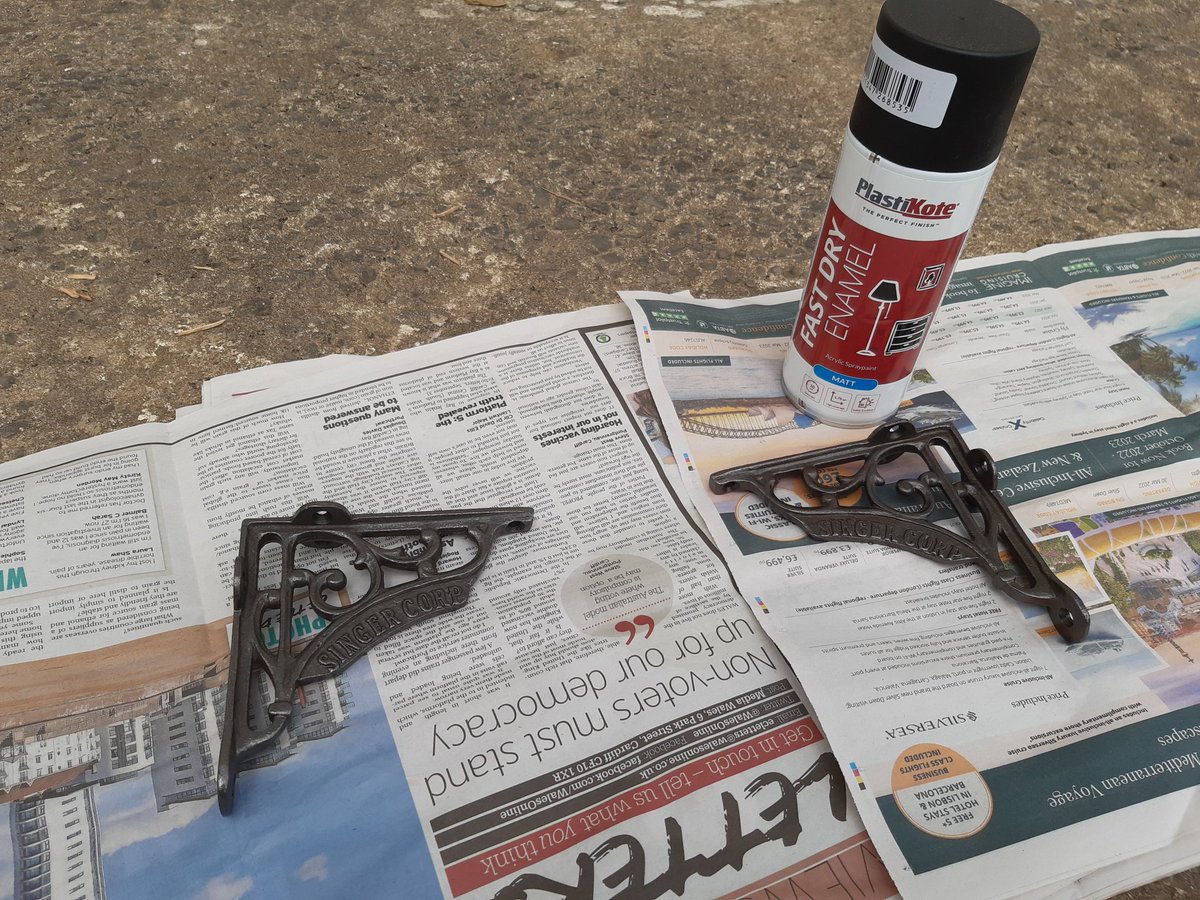
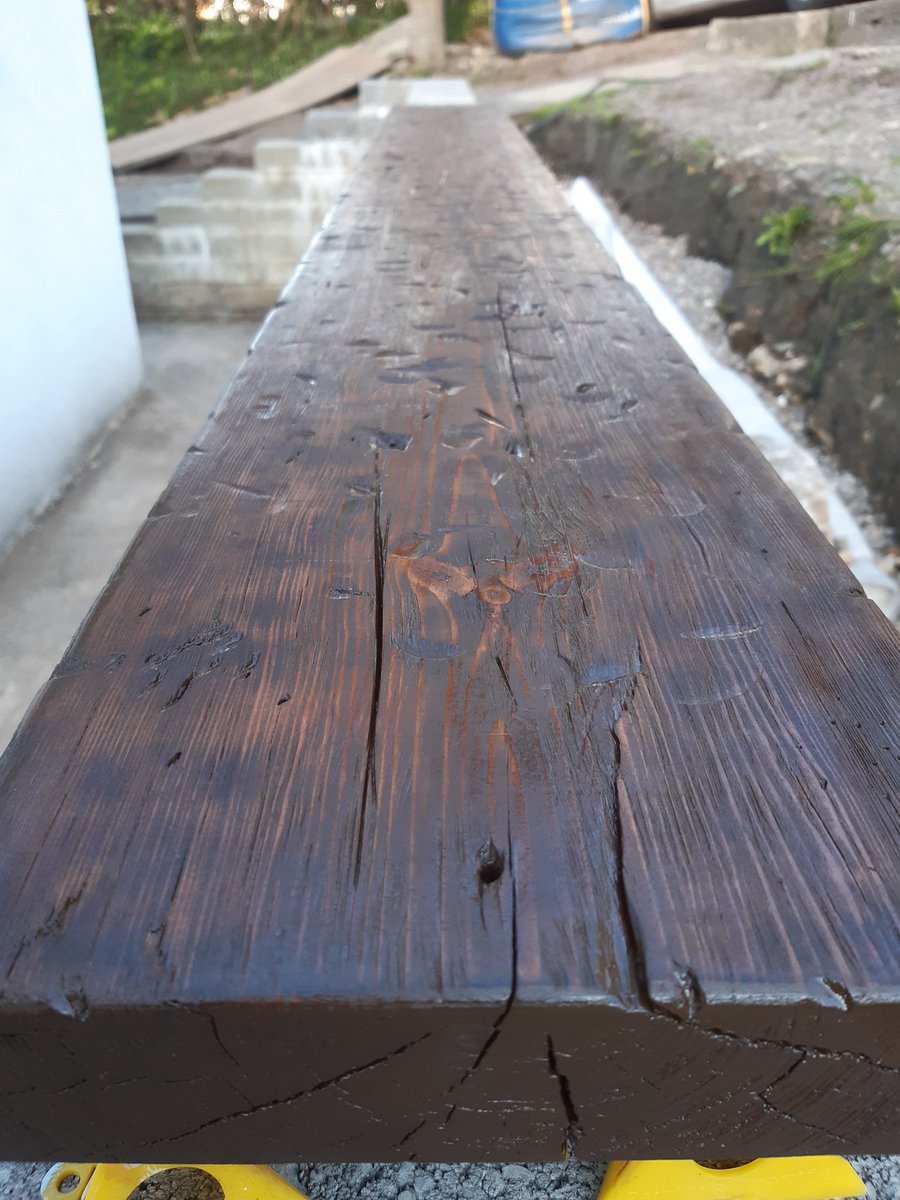
Using a leftover floor joist from the attic conversion, I made a radiator shelf. The wood was aged using a hammer, cutting splits in the wood using a multi-tool and burnt before going over it with a wire brush. Finally stained and varnished. #upcycle #diy

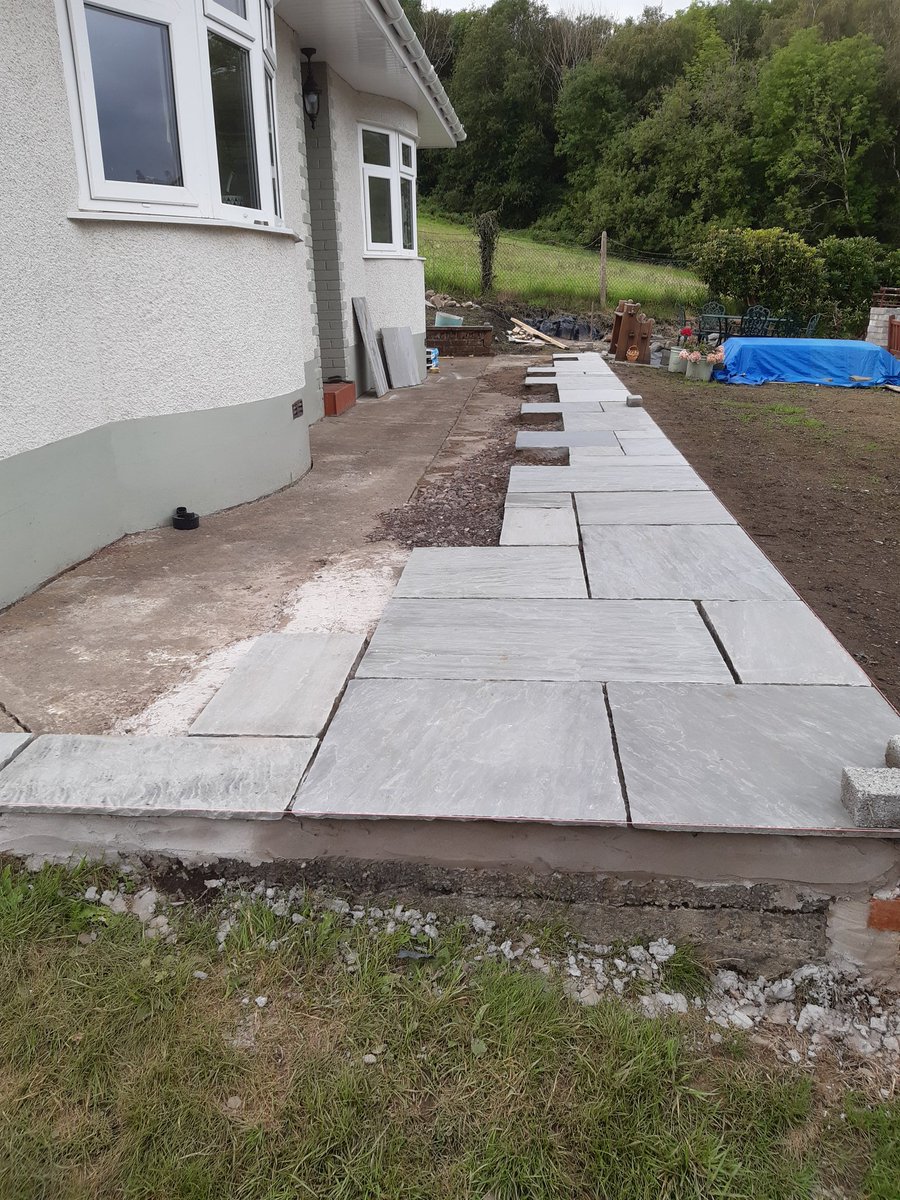
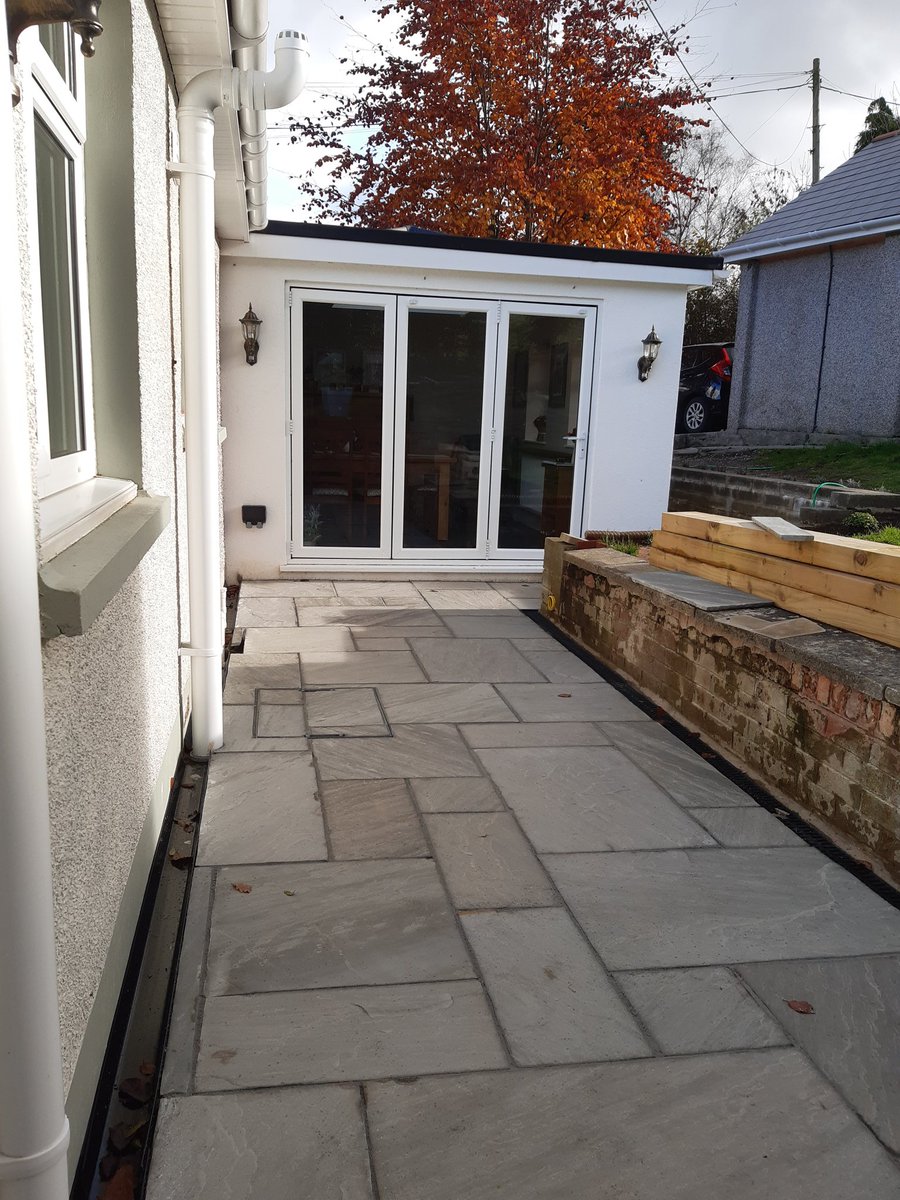
Laying an Indian sandstone patio around the house. This was a hard job as I had to lay upon an existing concrete slab, so drains had to be cut in , and levels kept ensuring I remained below the DPC. Well worth it in the end! #DIY #PATIO #renovation

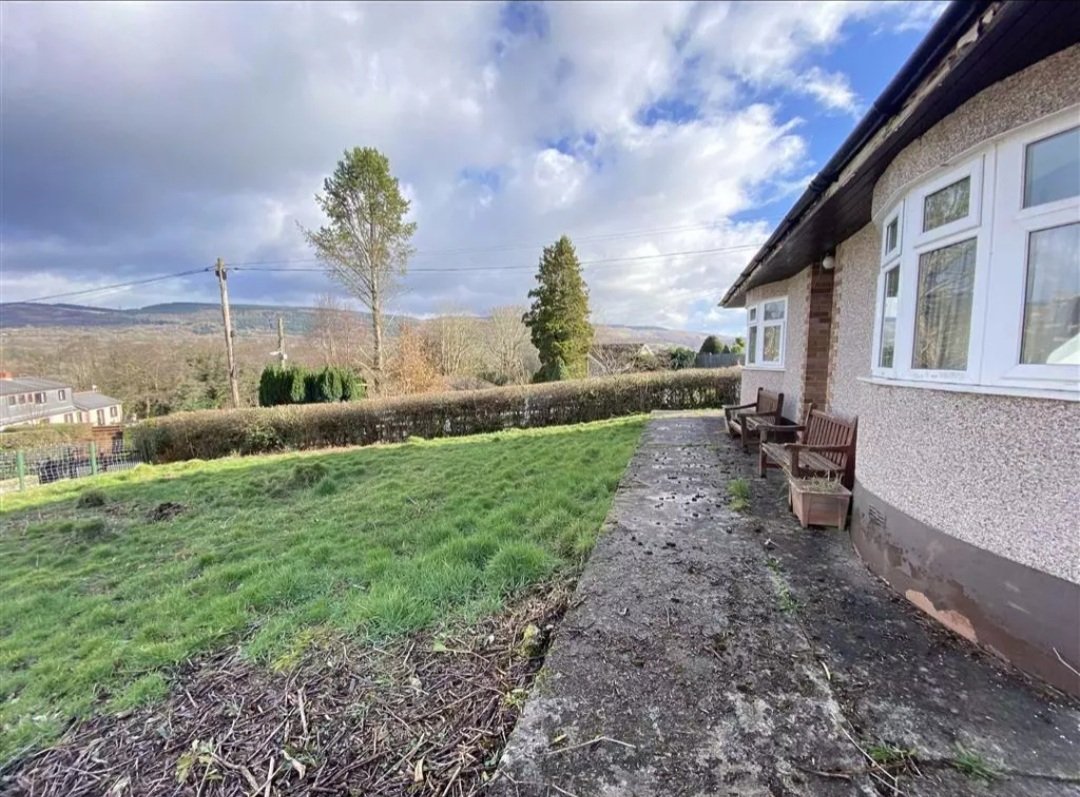
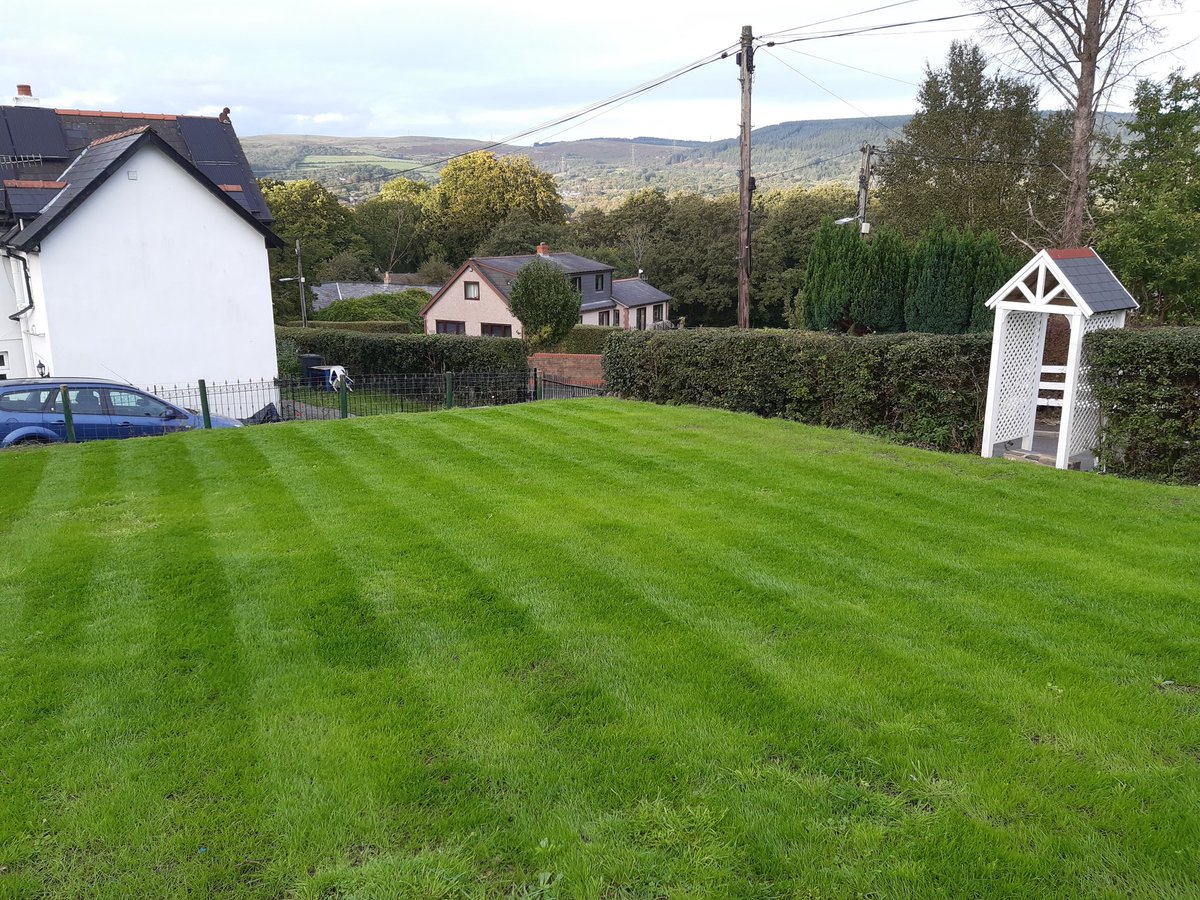
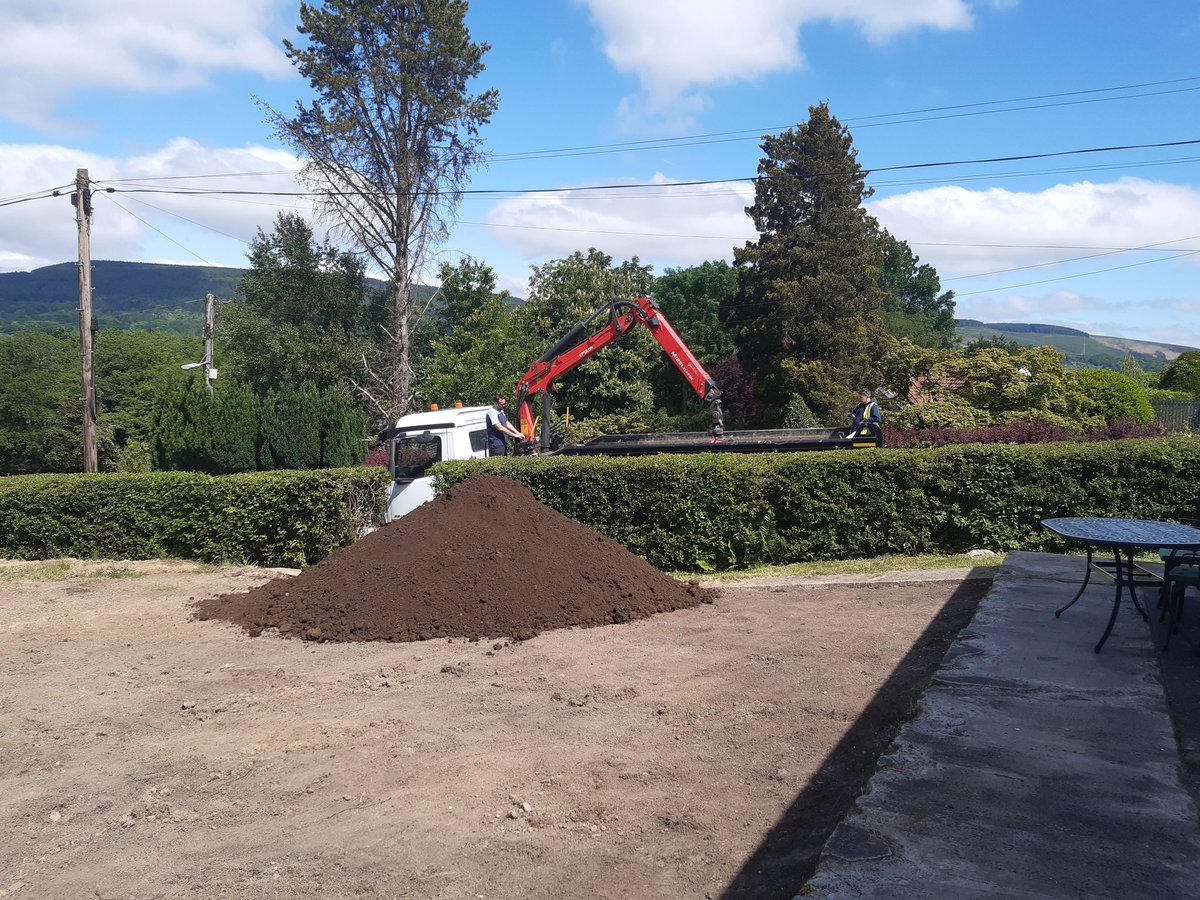
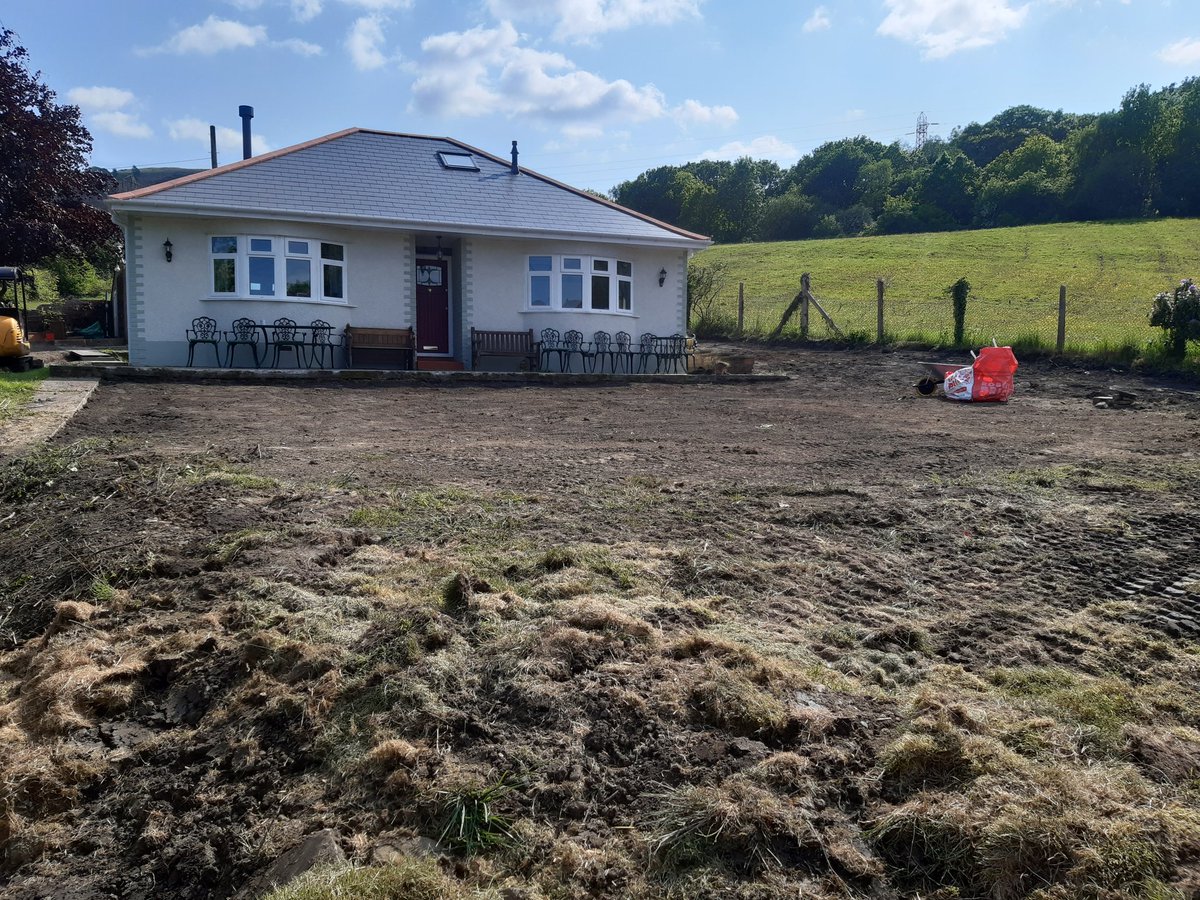
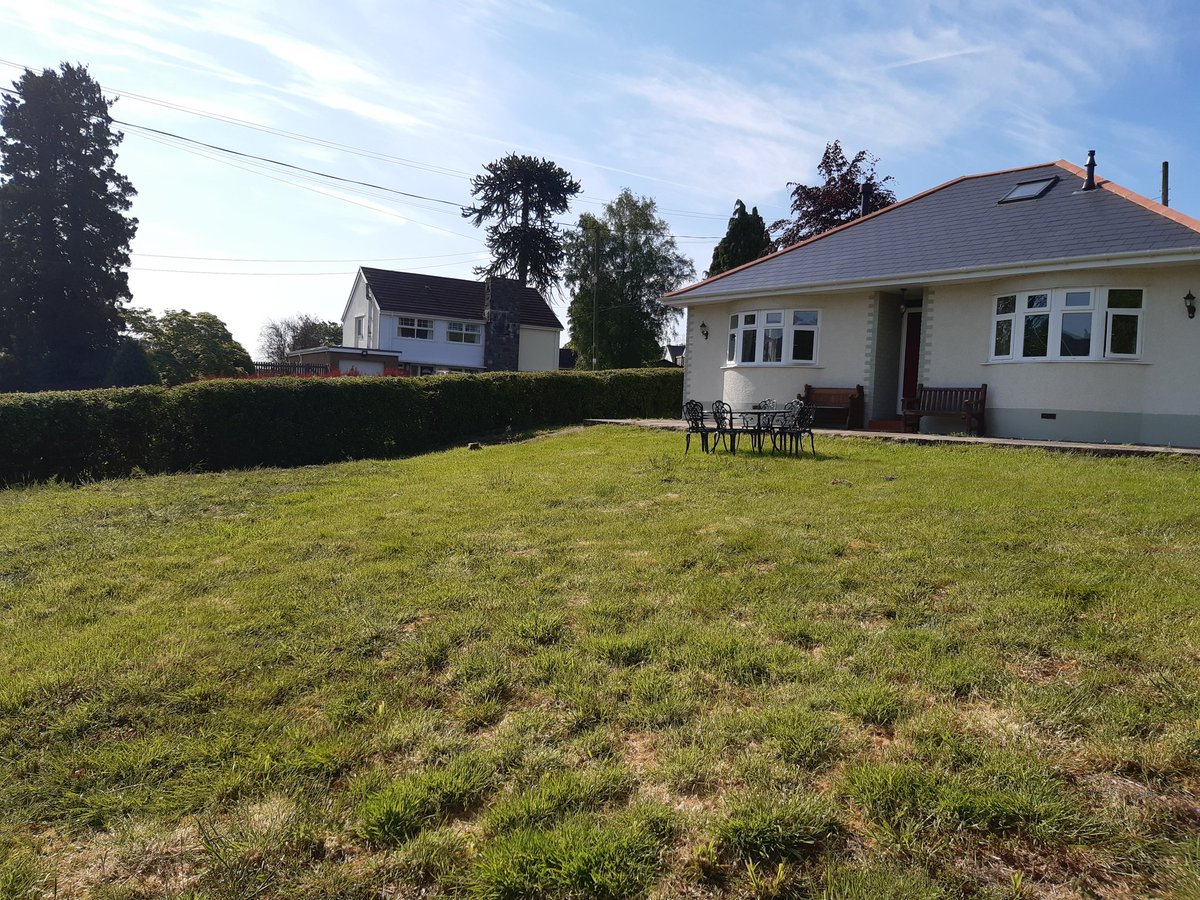
After nearly 10 years of not being looked after, the front lawn needed some attention and levelling. Nearly 20 tonnes of topsoil and a lot of hard work later it's almost there!
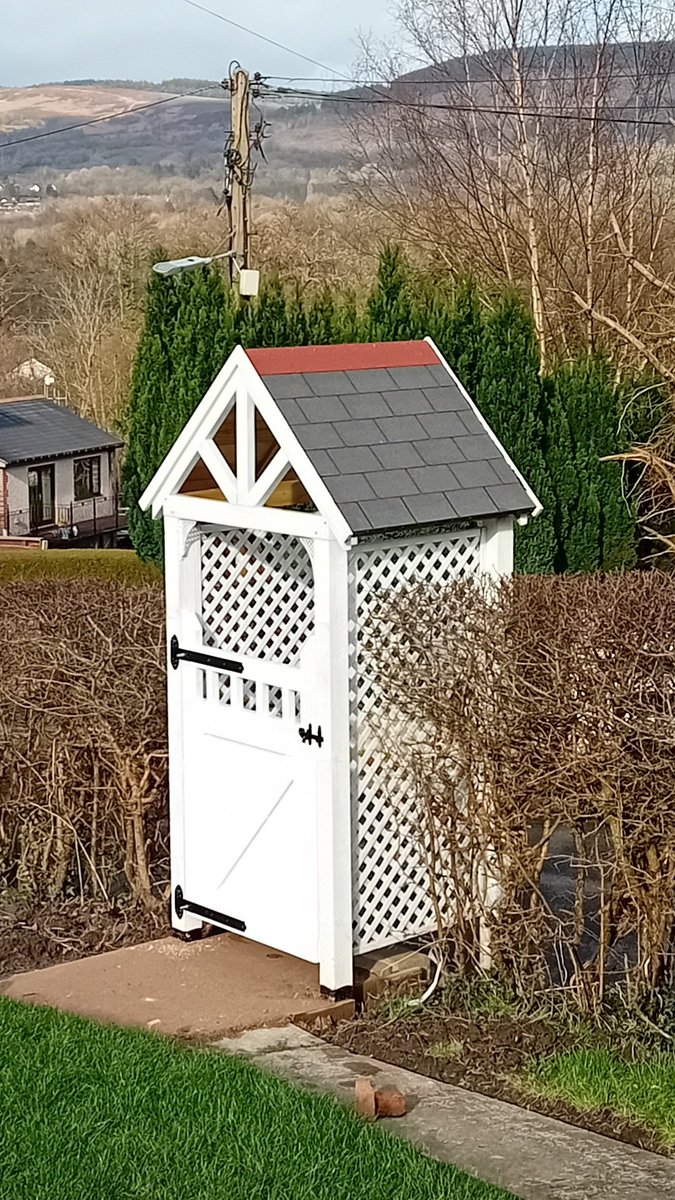
The second part of the gate build. Built an arbour to cover the steps. All angles cut at 45°, bolted into a concrete base and then finished in Daisy White. The gate itself is yet to be built as the Welsh weather beat me!
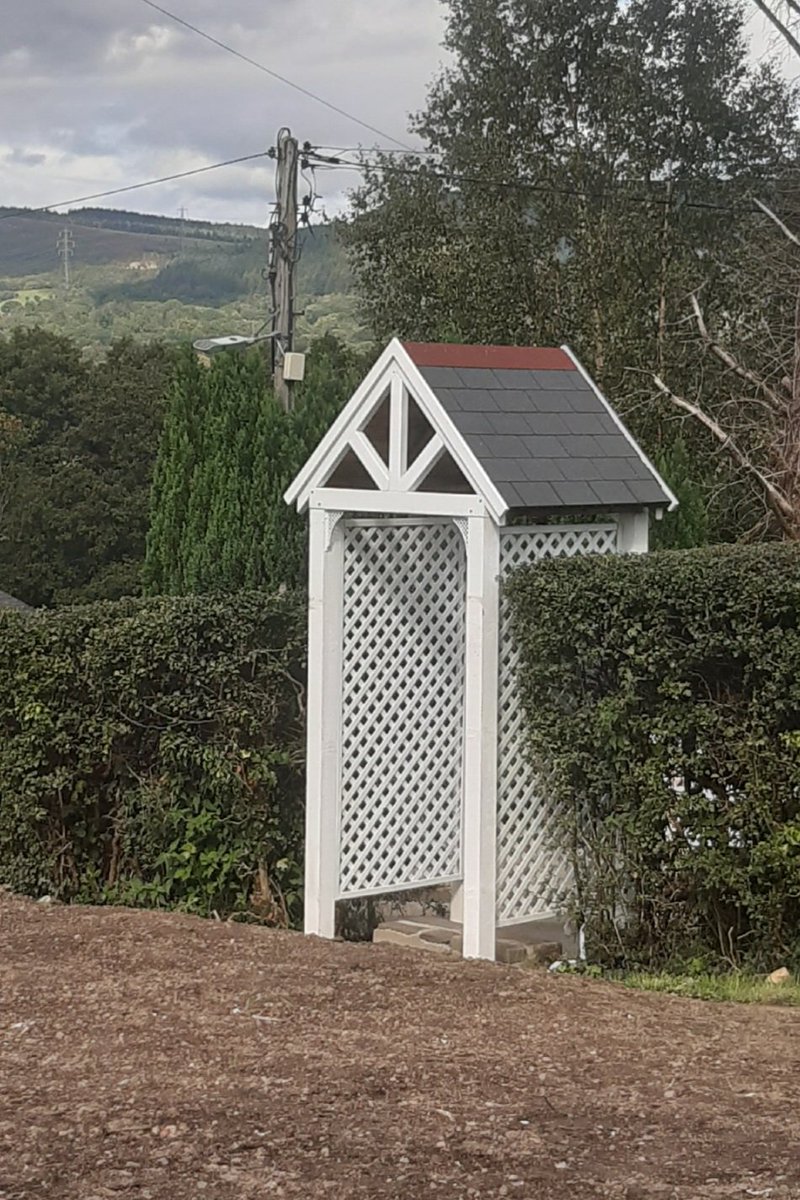
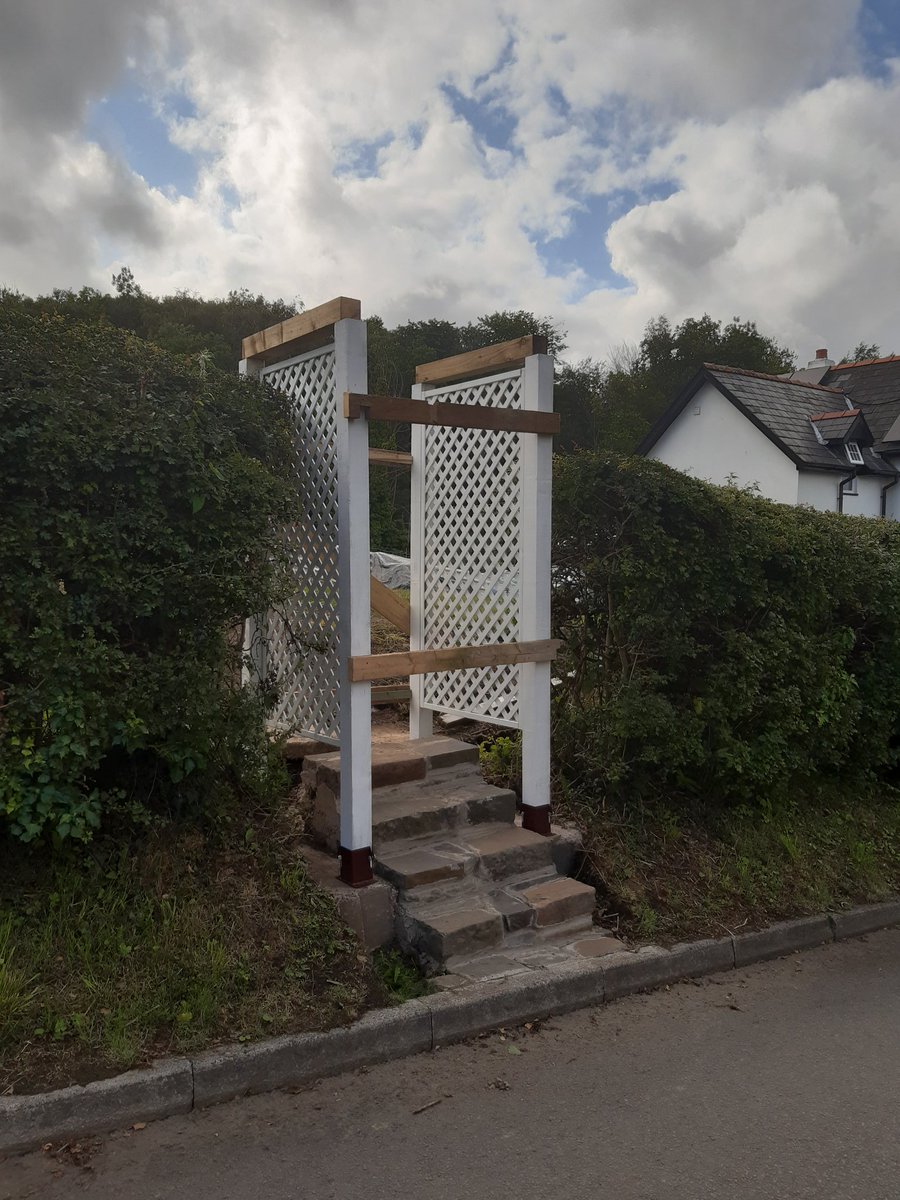

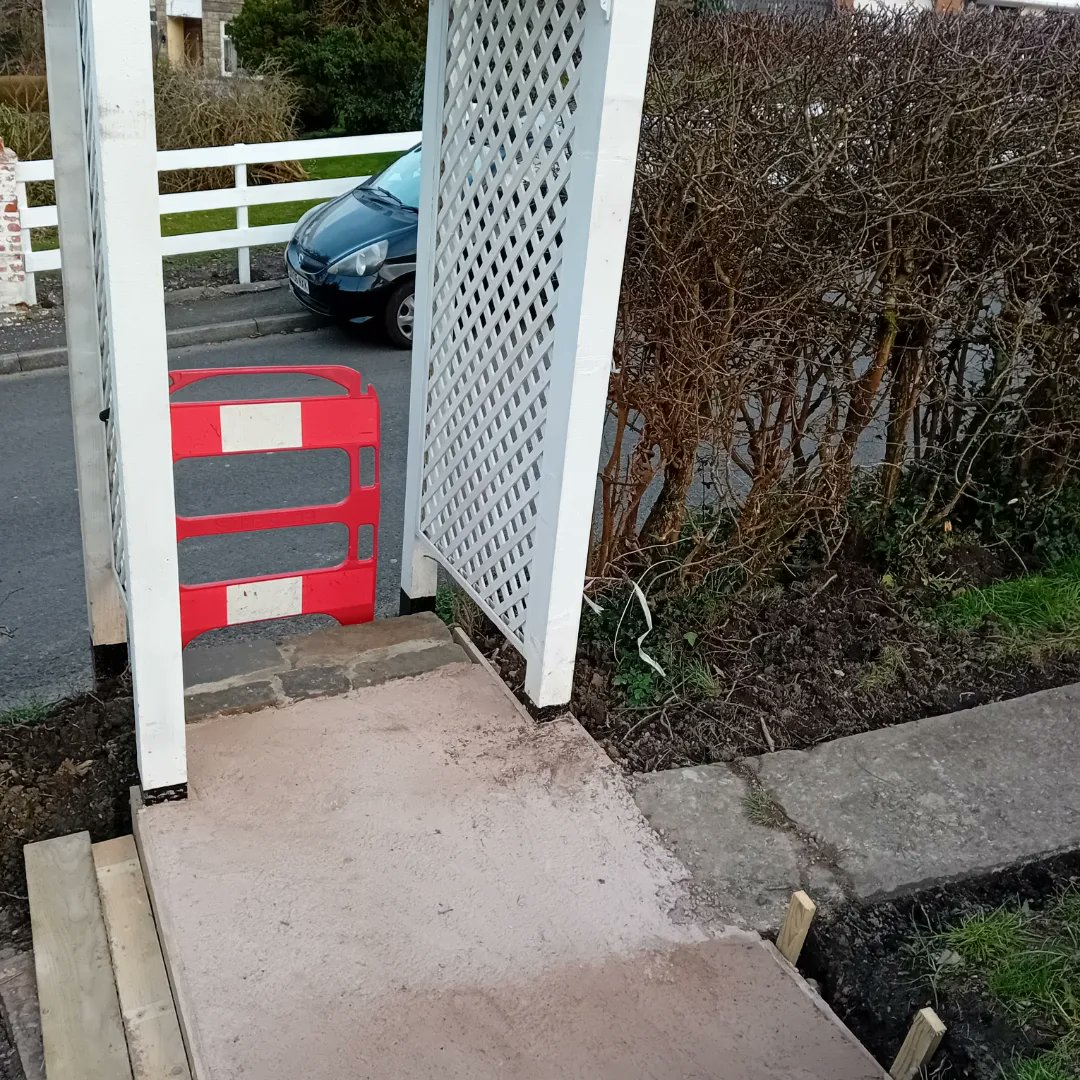
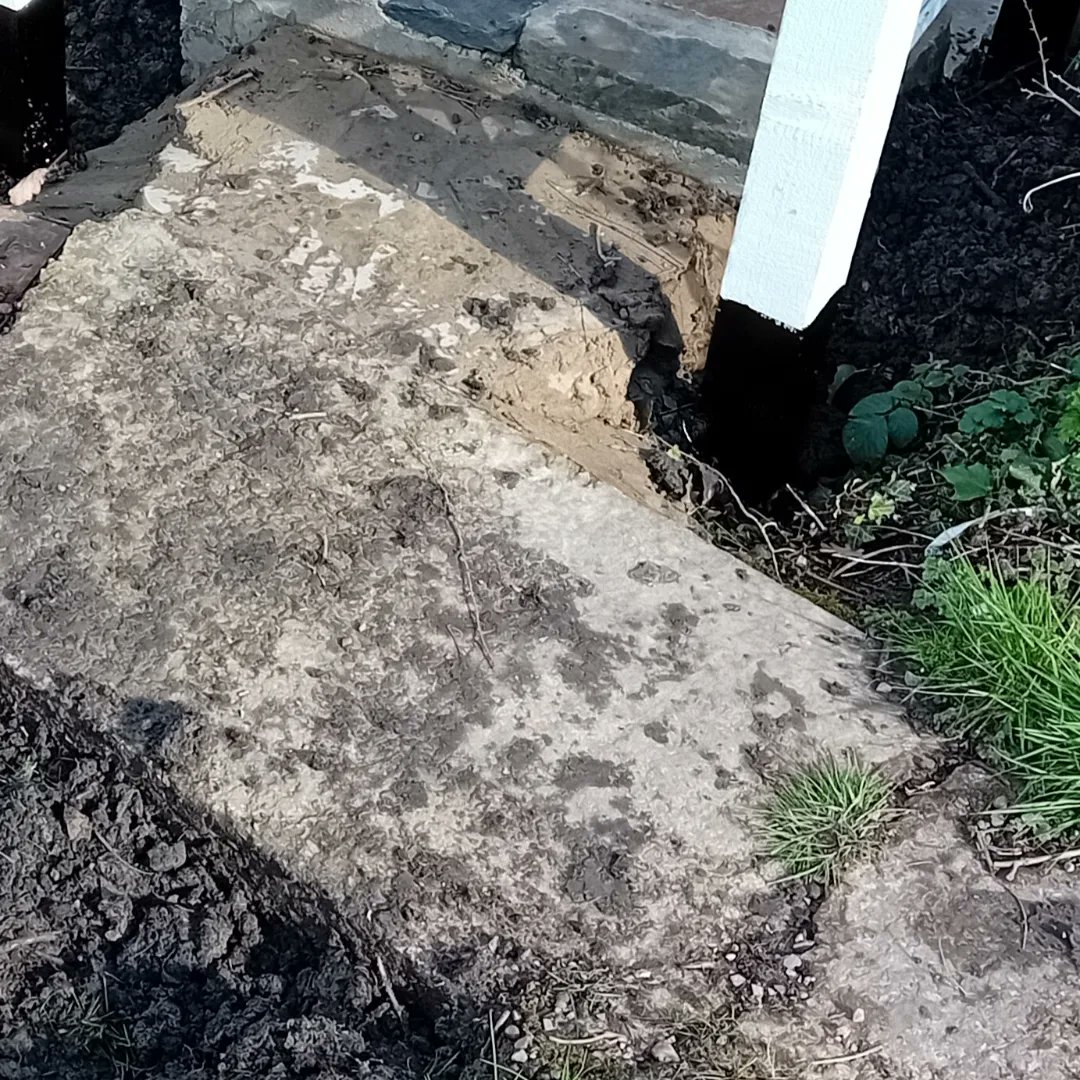
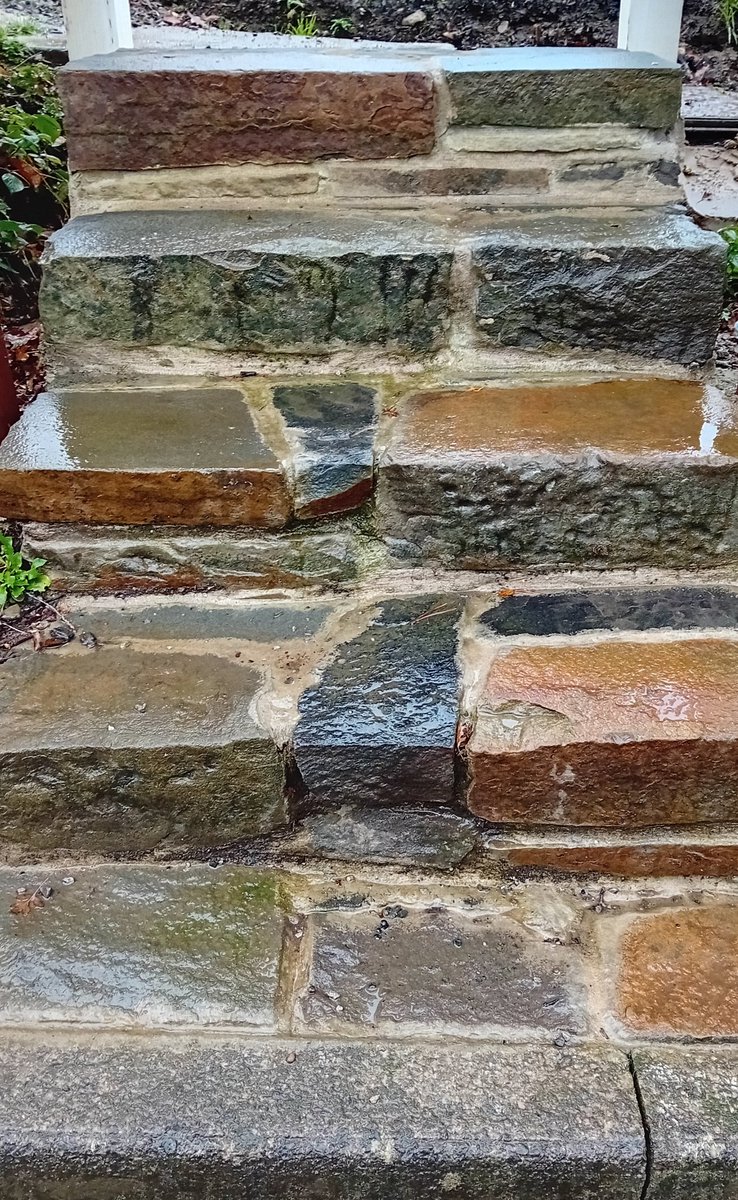
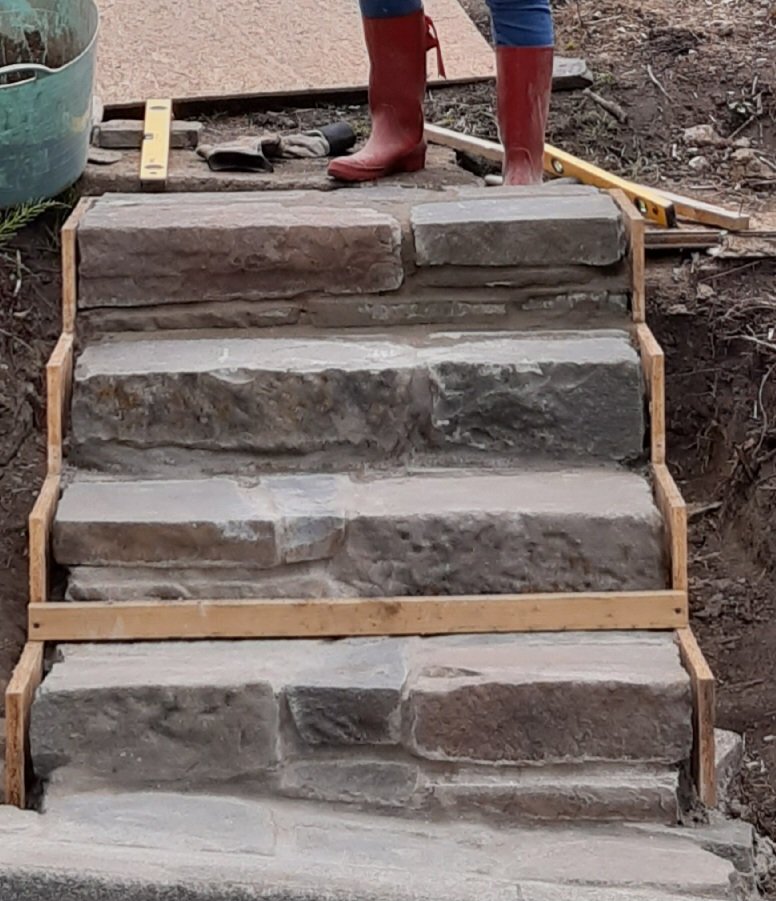
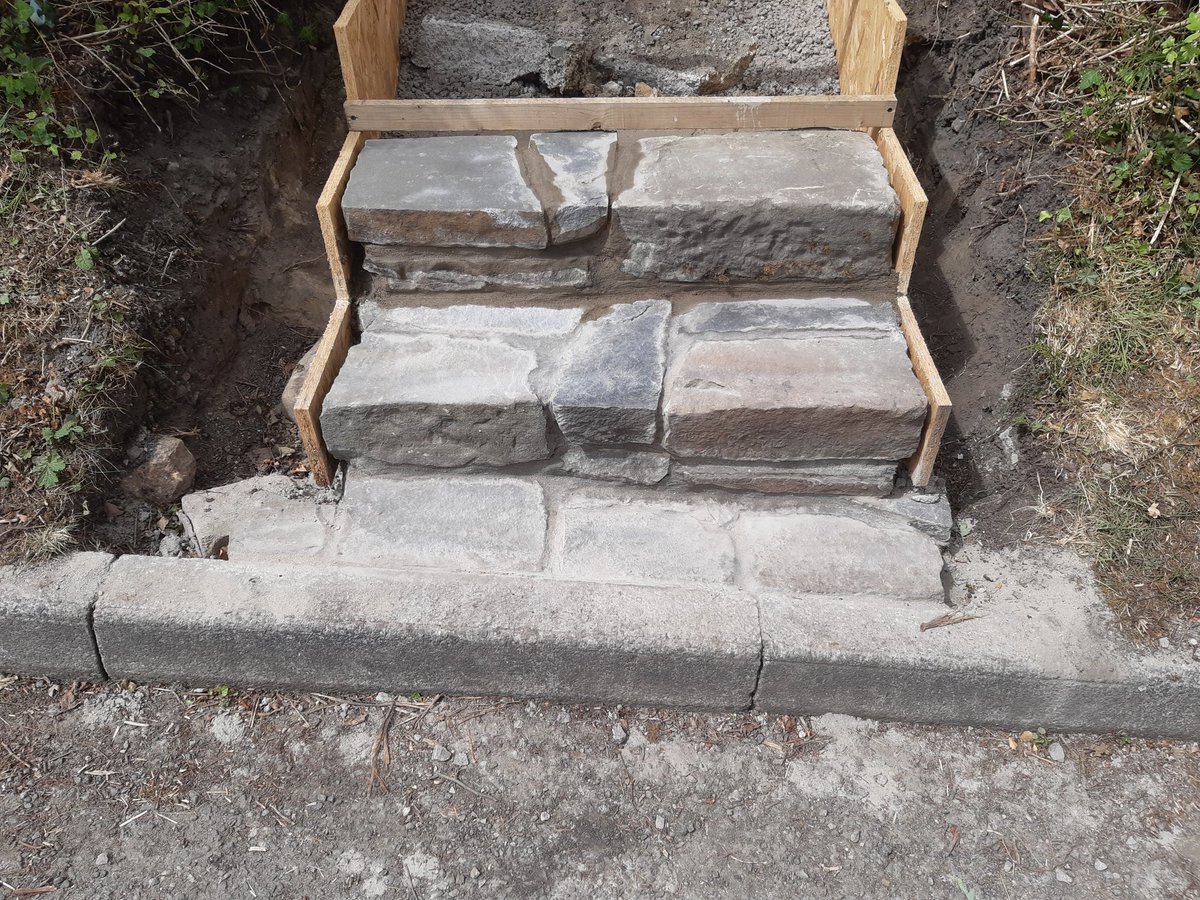
I had to build new steps up from the road to my garden. I used stone I'd previously dug out of the garden. Then, after measuring up, I built a frame that I levelled up and simply built one step at a time, backfilling as I went. This was part of a larger project, so more to come!

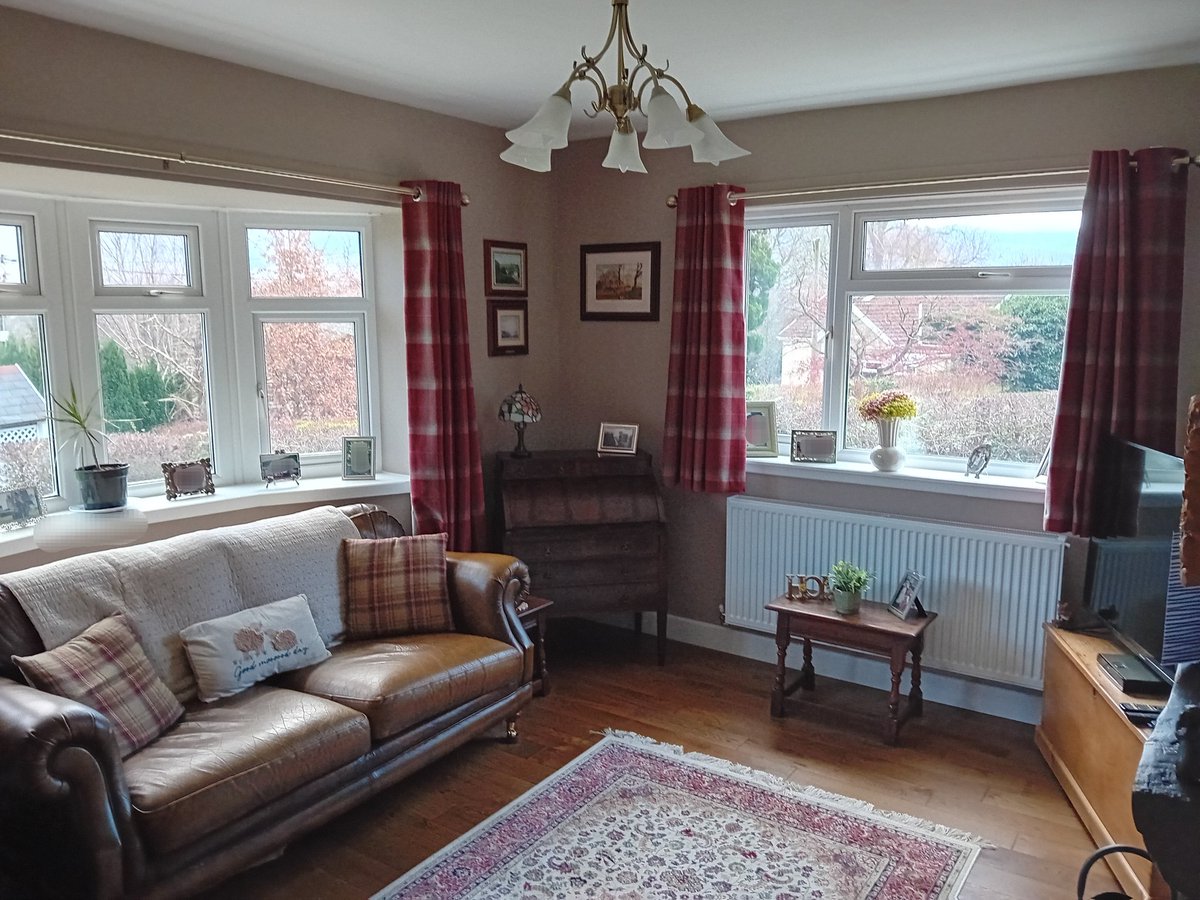
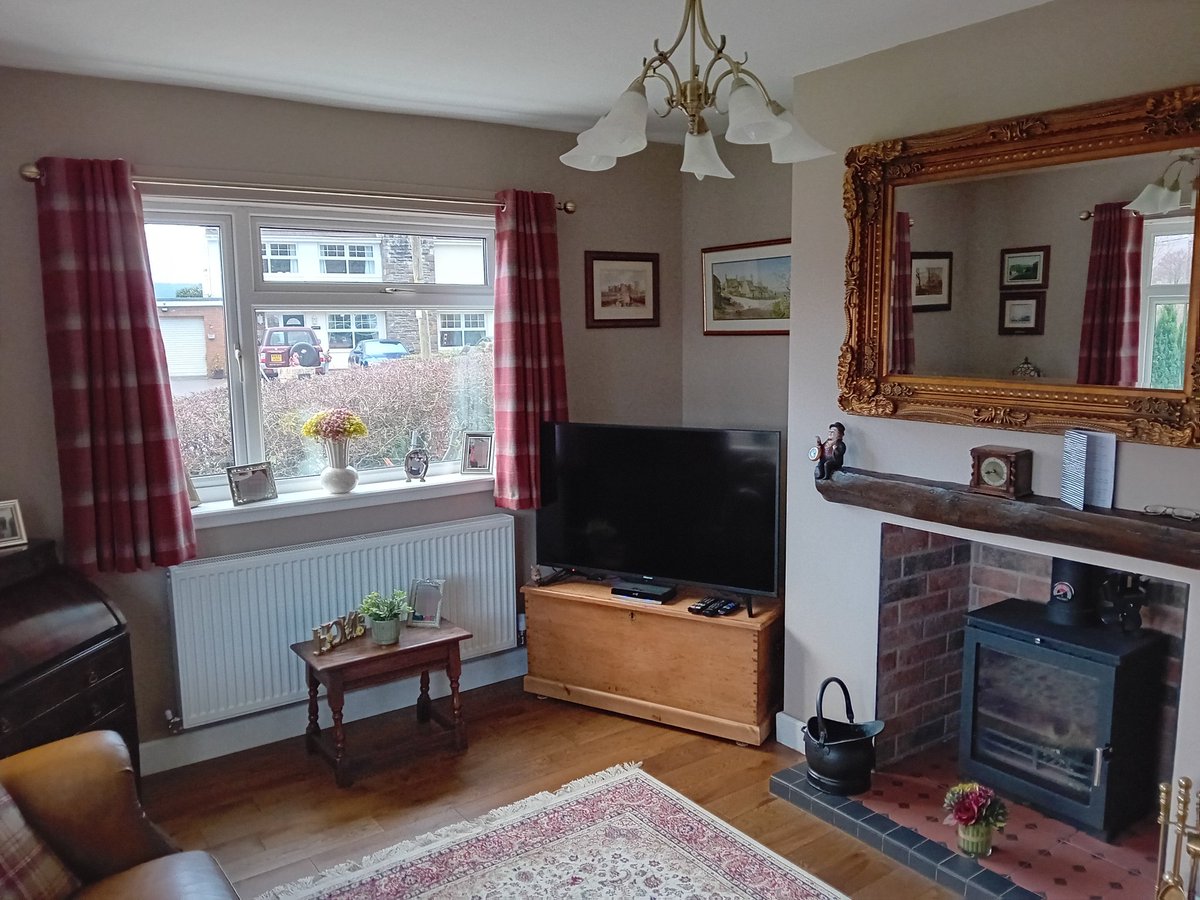
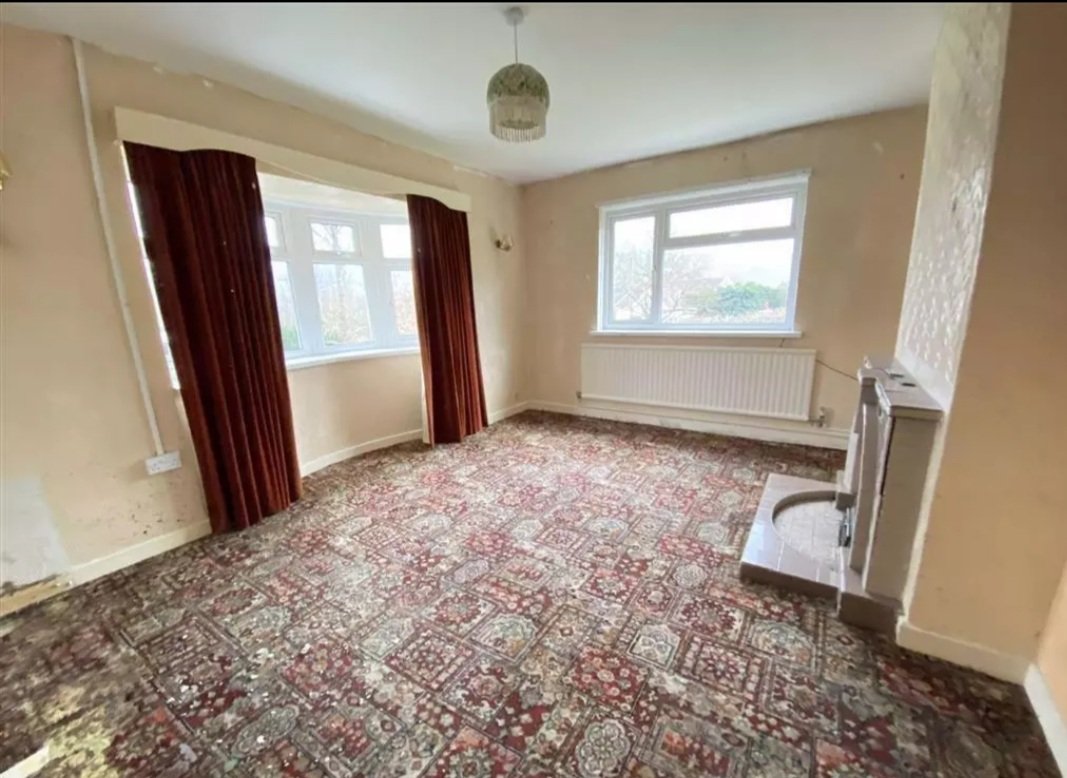
Progress with the house renovation. The living isn't quite finished but almost there! The chimney breast was taken down and centralised to accommodate a larger TV. Slow but steady progress!

First frost of winter. A chilly but beautiful day!


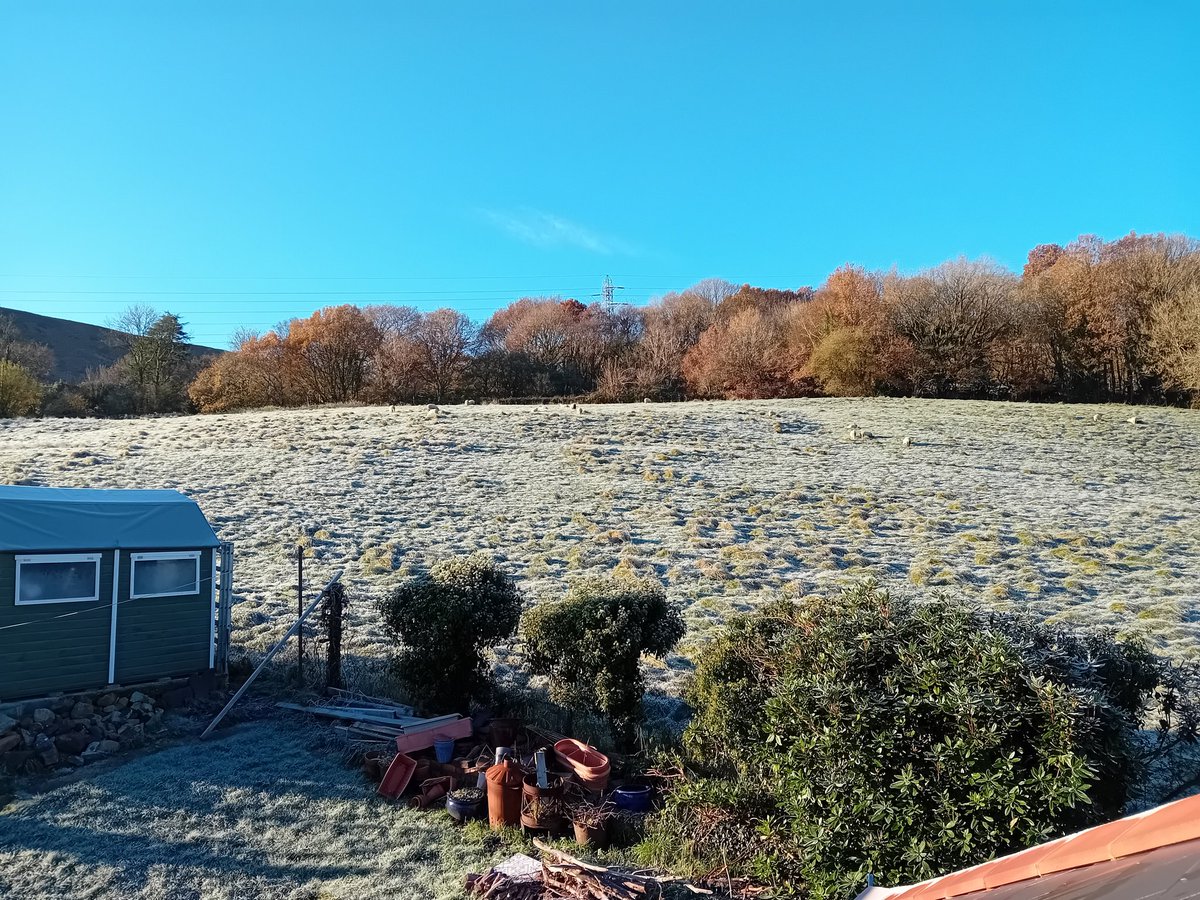
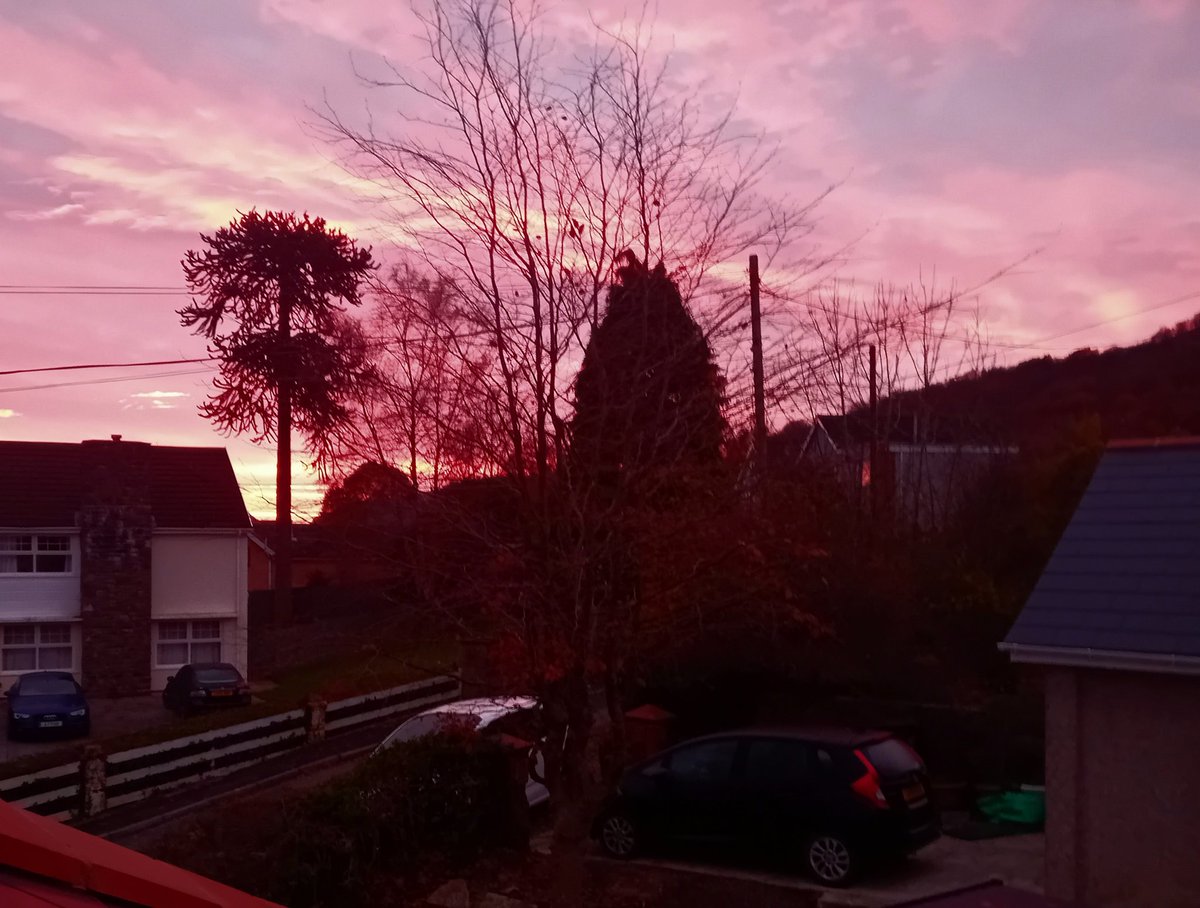
It was a beautiful sky this morning in Aberdare! Fortunately, it's too dark to see my building site garden 😀!!
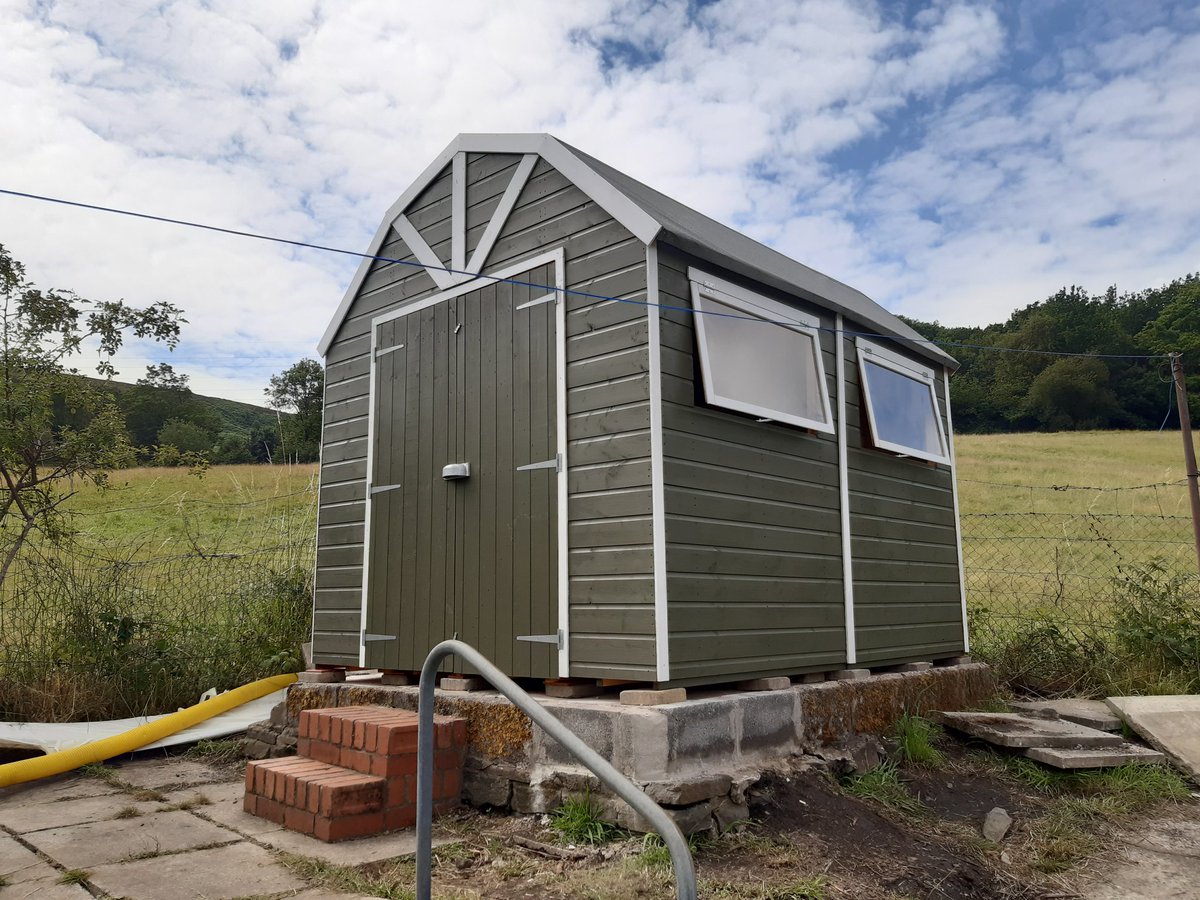
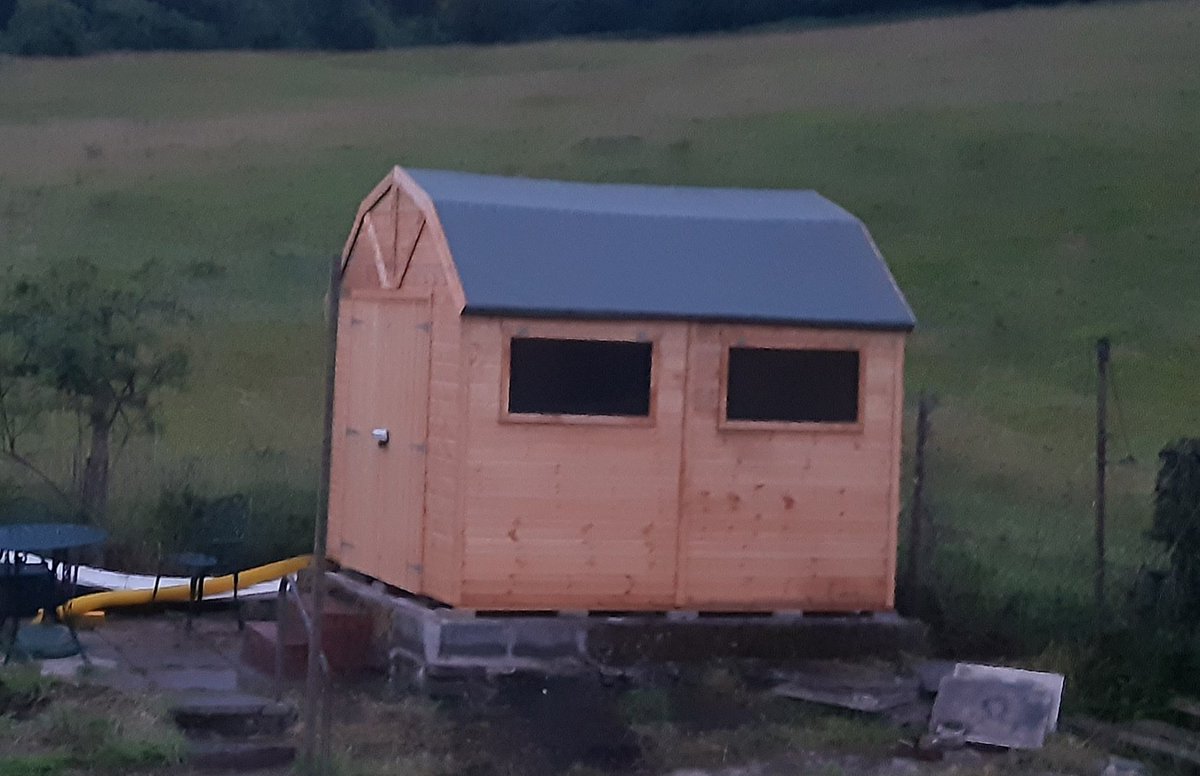
I've not posted much this year due to health issues so thought I'd post a project from earlier in the year. As a woodworker you'd think putting a shed together would be straightforward... sadly not 😄!! It's been up a few months now and withstood a few storms (this is Wales 🏴)


United States Trends
- 1. Thanksgiving 1.72M posts
- 2. Thankful 337K posts
- 3. Turkey Day 37.7K posts
- 4. #GoPackGo 3,845 posts
- 5. Cece Winans N/A
- 6. #OnePride 3,485 posts
- 7. #GBvsDET 1,106 posts
- 8. #ProBowlVote 20.1K posts
- 9. Go Lions 2,274 posts
- 10. National Anthem 5,223 posts
- 11. Busta Rhymes 1,278 posts
- 12. Afghanistan 249K posts
- 13. Grateful 232K posts
- 14. Lil Jon N/A
- 15. #PrizePicksNFL 2,834 posts
- 16. Gobble Gobble 22.7K posts
- 17. Sarah Beckstrom 17.6K posts
- 18. Toys R Us N/A
- 19. Debbie Gibson N/A
- 20. Turn Down for What N/A

Something went wrong.
Something went wrong.