#shortstutorial نتائج البحث

🎬 BTS of 3D animation in Blender. Join us on this visual journey as we craft each frame and scene, bringing our imagination to life. Stay tuned for more exciting content. 🎬 #BlenderAnimation #ShortsTutorial #LearnBlender

Request Logo Design Tutorial YouTube Video Link 👇 youtube.com/shorts/Cumq6k8… #logodesignturialshorts #logoshorts #shortstutorial #logodesigntutorialreels #logoreels #tutorialsreels #graphicslab #freelancercontest #dropshadow #logodesigntutorial #ytshorts #ahlogodesign
Logo design tutorial for freelancer contest 🙏Please Subscribe My YouTube Channel 👇👇👇 sub4unlock.io/oh87x Video Link👇👇👇 youtube.com/shorts/O4hI0Oy… #ginoskologo #shortstutorial #ytshorts #logodesignreels #tutorialsreels #graphicdesignreels #viralrerls #trendingreels

Dive into the world of website creation with our YouTube Shorts tutorial! In this rapid guide, discover the magic of building your online presence in minuts. #WebsiteCreation #ShortsTutorial #OnlineSuccess #DigitalEmpire #WebsiteMagic #YouTubeShorts #OnlinePresence #WebsiteBuild

Create Clipping Mask Photoshop Shortcut 💫😵✨ YouTube 🔗 youtube.com/@tapas_raj_cre… #shortsvideo #short #shortstutorial #Like #FolloMe #subscribe #photoshop #Creative #Creativeshorts #GraphicDesign

"AP" Anik Paul Requested logo design tutorial YouTube Video Link 👇👇👇 youtube.com/shorts/vRKmCkL… #ytshorts #shortstutorial #requestedlogoreels #viralreels #toplogodesigner #viraltutorial #fbtutorialvideo #graphicdesigntutorial #graphicslab #tutorial @followers @highlight


Fourteen #ShortsTutorial Olga hopes you could all follow and hopes you enjoyed it. We hope it’s given you some ideas

Shorts Not Uploading To Youtube In #Shorts youtu.be/HdSU_959_2E via @YouTube #YouTubeShorts #ShortsTutorial #HowToShorts #YouTubeTips #ShortsCreators #ShortsUpload #YouTubeShortsTips #ShortsForBeginners #YouTubeShortsMarketing #ShortsSuccess #YouTubeShortsCommunity #shorts

YouTube Shorts has been updated with new features, and one of them allows you to reply to comments with videos! Want to learn more? Watch this video to learn how to reply to comments with a video on YouTube Shorts. #youtubeshorts #shortstutorial youtu.be/UZ_Oh4Qy6FA
youtube.com
YouTube
How to Reply to Comments with Video on YouTube Shorts
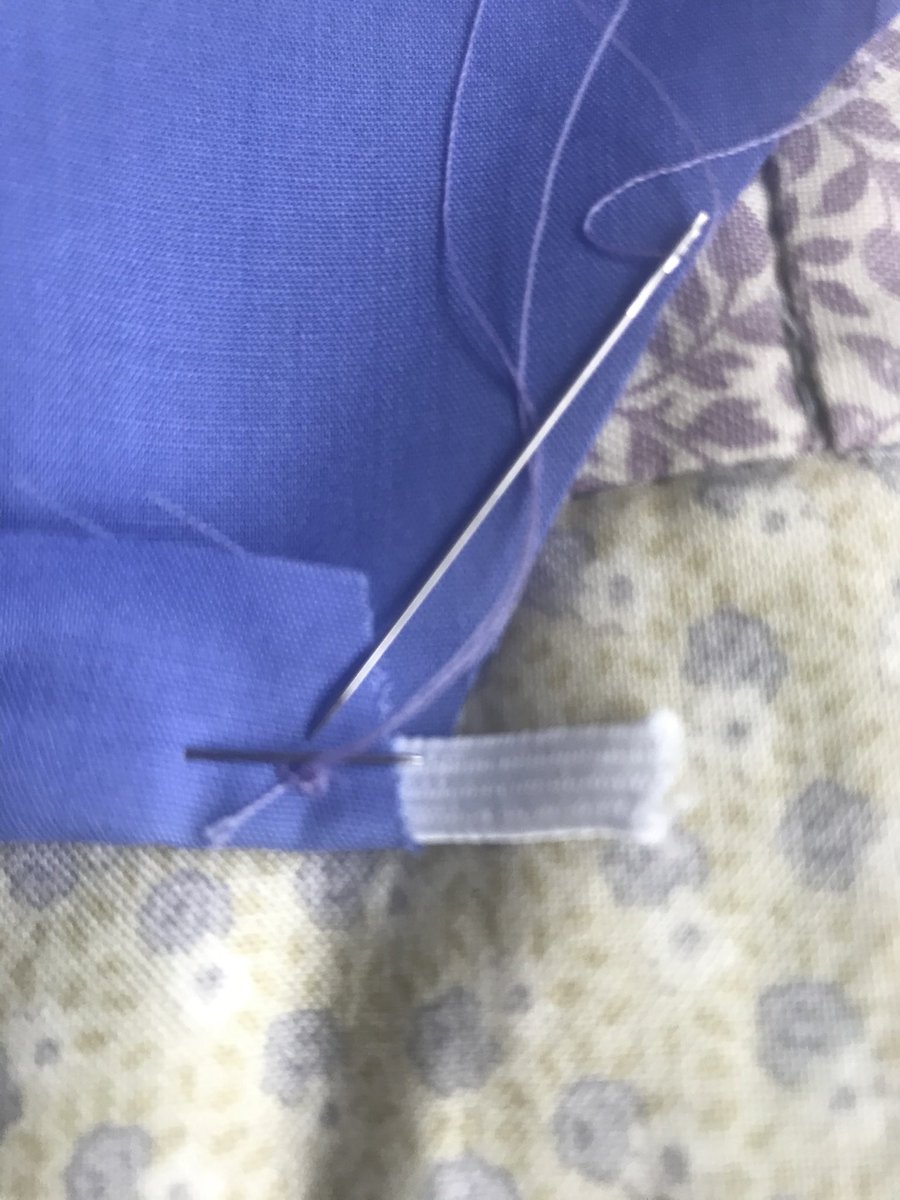
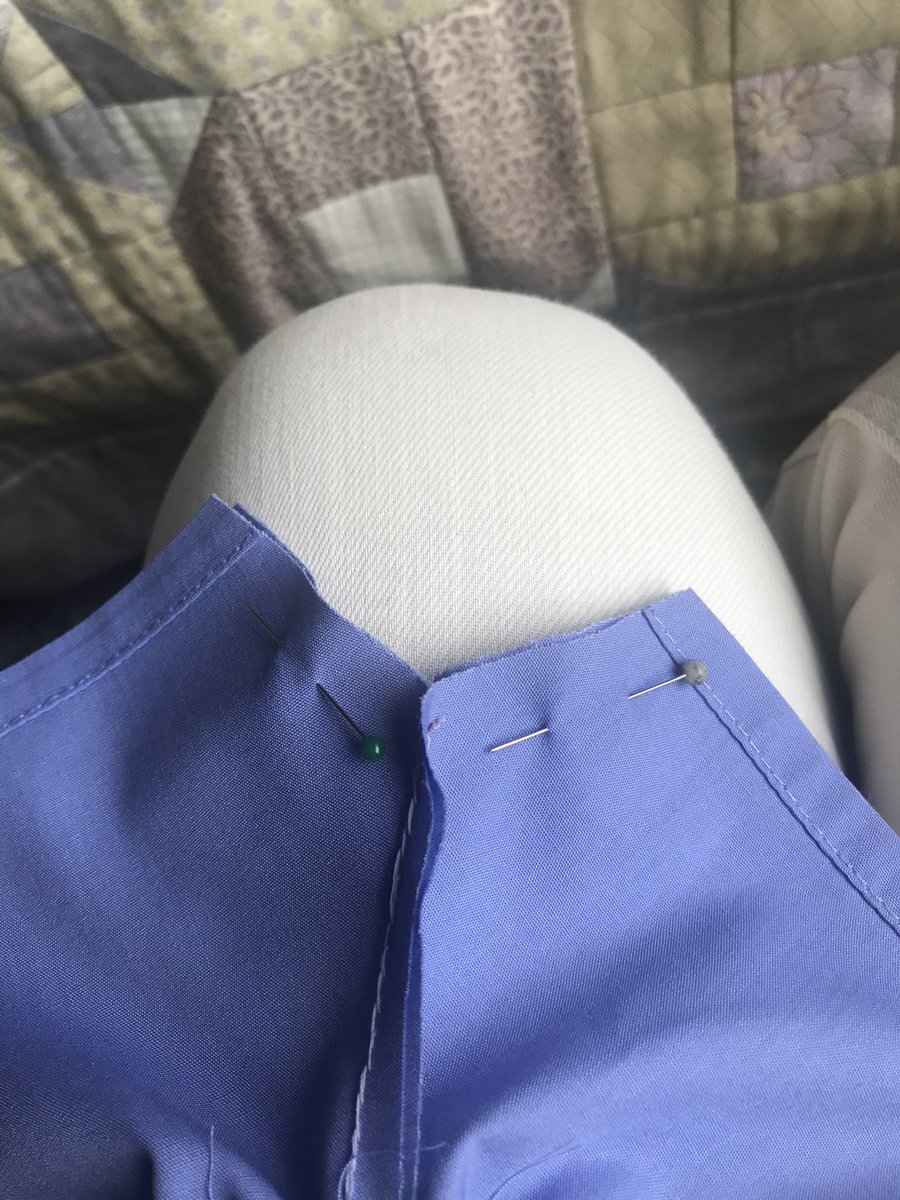
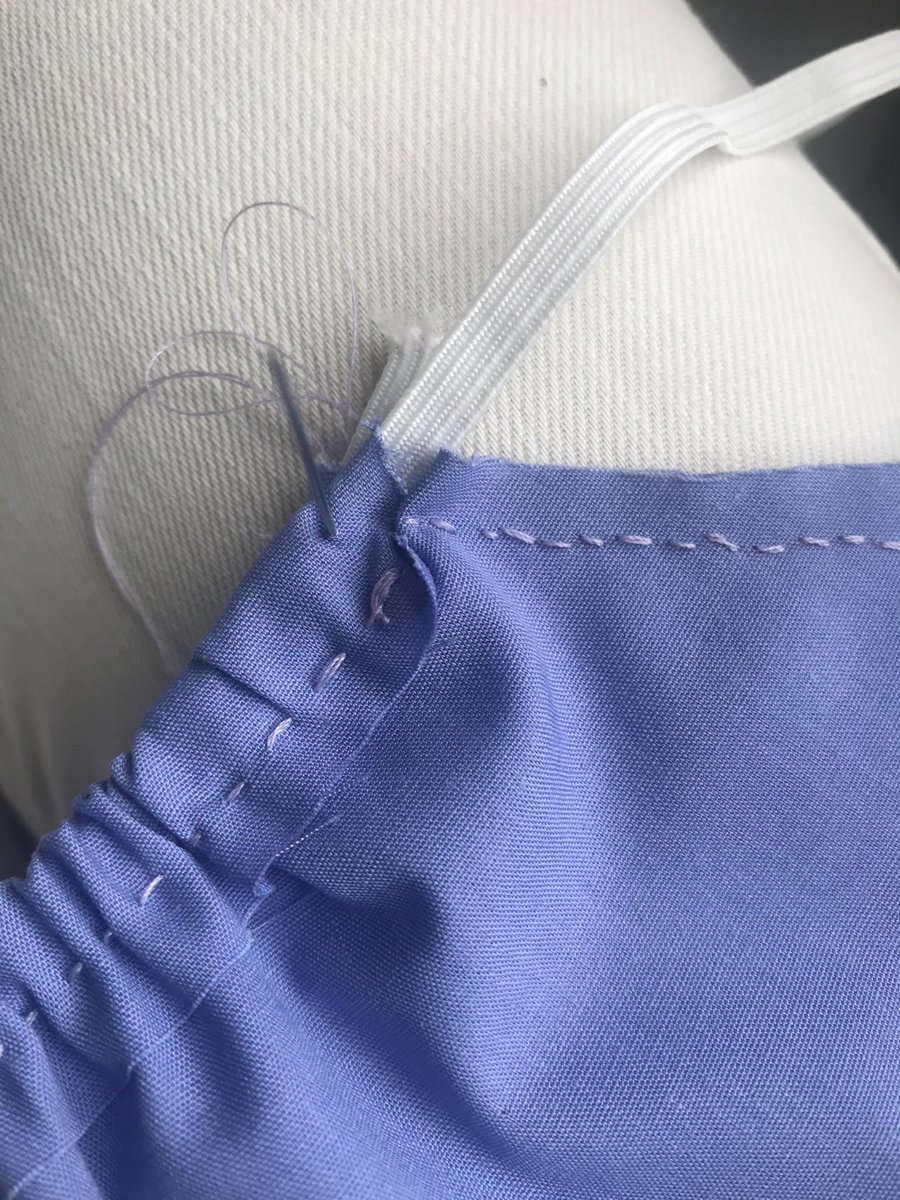
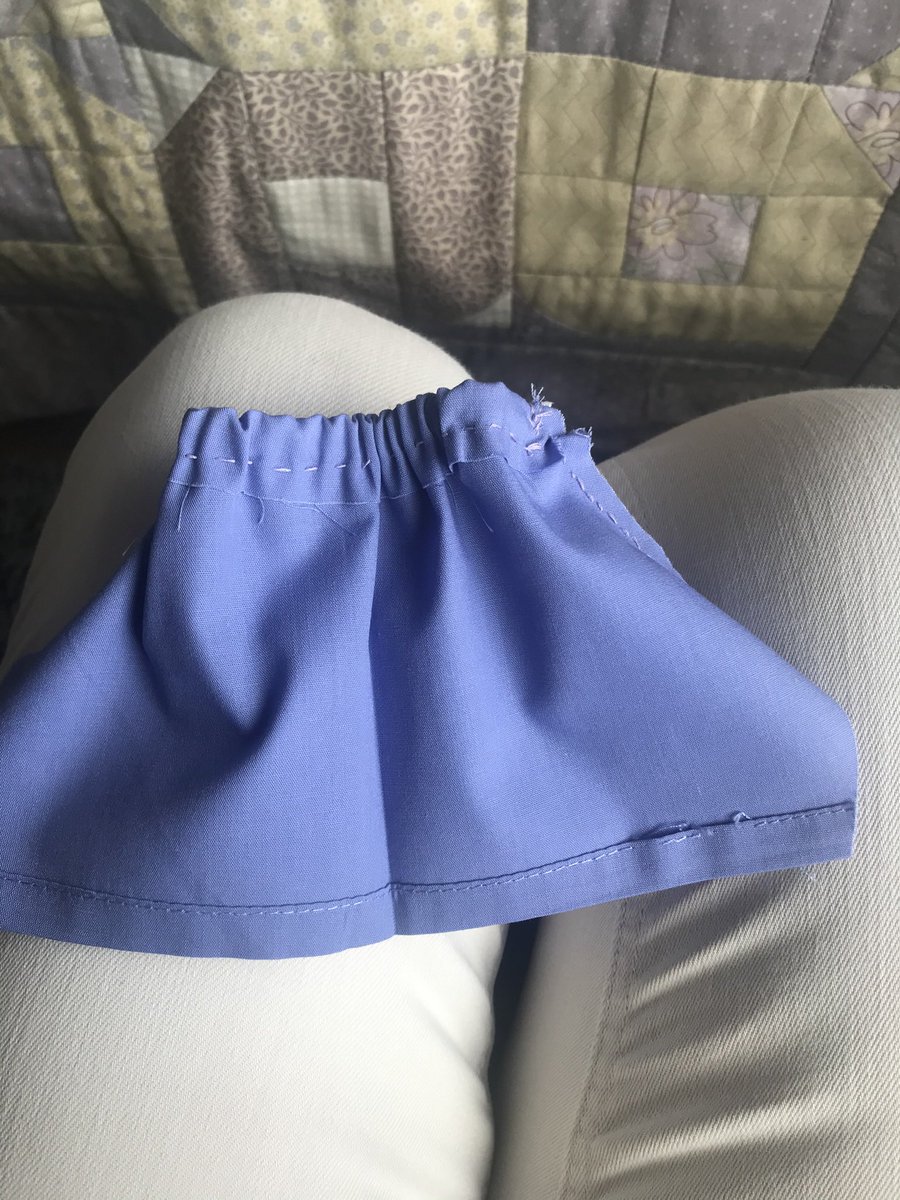
Eight #ShortsTutorial now for the waist - where the elastic goes. Alternatively you could add a drawstring - don’t forget to iron the top over if you need to. Pin (even a safety pin) the elastic at the end & puta couple of stitches in to anchor it

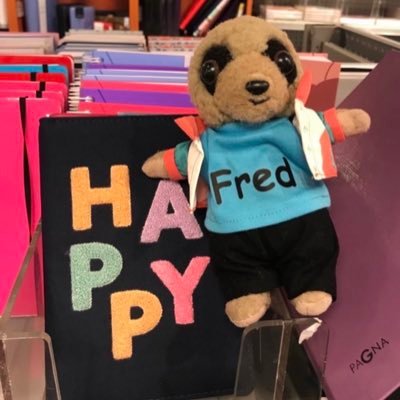
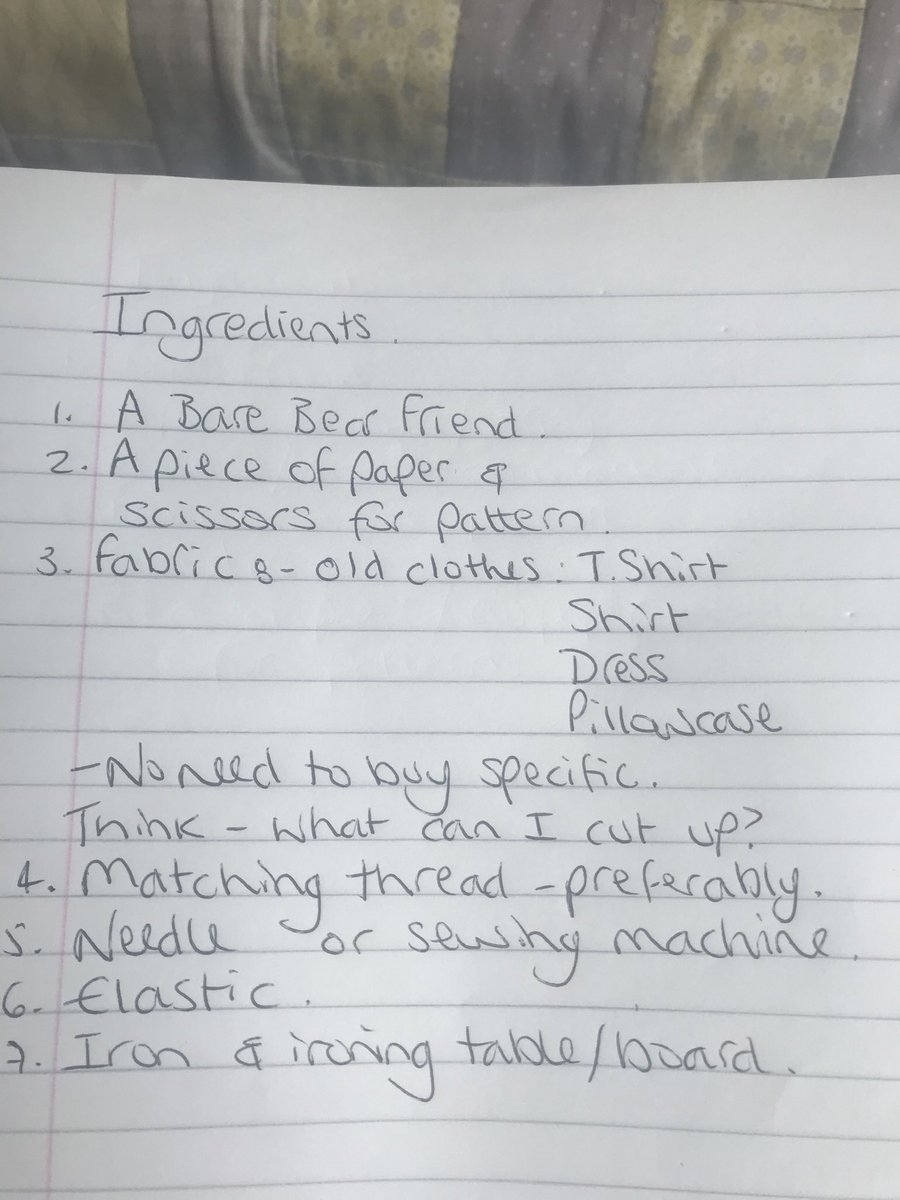
one #ShortsTutorial - gather your ingredients. Best to use something you’ve got before you want to lash out on any fabric - a pillow case is good if you have one spare as some seams already sewn will be useful. The likes of Aldi sometimes sell “fat quarters” that are inexpensive

Printing a Christmas tree in python... #shortstutorial #shorts youtu.be/A5rhbUU7YpQ?si… via @YouTube
youtube.com
YouTube
Printing a Christmas tree in python... #shortstutorial #shorts
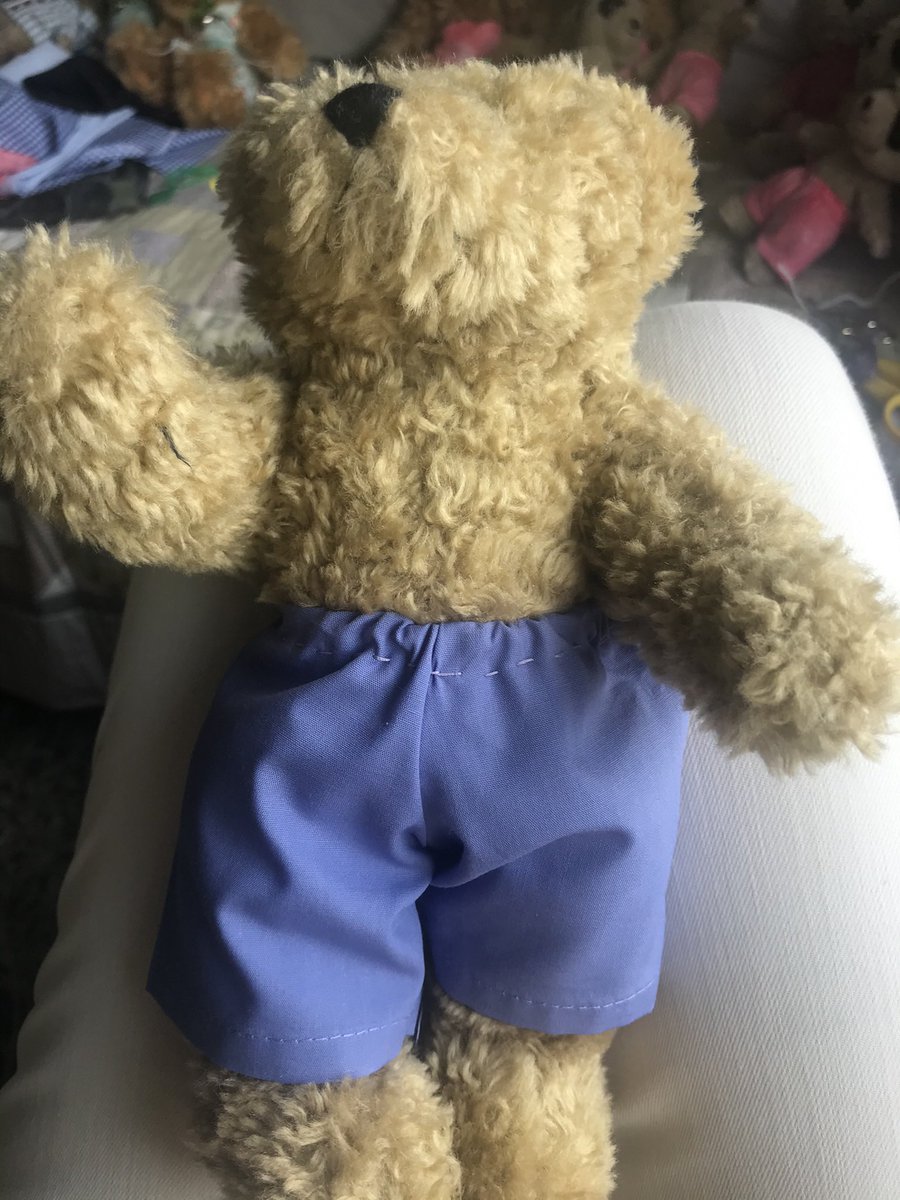
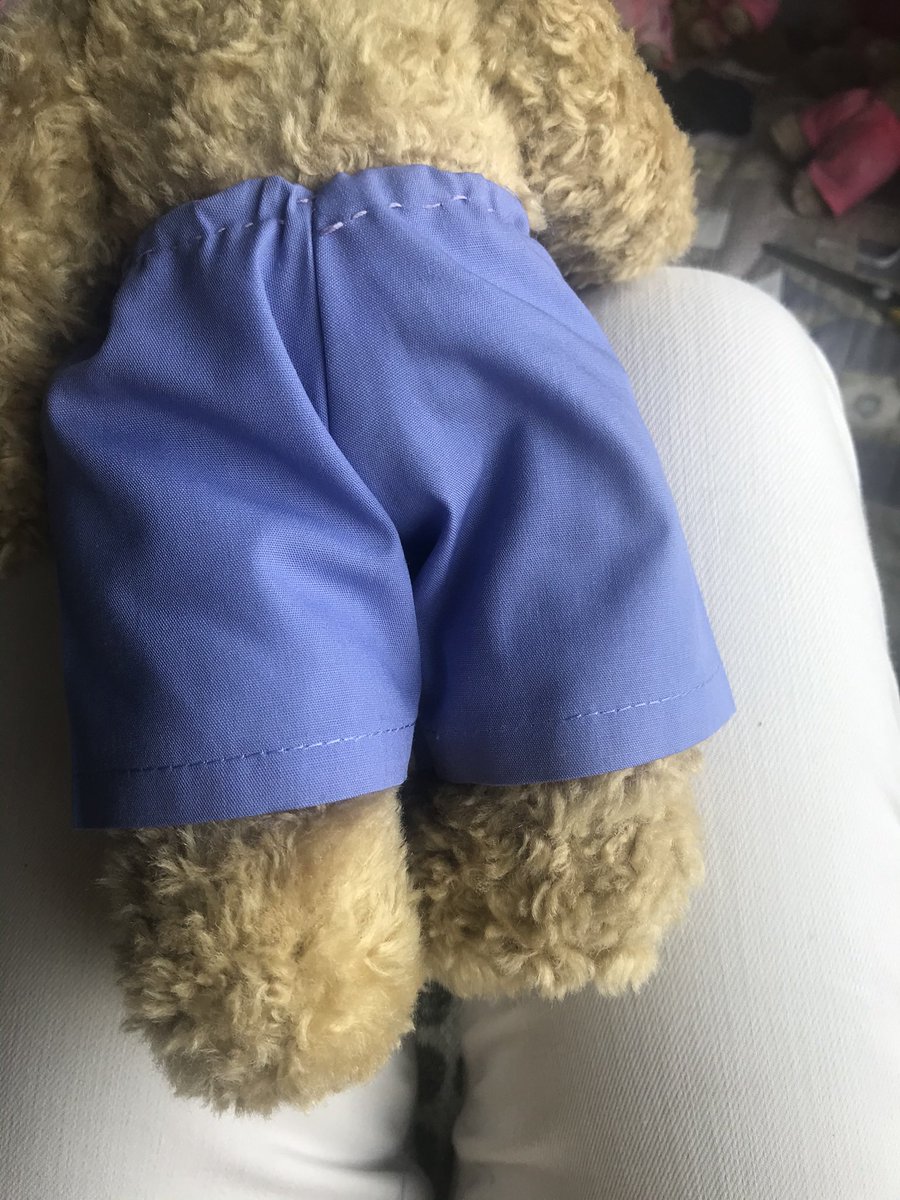
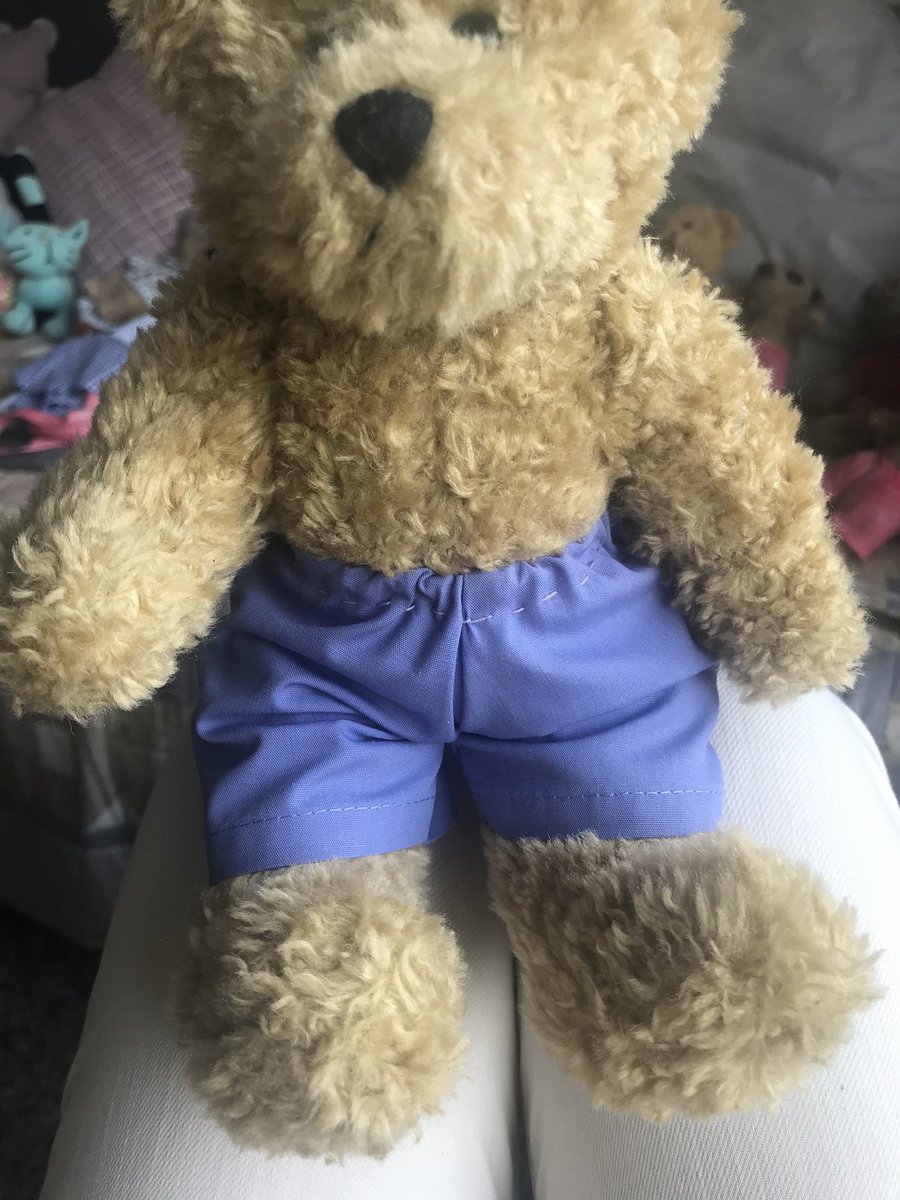
Thirteen #ShortsTutorial now it’s time to turn them the right way round. Giles doesn’t mind how they’re stitched &he doesn’t have a tail which made it a little easier. You will get better - but look - if Giles had a jumper on - no one sees the stitches &he’s ready for the beach
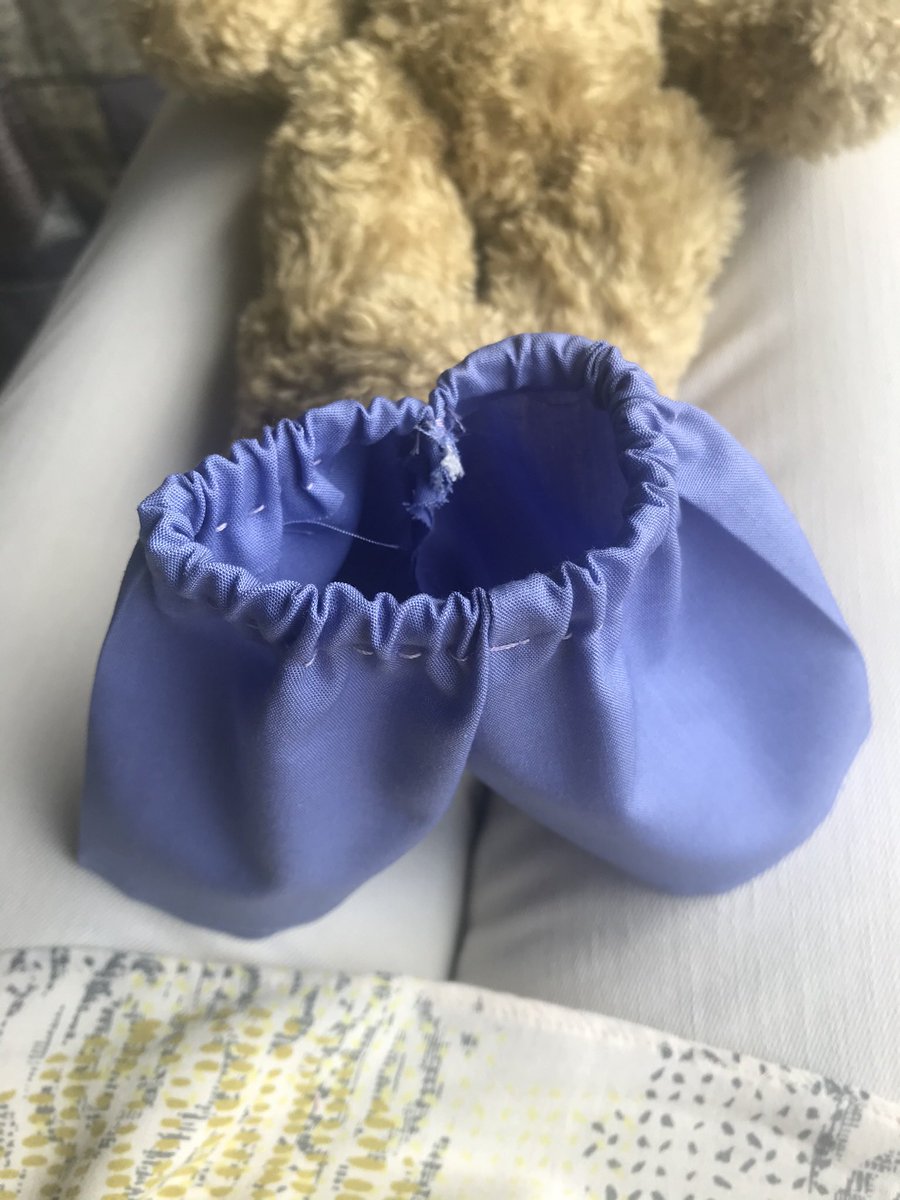
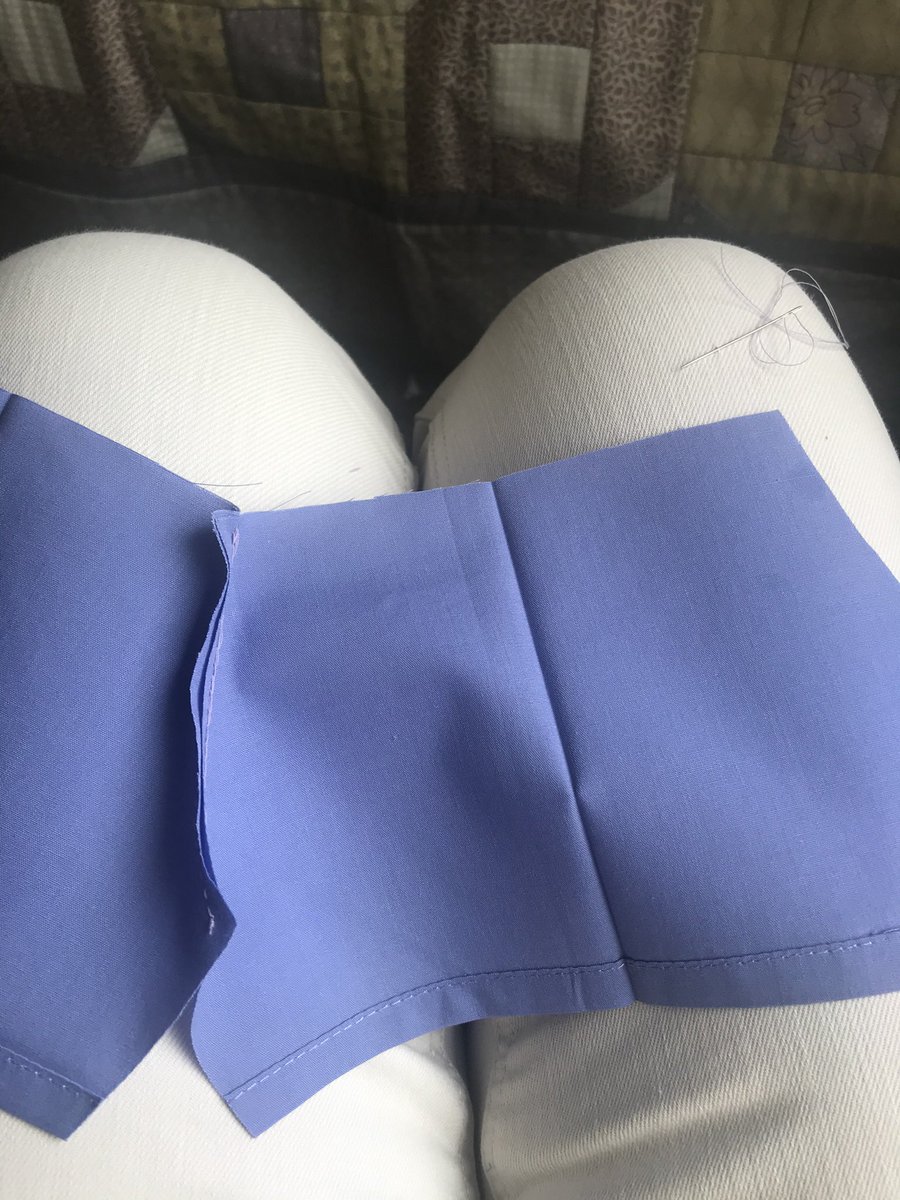
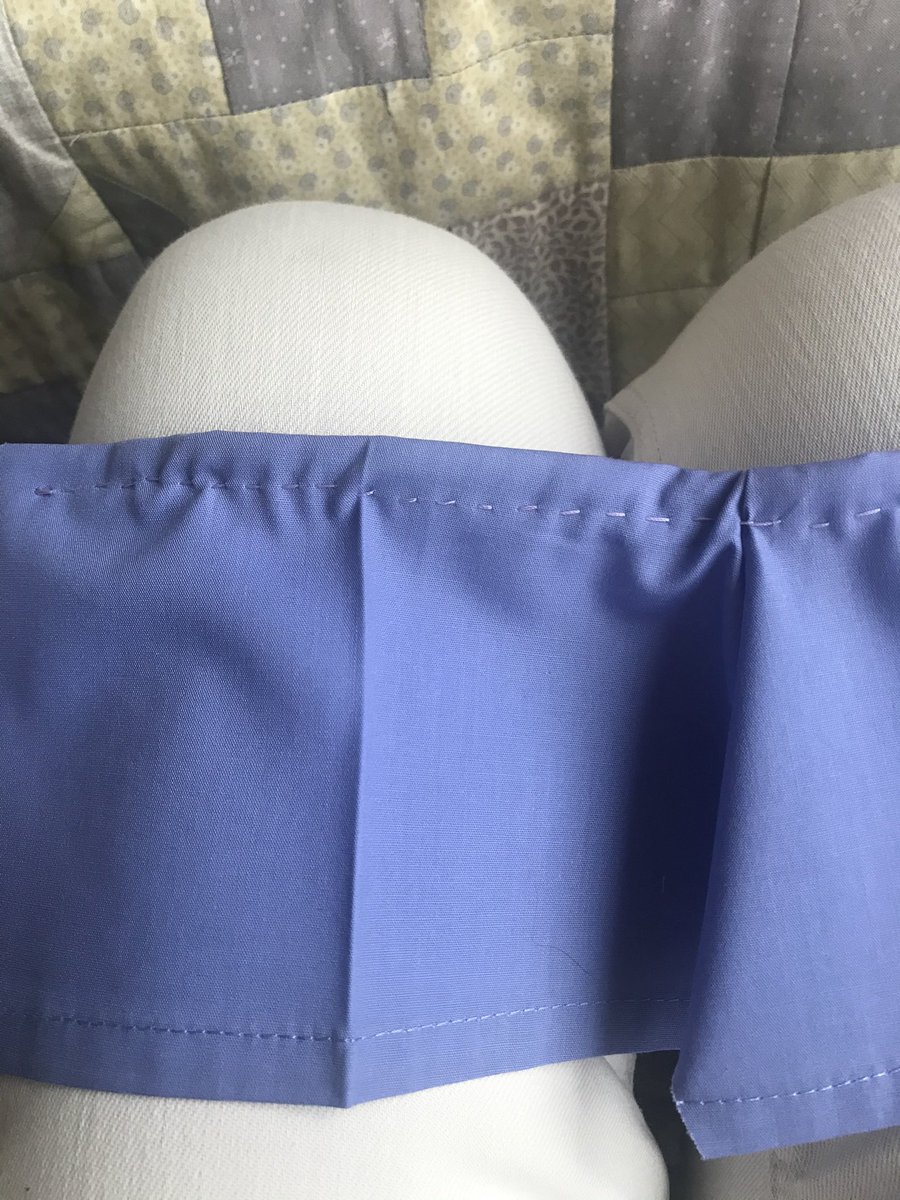
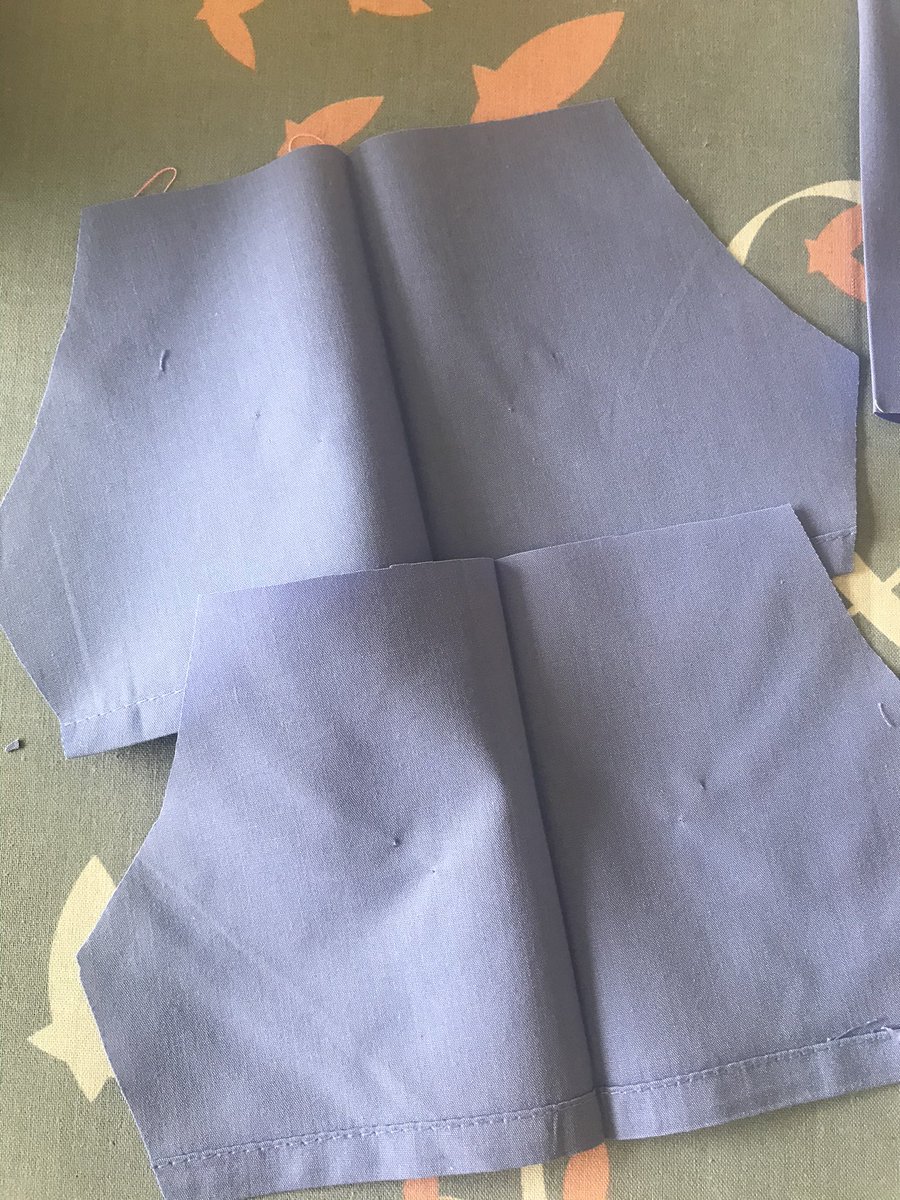
Twelve #ShortsTutorial the last bit is both the legs (still inside out everyone) so you are stitching right across the two legs - can you see - the picture is upside down
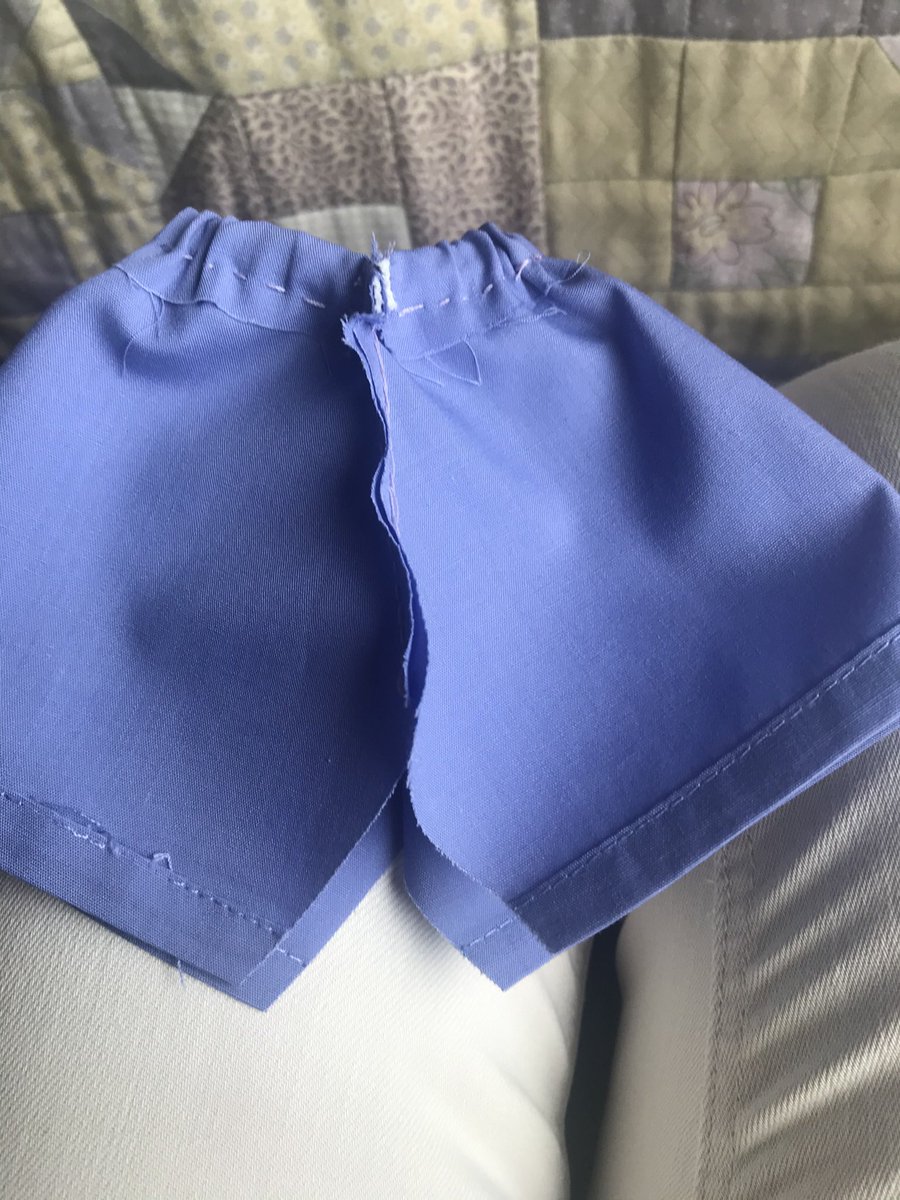
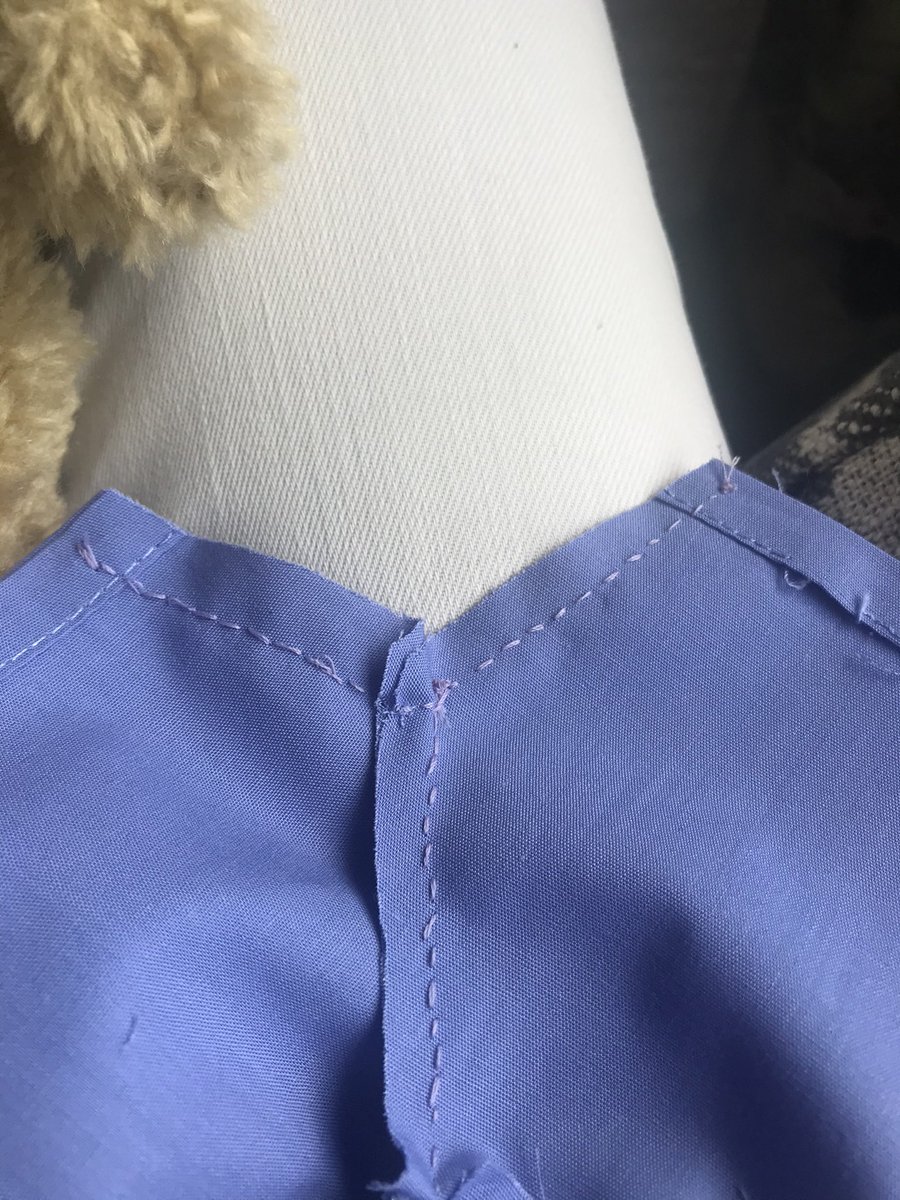
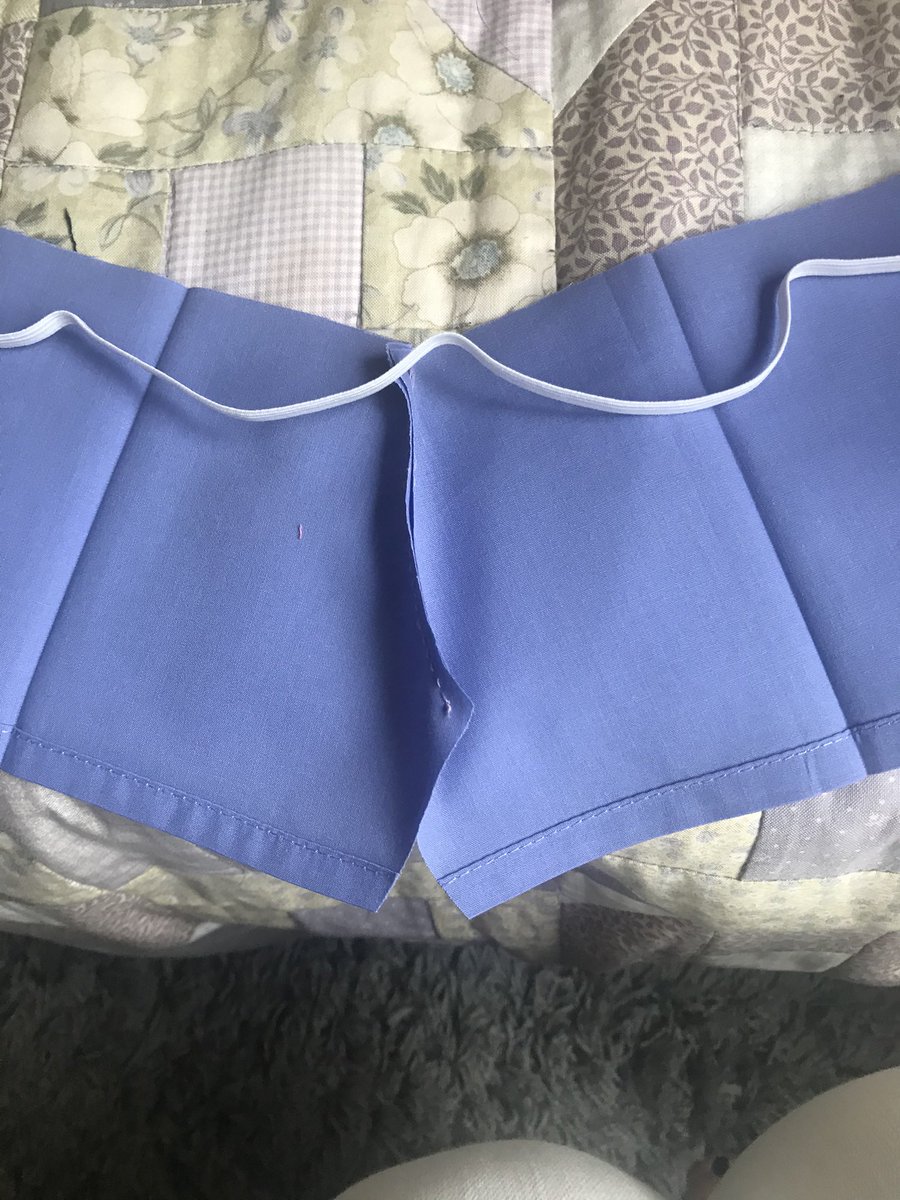
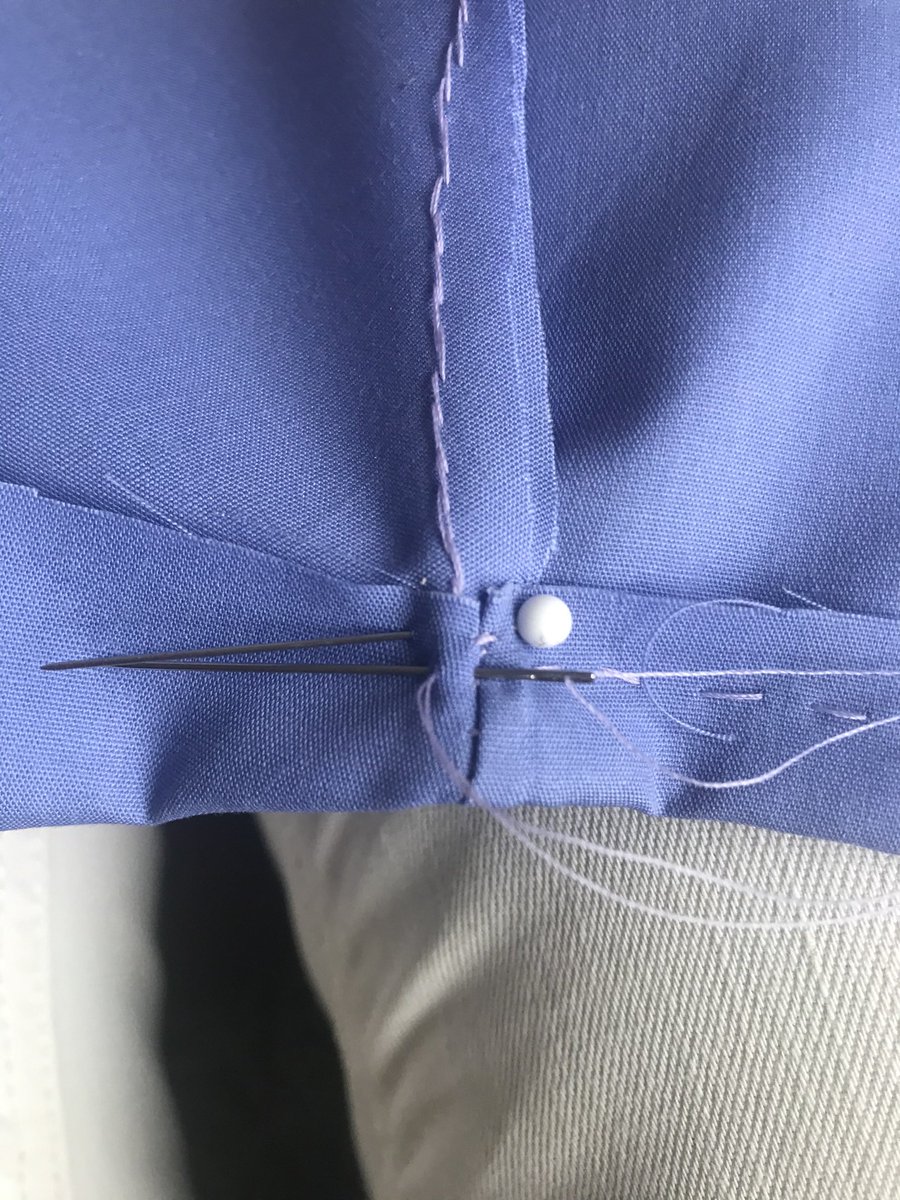
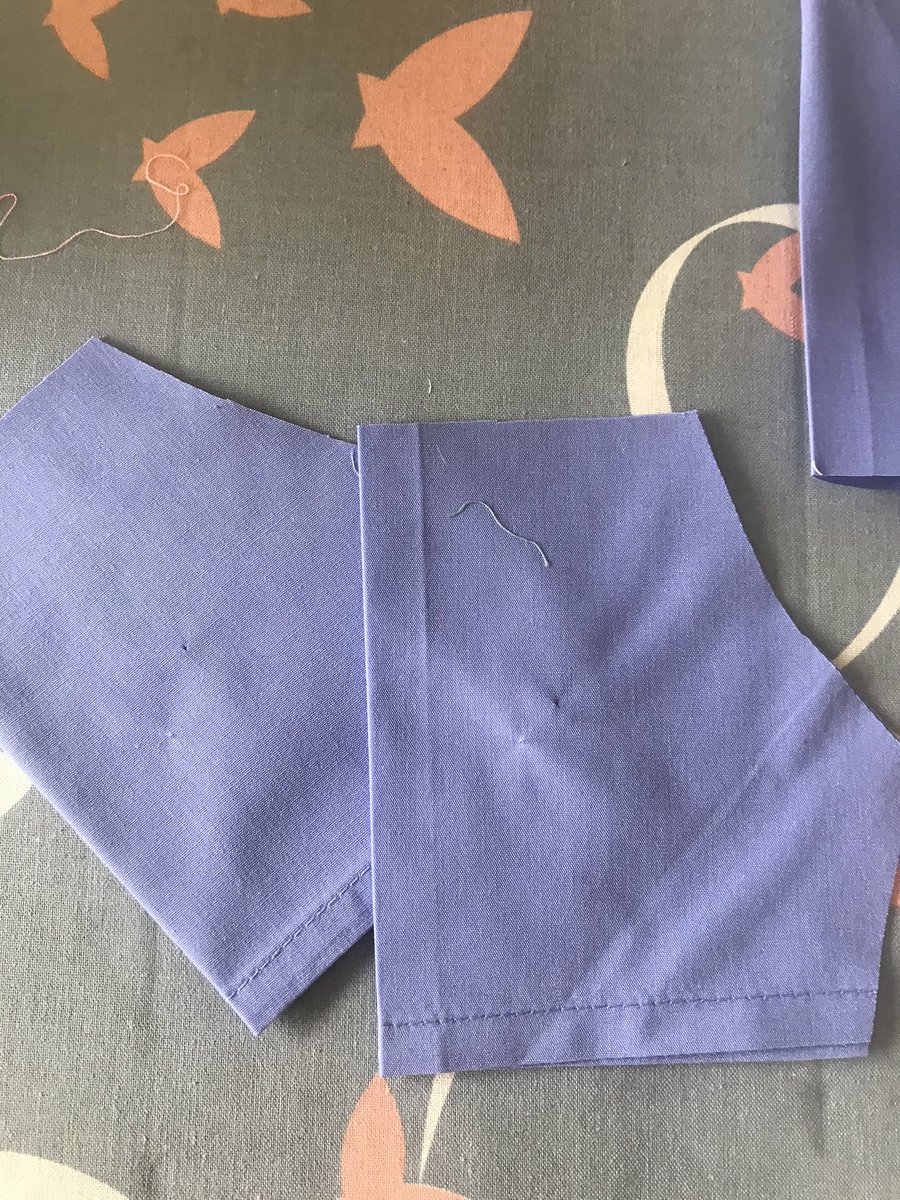
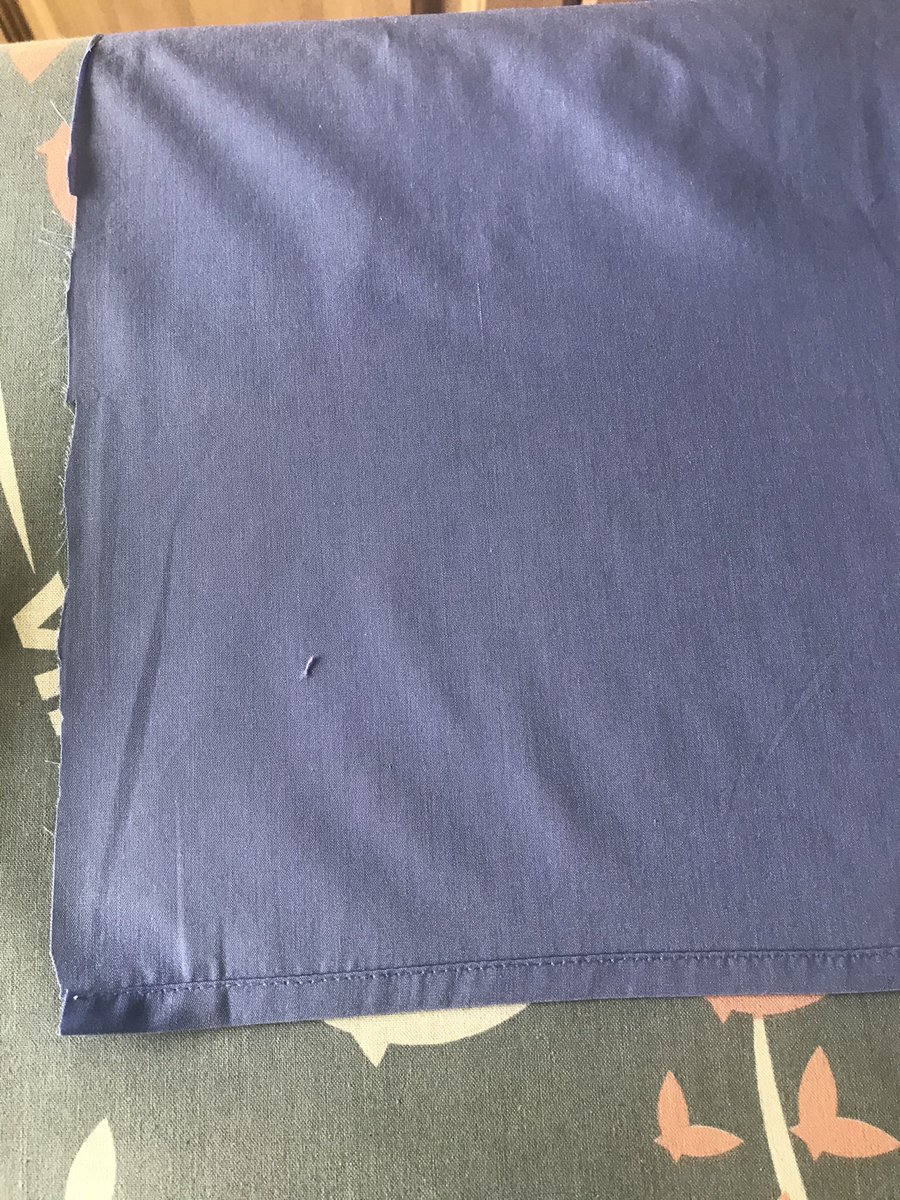
Six #ShortsTutorial with the hemmed edges at the bottom and the raw edges at the top - stitch the crotch area together as small stitches as possible - but don’t worry - they’re not on show
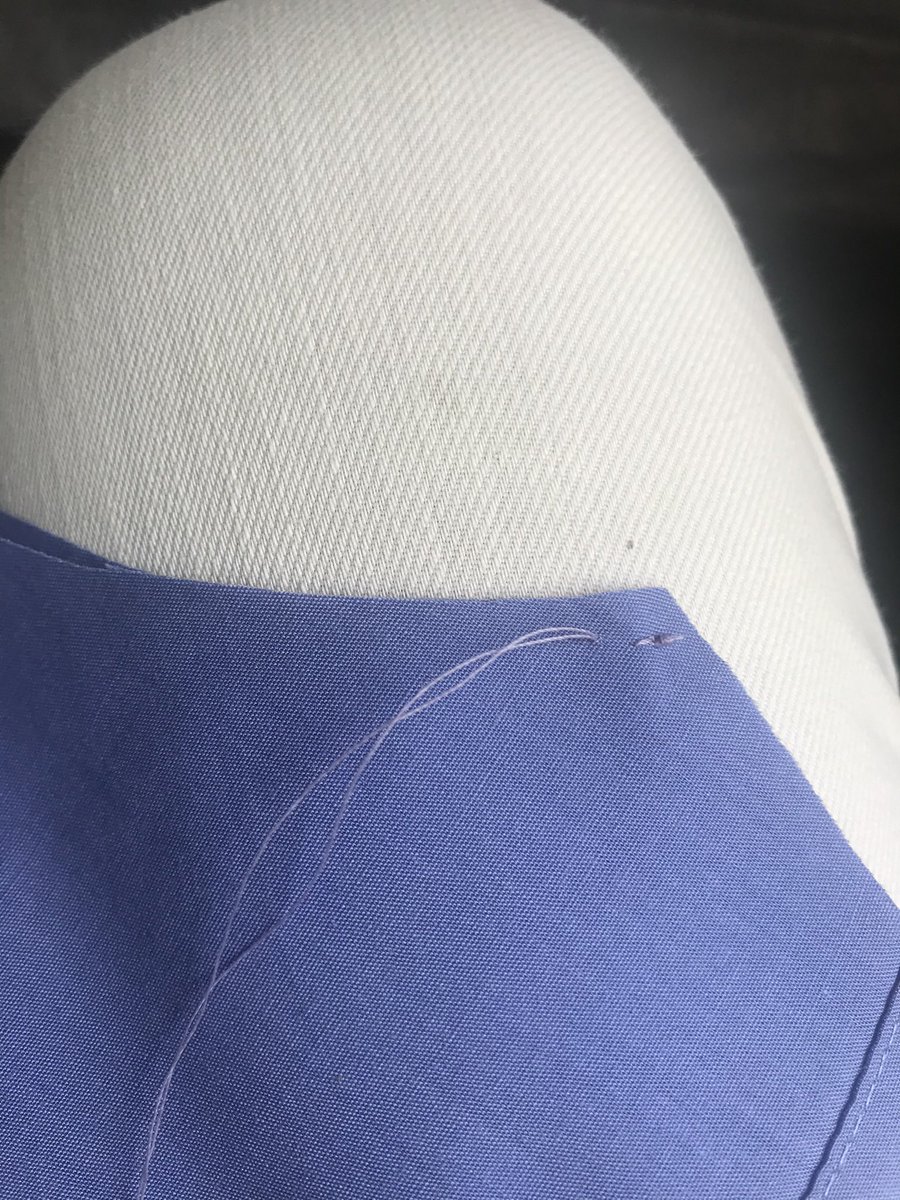

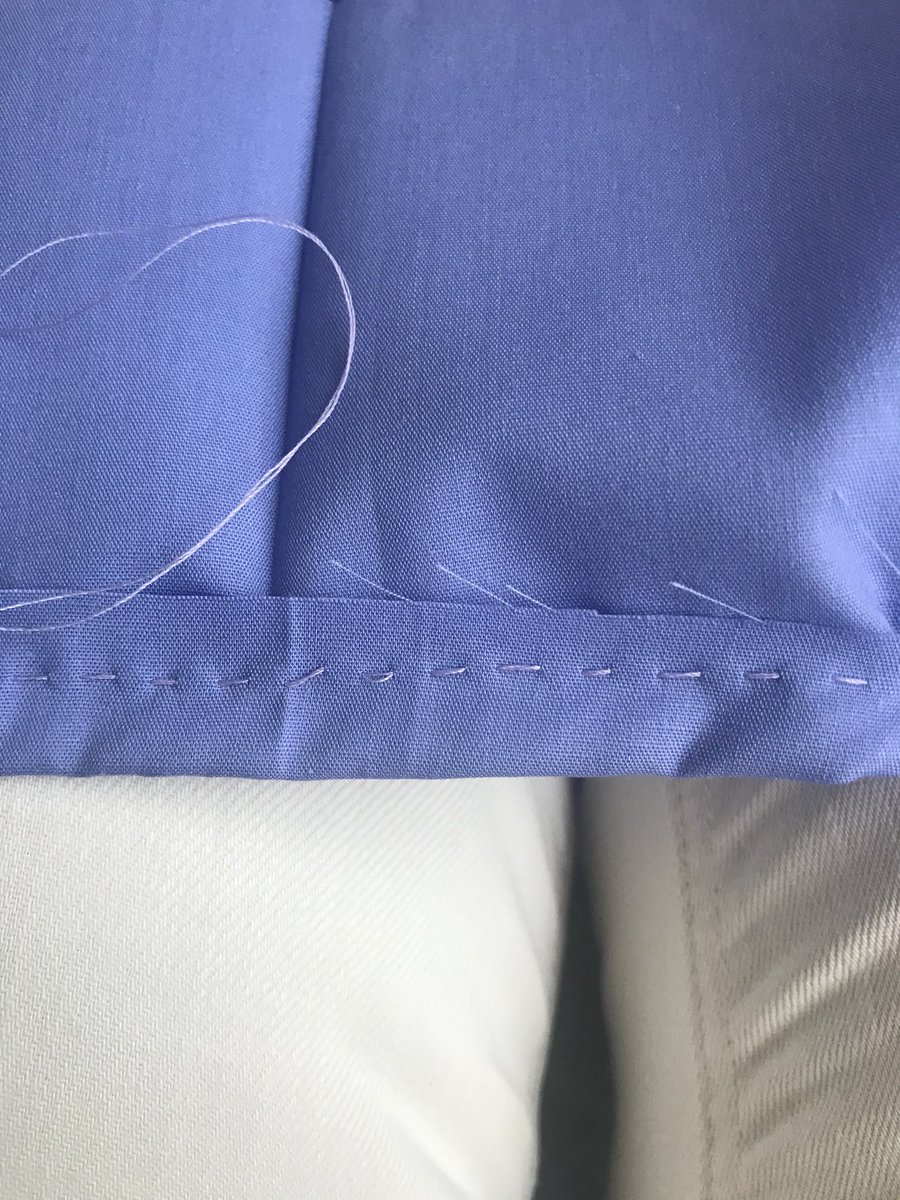
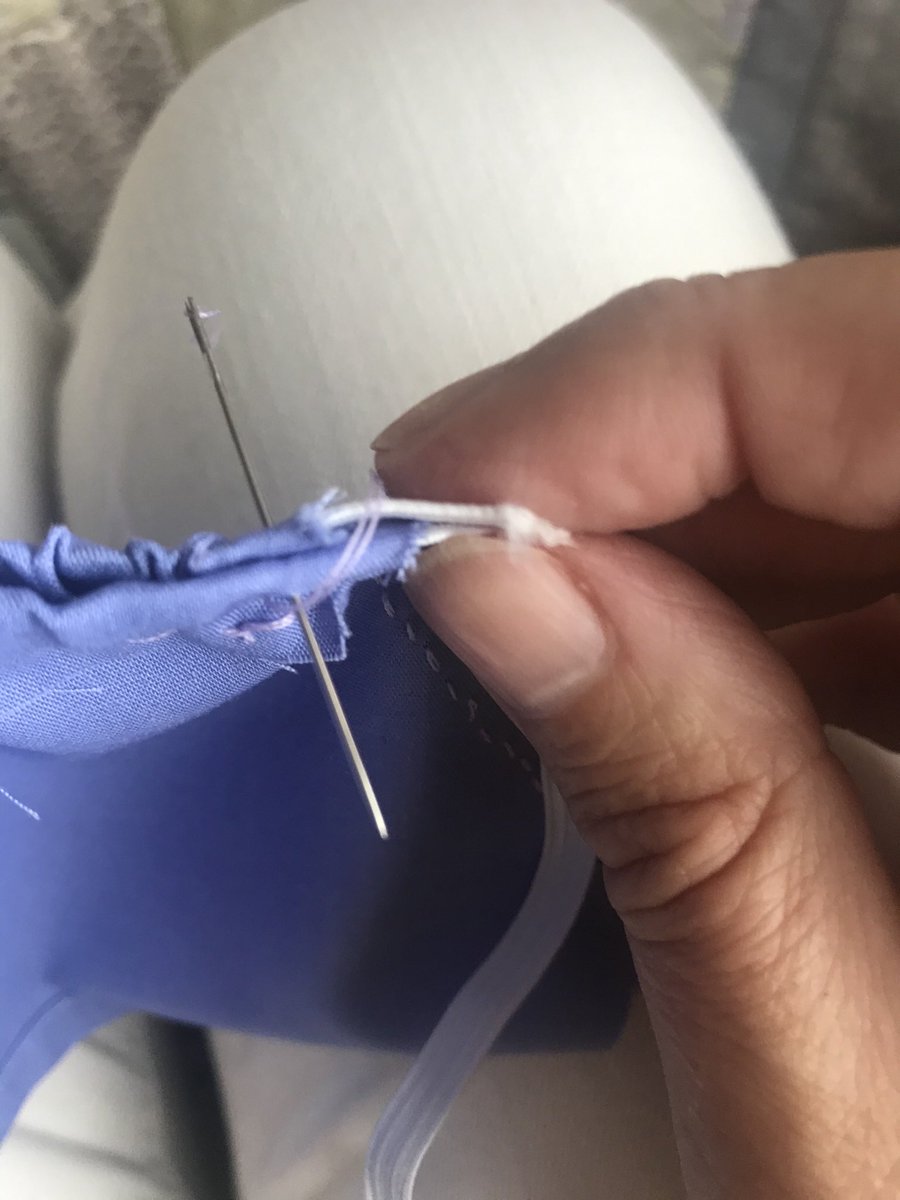
Nine #ShortsTutorial hope you are all following this - we’ve seen results from friends before and we hope you get inspired - anyway. You need a channel for the elastic - so stitch right along the top

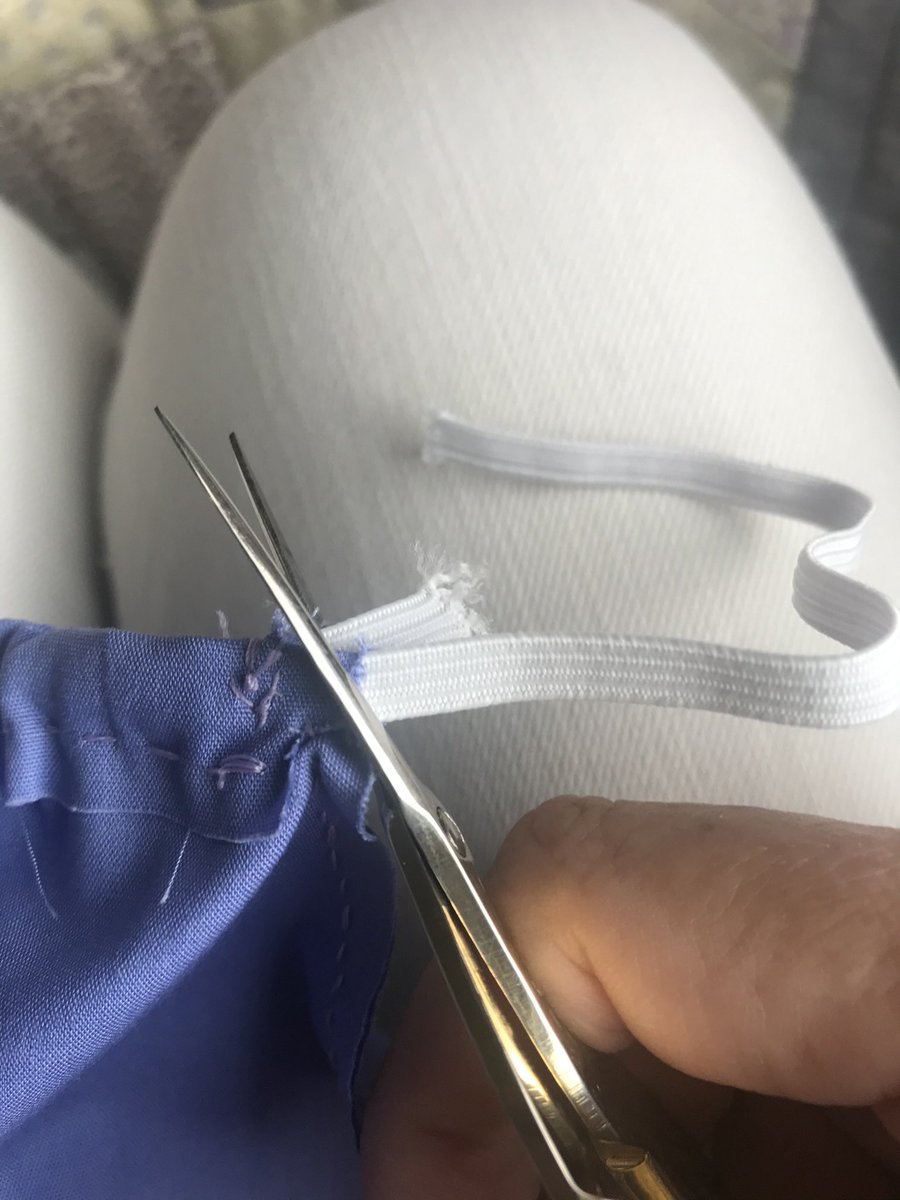
Eleven #ShortsTutorial now you need to pull your elastic through a bit and keep sewing in the same place to finish it offa d anchor it before cutting it off. Almost there. As you can see - it doesn’t have to be neat.
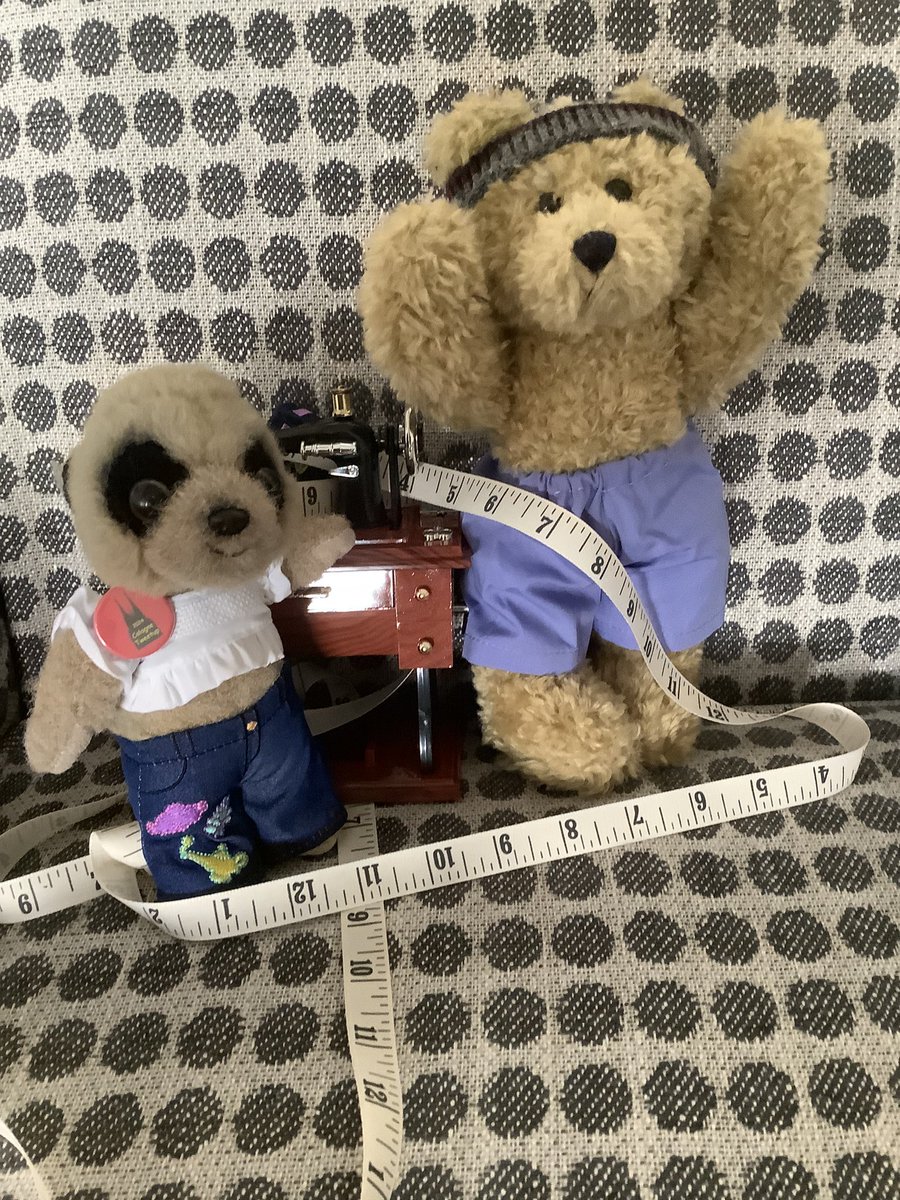
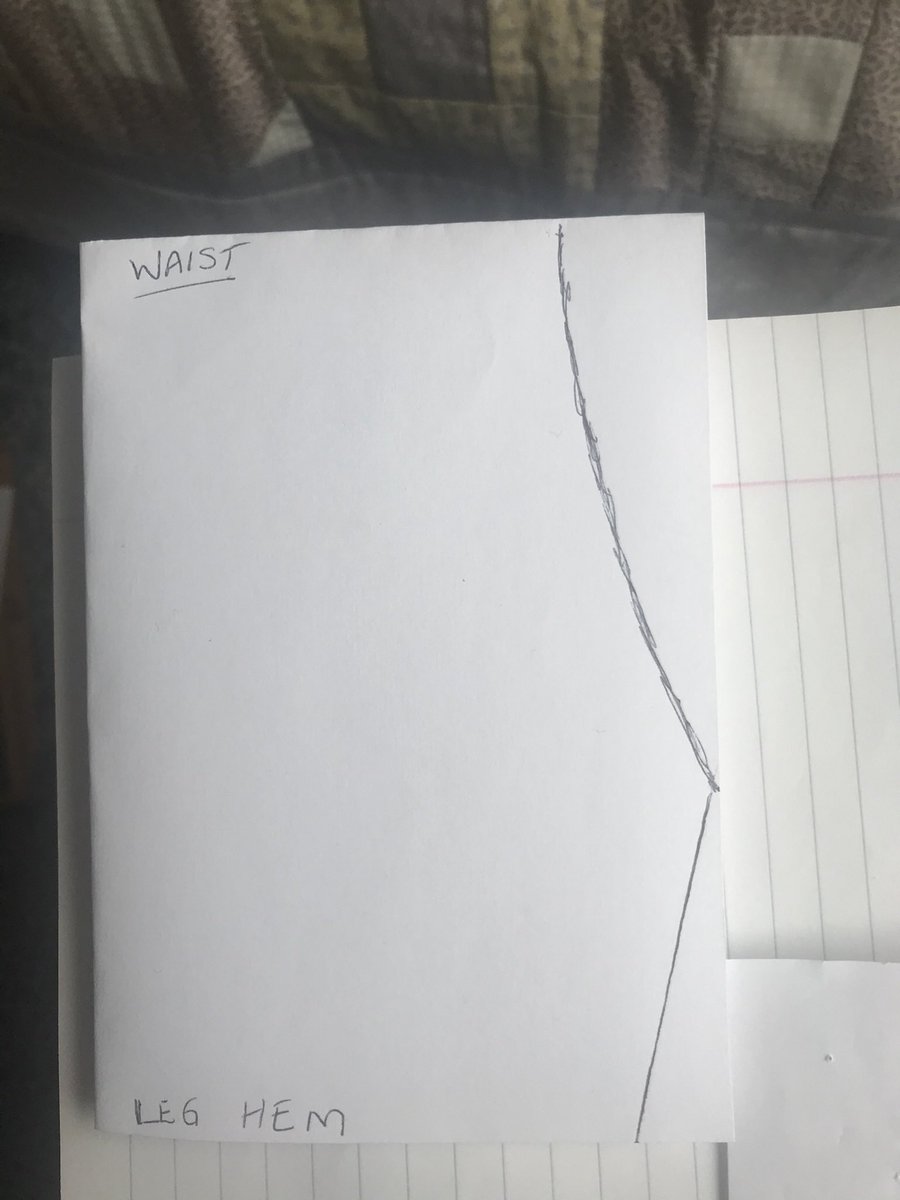
Three #ShortsTutorial - just look down our media to catch up if you get a bit lost. First you need a pattern - and you can just use a bit of wool or string to measure your bear - make two and you can adjust it another time - better too big than too small


✨ Homemade Earrings Making: Simple Beaded Snowflake Earring with Pearls! ✨ Get Ready to Craft your own Earrings—ideal for Festive Occasions! #shortstutorial #beading #snowflake #beads #earrings #diyjewelry #jewellery #jewelrydesign #Holiday youtube.com/shorts/wuxC6AX…
youtube.com
YouTube
Homemade Earring Making: Simple Beaded Snowflake Earrings with Pearls...
#ShortsTutorial - they are numbered 0ne to Fourteen I think - any problems I can easy retweet and the just bookmark them and you'll have them 😃
Fourteen #ShortsTutorial Olga hopes you could all follow and hopes you enjoyed it. We hope it’s given you some ideas
Thirteen #ShortsTutorial now it’s time to turn them the right way round. Giles doesn’t mind how they’re stitched &he doesn’t have a tail which made it a little easier. You will get better - but look - if Giles had a jumper on - no one sees the stitches &he’s ready for the beach
Twelve #ShortsTutorial the last bit is both the legs (still inside out everyone) so you are stitching right across the two legs - can you see - the picture is upside down
Eleven #ShortsTutorial now you need to pull your elastic through a bit and keep sewing in the same place to finish it offa d anchor it before cutting it off. Almost there. As you can see - it doesn’t have to be neat.
Nine #ShortsTutorial hope you are all following this - we’ve seen results from friends before and we hope you get inspired - anyway. You need a channel for the elastic - so stitch right along the top
Eight #ShortsTutorial now for the waist - where the elastic goes. Alternatively you could add a drawstring - don’t forget to iron the top over if you need to. Pin (even a safety pin) the elastic at the end & puta couple of stitches in to anchor it
Six #ShortsTutorial with the hemmed edges at the bottom and the raw edges at the top - stitch the crotch area together as small stitches as possible - but don’t worry - they’re not on show
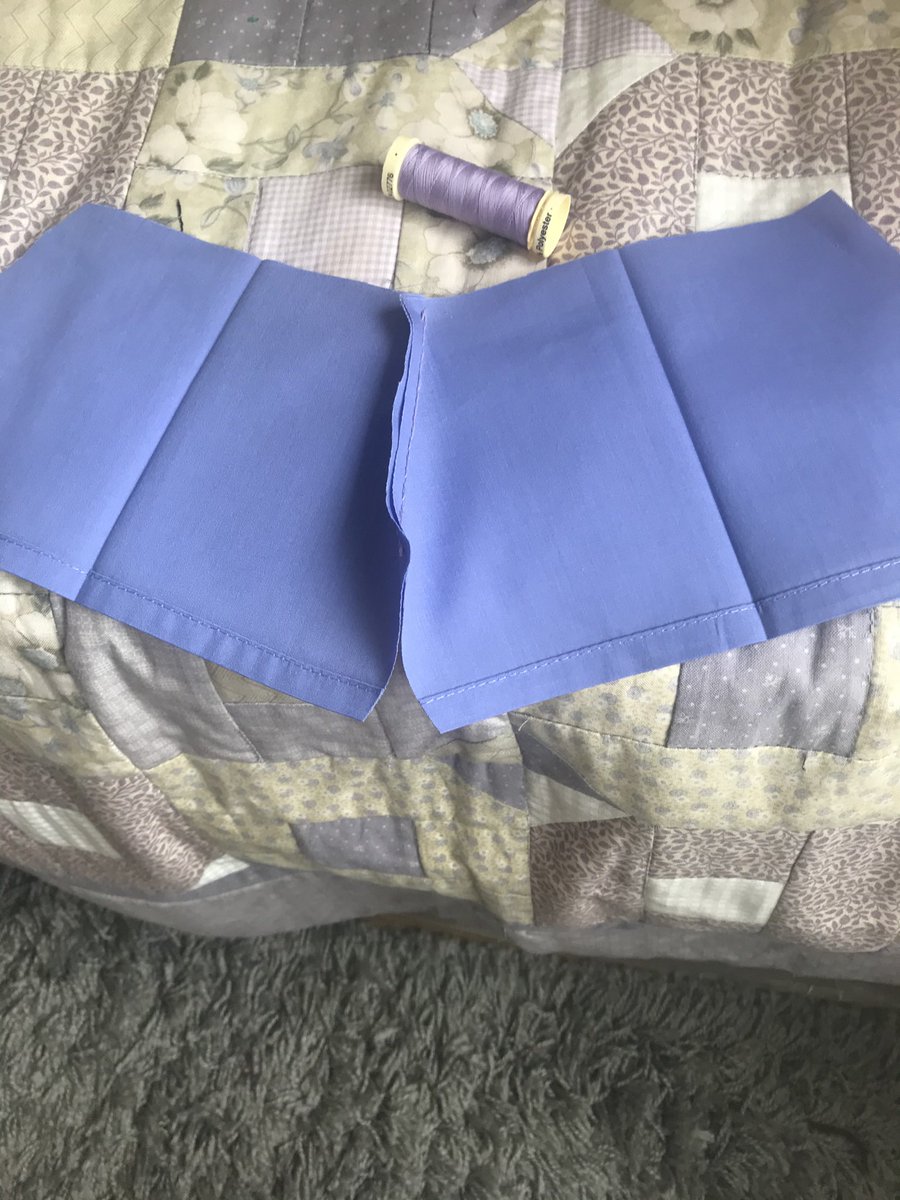
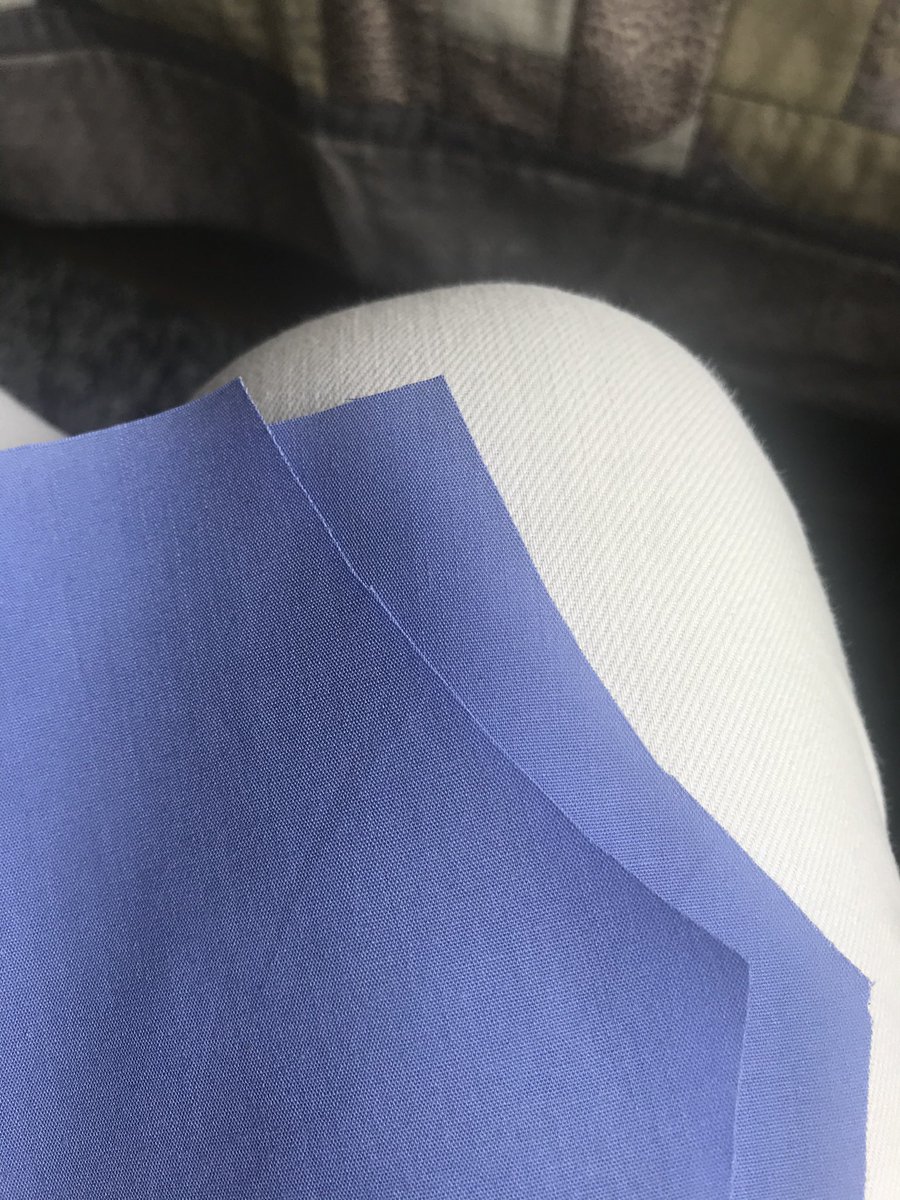
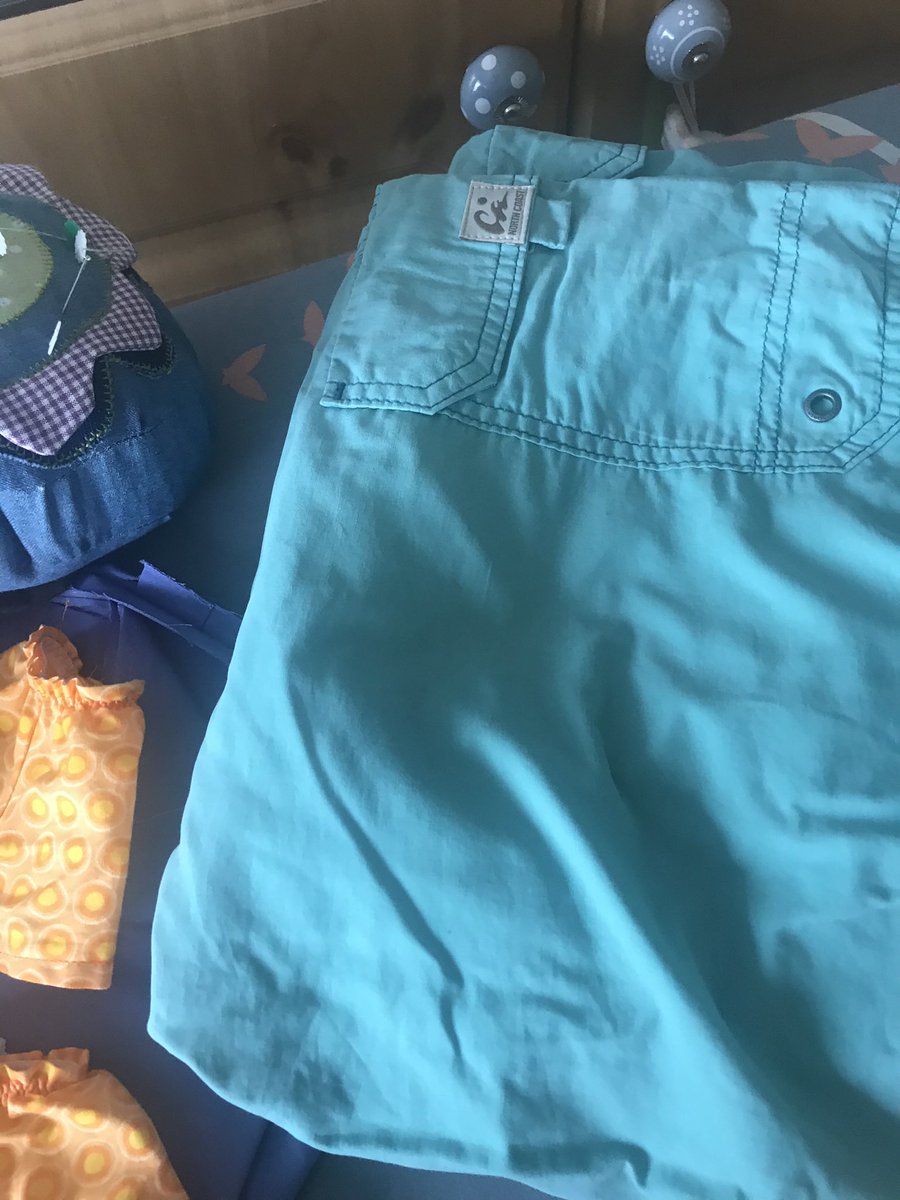
Five #ShortsTutorial if you use something with a pre-sewn hem this will give a neat finish & look good. Fold the material in half & put your pattern on as shown - you need two legs cut out. Press your fabric before cutting out (look at the pictures - describing is hard 🙂)
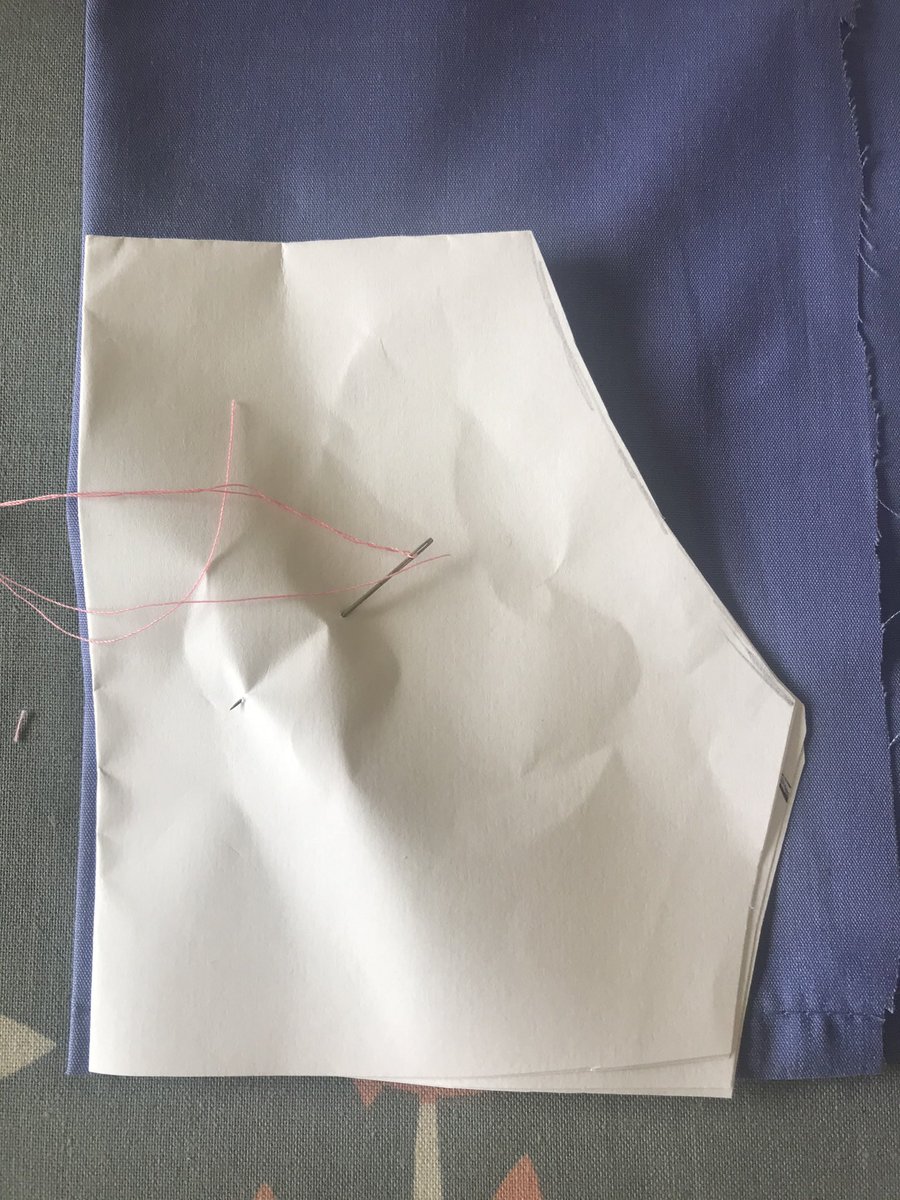

Three #ShortsTutorial - just look down our media to catch up if you get a bit lost. First you need a pattern - and you can just use a bit of wool or string to measure your bear - make two and you can adjust it another time - better too big than too small
Two #ShortsTutorial - you don’t need a sewing machine but obviously you can use one - once you know what you’re doing. The bears don’t mind what the stitches look like - they get excited about getting new clothes. Look at the lilac material - - pillowcase with a pre-sewn hem .
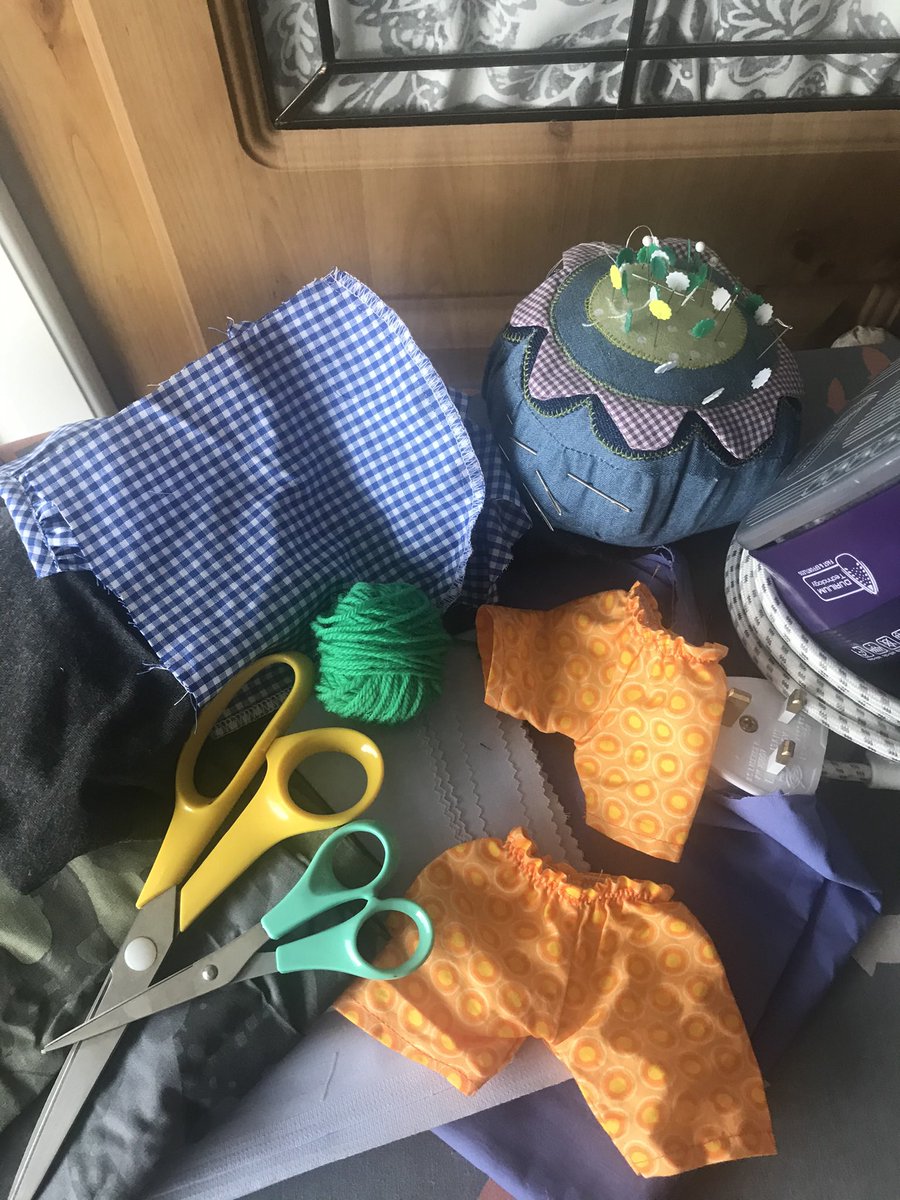
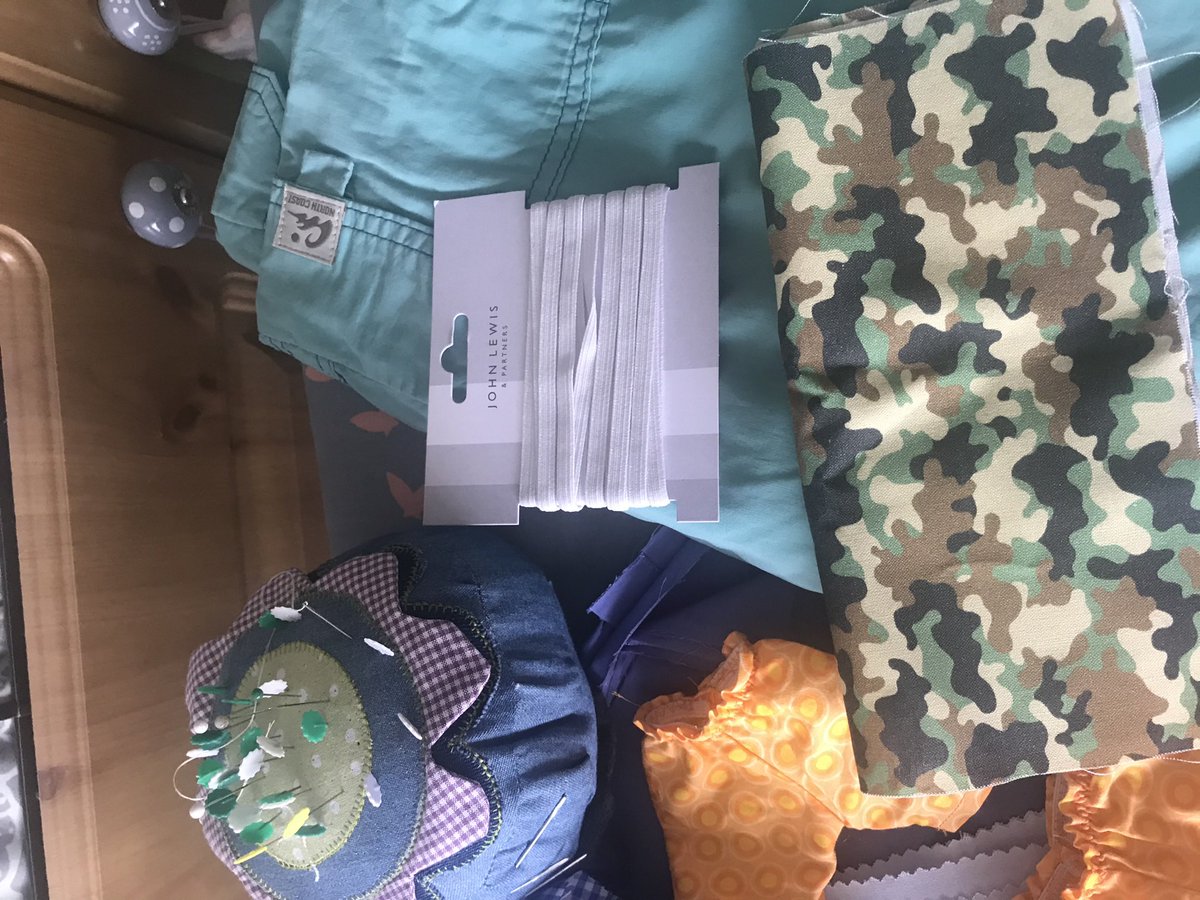
one #ShortsTutorial - gather your ingredients. Best to use something you’ve got before you want to lash out on any fabric - a pillow case is good if you have one spare as some seams already sewn will be useful. The likes of Aldi sometimes sell “fat quarters” that are inexpensive
🎬 BTS of 3D animation in Blender. Join us on this visual journey as we craft each frame and scene, bringing our imagination to life. Stay tuned for more exciting content. 🎬 #BlenderAnimation #ShortsTutorial #LearnBlender
Fourteen #ShortsTutorial Olga hopes you could all follow and hopes you enjoyed it. We hope it’s given you some ideas
Eight #ShortsTutorial now for the waist - where the elastic goes. Alternatively you could add a drawstring - don’t forget to iron the top over if you need to. Pin (even a safety pin) the elastic at the end & puta couple of stitches in to anchor it
one #ShortsTutorial - gather your ingredients. Best to use something you’ve got before you want to lash out on any fabric - a pillow case is good if you have one spare as some seams already sewn will be useful. The likes of Aldi sometimes sell “fat quarters” that are inexpensive
Six #ShortsTutorial with the hemmed edges at the bottom and the raw edges at the top - stitch the crotch area together as small stitches as possible - but don’t worry - they’re not on show
Thirteen #ShortsTutorial now it’s time to turn them the right way round. Giles doesn’t mind how they’re stitched &he doesn’t have a tail which made it a little easier. You will get better - but look - if Giles had a jumper on - no one sees the stitches &he’s ready for the beach
Two #ShortsTutorial - you don’t need a sewing machine but obviously you can use one - once you know what you’re doing. The bears don’t mind what the stitches look like - they get excited about getting new clothes. Look at the lilac material - - pillowcase with a pre-sewn hem .
Nine #ShortsTutorial hope you are all following this - we’ve seen results from friends before and we hope you get inspired - anyway. You need a channel for the elastic - so stitch right along the top
Twelve #ShortsTutorial the last bit is both the legs (still inside out everyone) so you are stitching right across the two legs - can you see - the picture is upside down
Eleven #ShortsTutorial now you need to pull your elastic through a bit and keep sewing in the same place to finish it offa d anchor it before cutting it off. Almost there. As you can see - it doesn’t have to be neat.
Three #ShortsTutorial - just look down our media to catch up if you get a bit lost. First you need a pattern - and you can just use a bit of wool or string to measure your bear - make two and you can adjust it another time - better too big than too small
Five #ShortsTutorial if you use something with a pre-sewn hem this will give a neat finish & look good. Fold the material in half & put your pattern on as shown - you need two legs cut out. Press your fabric before cutting out (look at the pictures - describing is hard 🙂)
Something went wrong.
Something went wrong.
United States Trends
- 1. #2025MAMAVOTE 1.35M posts
- 2. #KonamiWorldSeriesSweepstakes N/A
- 3. Tyla 15.1K posts
- 4. Fetterman 66.1K posts
- 5. Deport Harry Sisson 24.5K posts
- 6. No Kings 146K posts
- 7. Somalia 29.7K posts
- 8. Andrade 6,383 posts
- 9. #thursdayvibes 3,578 posts
- 10. Dave Dombrowski N/A
- 11. #SpiritDay 1,214 posts
- 12. Miguel Vick N/A
- 13. #ThursdayThoughts 2,559 posts
- 14. Mila 17.3K posts
- 15. Ninja Gaiden 24.7K posts
- 16. Jennifer Welch 7,689 posts
- 17. Turkey Leg Hut N/A
- 18. Starting 5 7,353 posts
- 19. Tomonobu Itagaki 18.4K posts
- 20. Caresha N/A