
Enid
@ios_dev_alb
iOS dev • Content creator • Learn iOS development visually: https://learnandcodewithenid.com
Bạn có thể thích


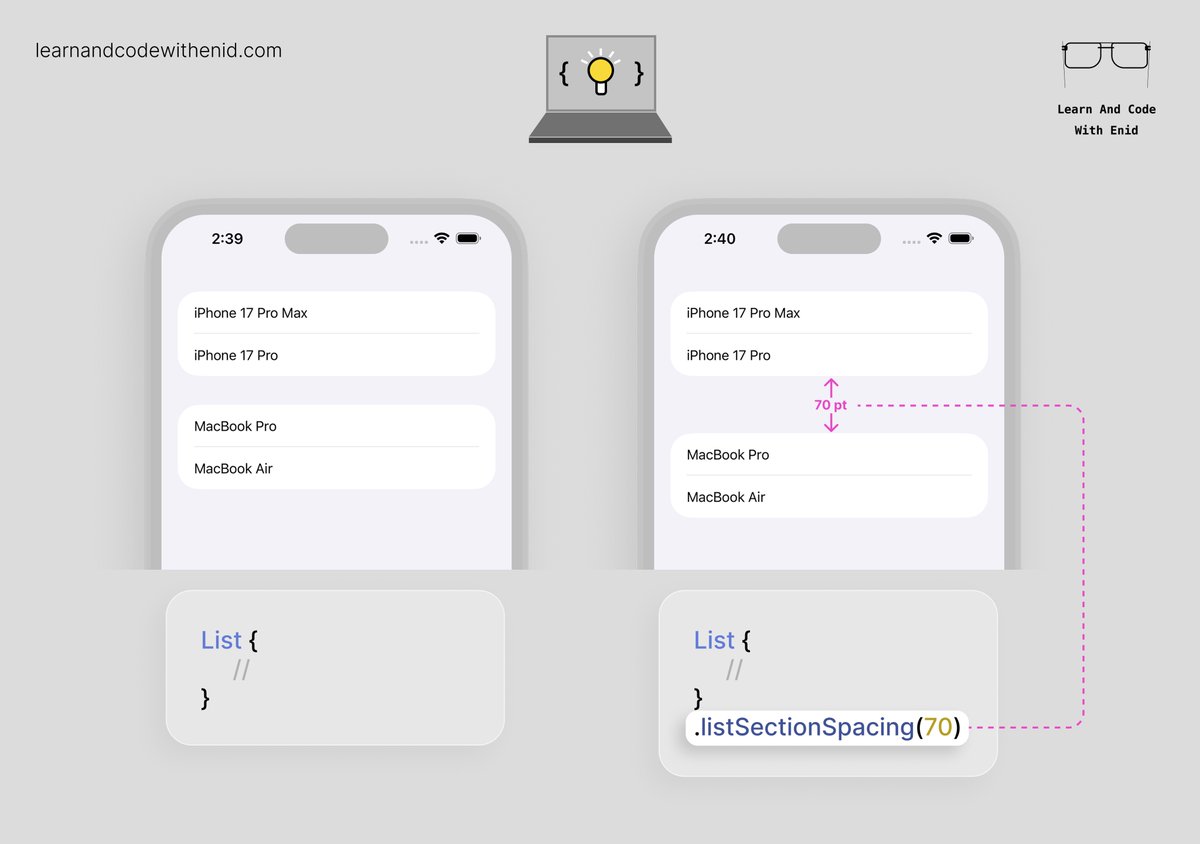
SwiftUI Tip 💡 In iOS 17.0+, use listSectionSpacing() to control the vertical space between sections in a List. → learnandcodewithenid.com
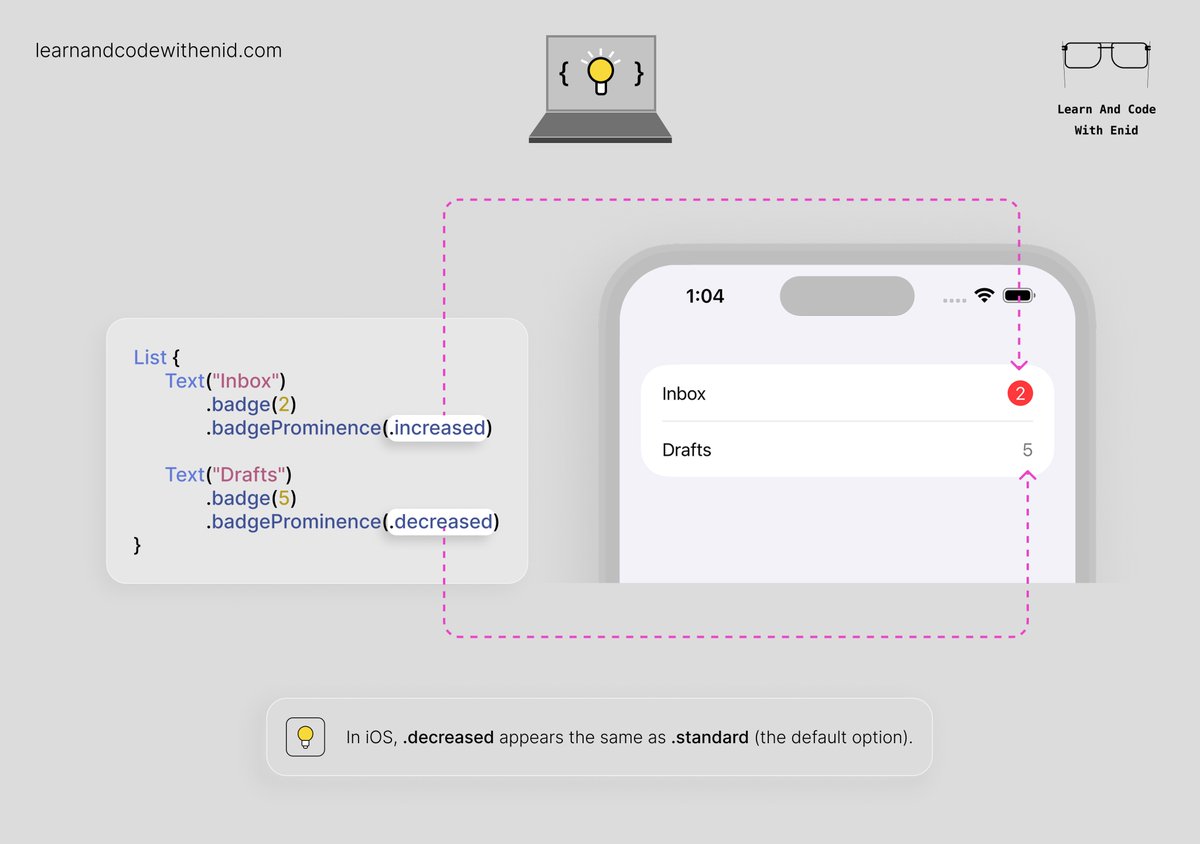
SwiftUI Tip 💡 In iOS 17.0+, use the badgeProminence() modifier to control how noticeable a badge appears. → learnandcodewithenid.com
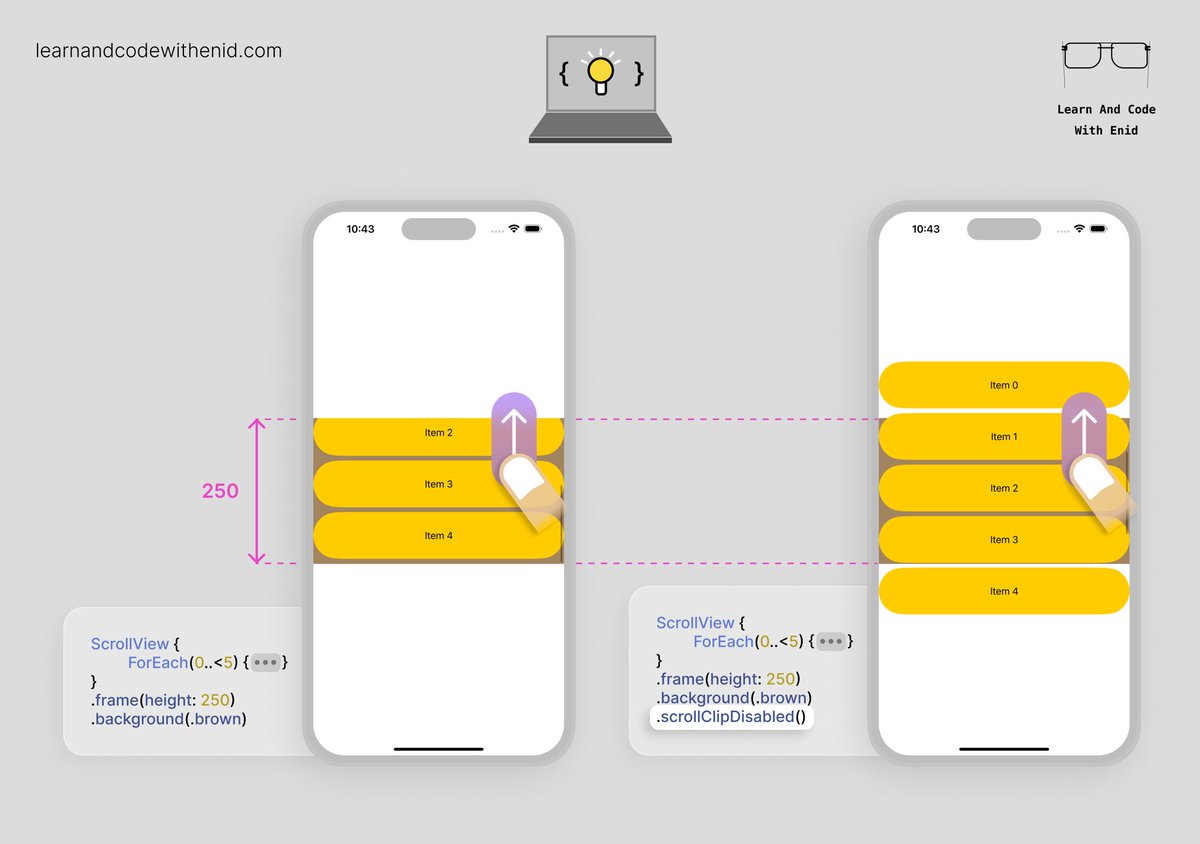
SwiftUI Tip 💡 By default, a scroll view clips anything that extends past its bounds. In iOS 17.0+, use scrollClipDisabled() to let items extend beyond the scroll view’s bounds → learnandcodewithenid.com
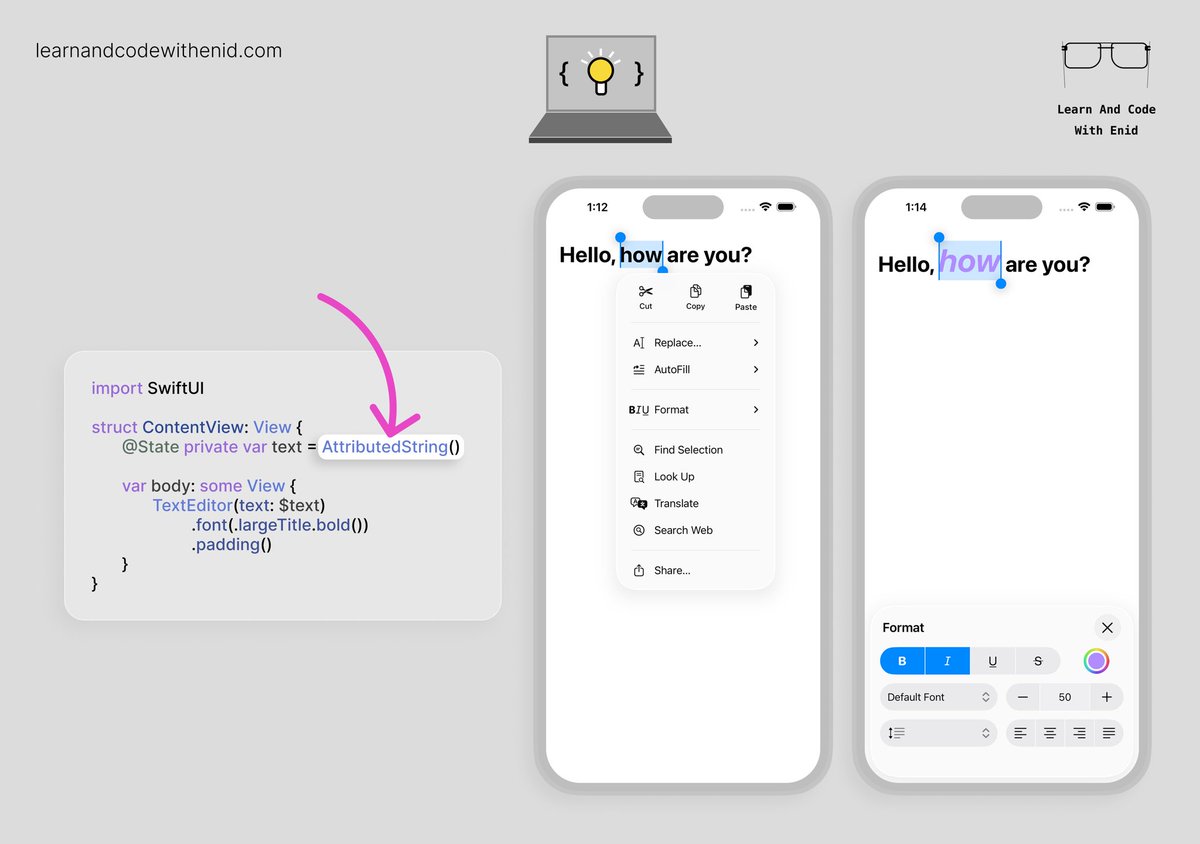
SwiftUI Tip 💡 In iOS 26.0+, TextEditor supports rich text editing when you bind it to an AttributedString. This instantly unlocks system-native formatting tools - bold, italics, underline, colors, alignment, and more. → learnandcodewithenid.com
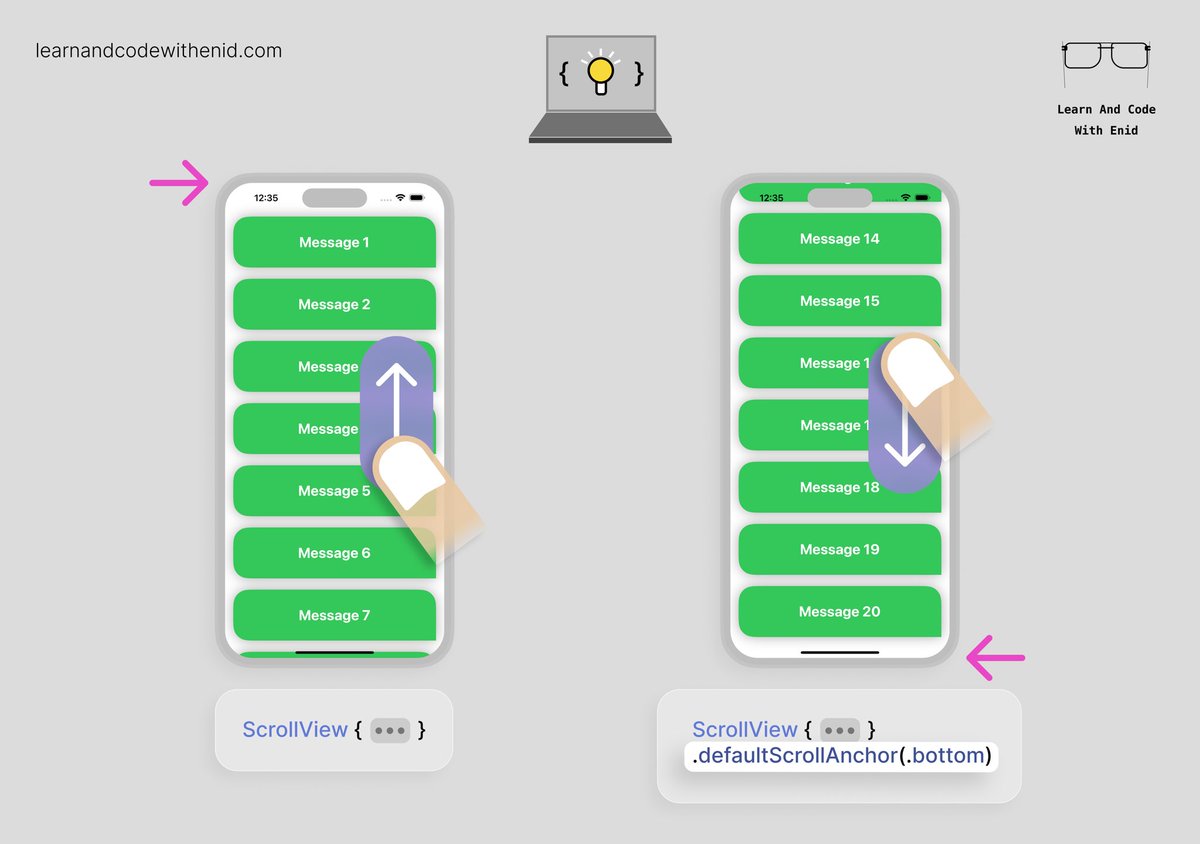
SwiftUI Tip 💡 In iOS 17+, you can choose where your scroll view starts scrolling from using defaultScrollAnchor(). For example, use .top to begin at the start, or .bottom to jump to the latest content - perfect for chat views or message feeds. → learnandcodewithenid.com
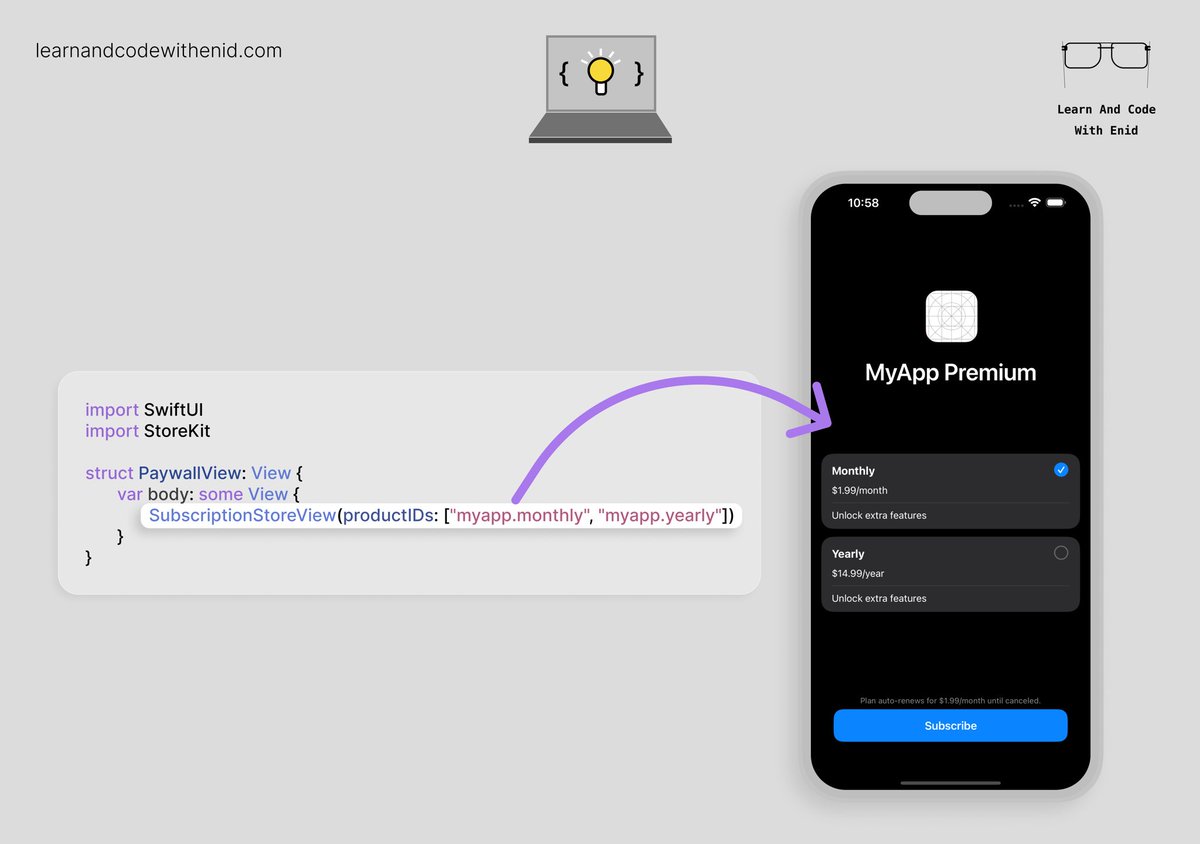
SwiftUI Tip 💡 Did you know? StoreKit lets you present a full paywall with all your subscription plans using just a single line of code. → learnandcodewithenid.com
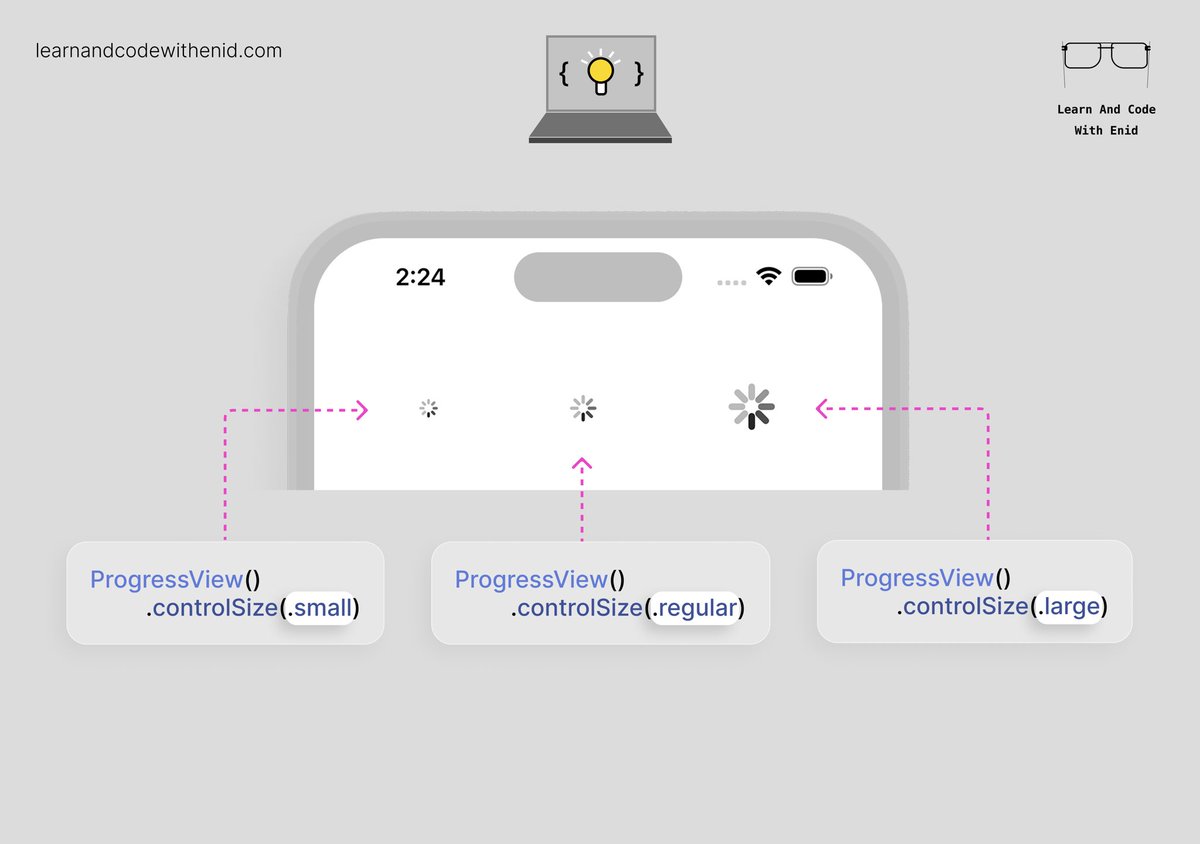
SwiftUI Tip 💡 Did you know? You can change the size of a circular ProgressView using the controlSize() modifier. → learnandcodewithenid.com
🚀 As always, new chapters, lessons, and updates are on the way. You can join with a 50% lifetime discount on the yearly plan — the offer expires soon. → learnandcodewithenid.com
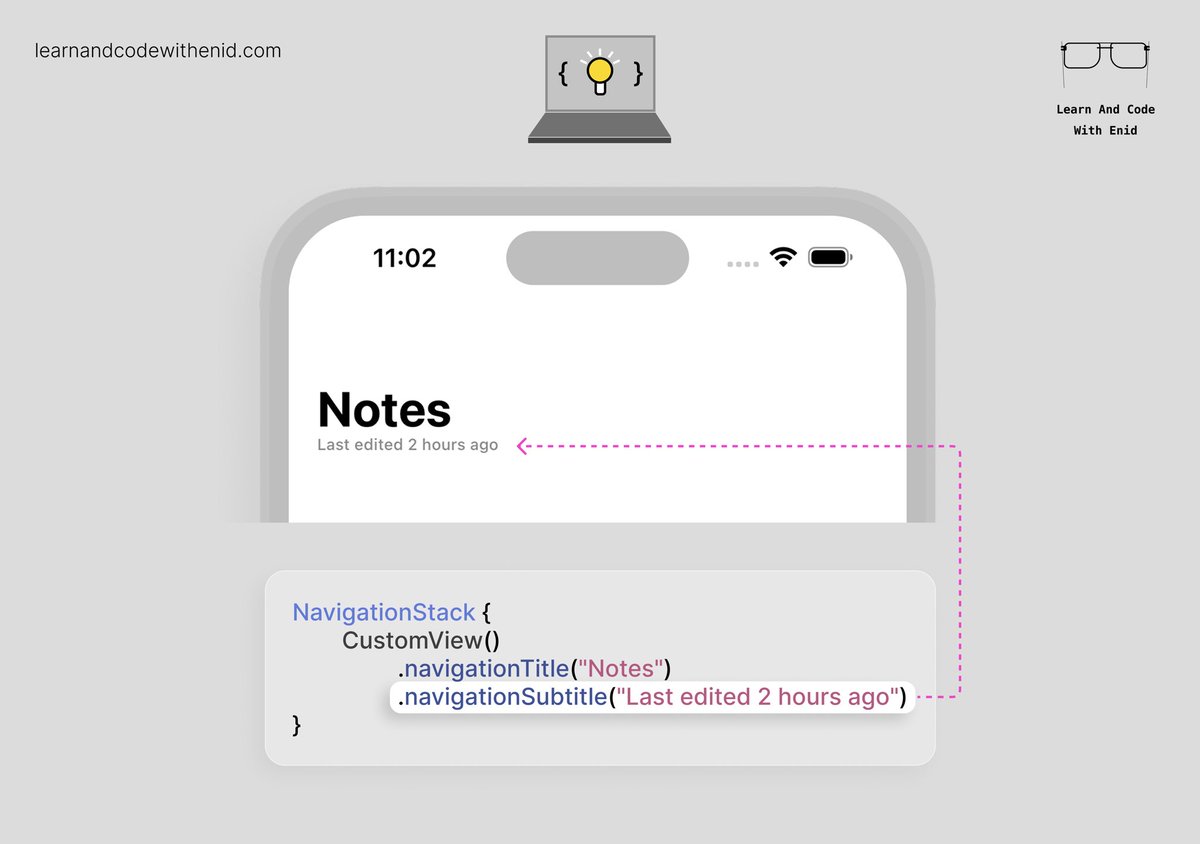
SwiftUI Tip 💡 In iOS 26.0+, you can finally display a subtitle in the navigation bar using the navigationSubtitle() modifier. → learnandcodewithenid.com
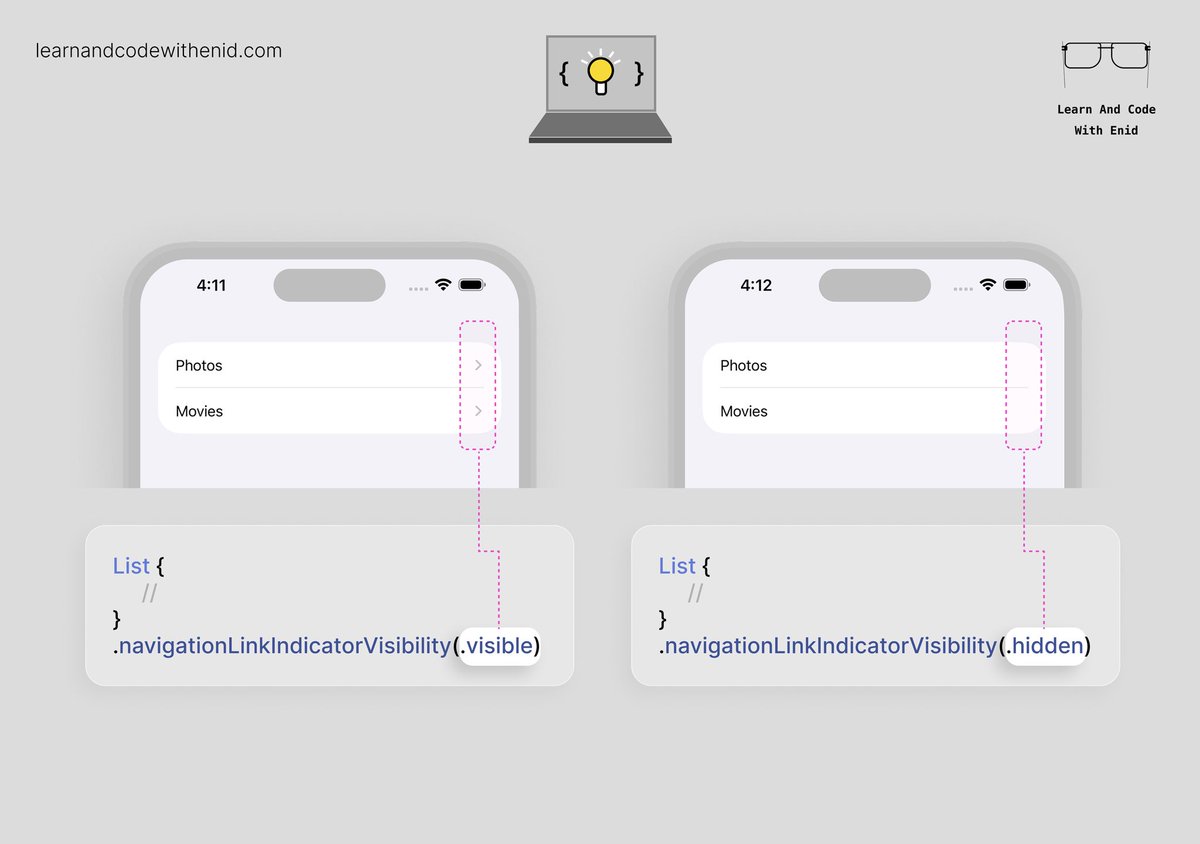
SwiftUI Tip 💡 In iOS 17.0+, use navigationLinkIndicatorVisibility() to control whether a NavigationLink shows its disclosure indicator. Perfect for cleaner lists, or when you want full control over row styling. → learnandcodewithenid.com
SwiftUI - Understanding DatePicker (Part 1) is now available to LACWE members 🎉 5 new visuals → learnandcodewithenid.com

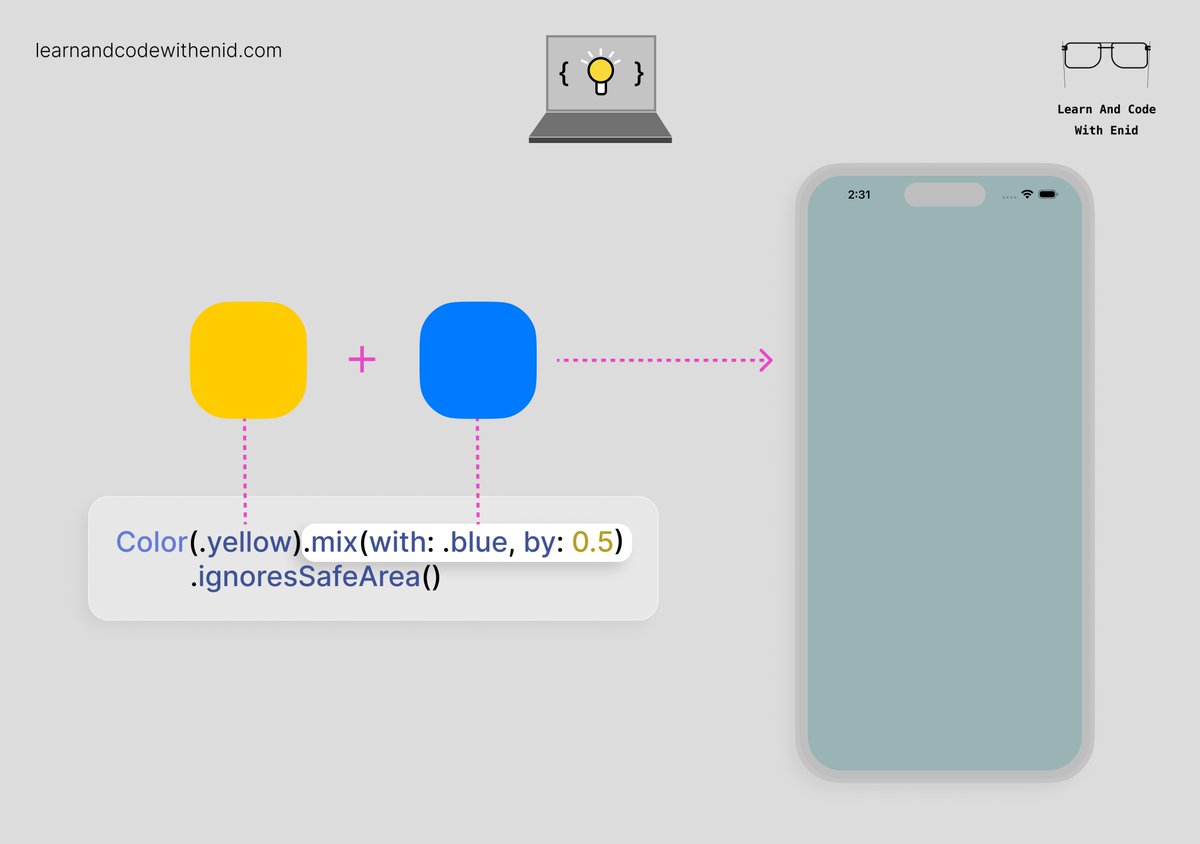
SwiftUI Tip 💡 In iOS 18.0+, use the .mix() modifier to blend two colors into a new one. Great for creating custom backgrounds, smooth gradients, or dynamic themes on the fly. → learnandcodewithenid.com
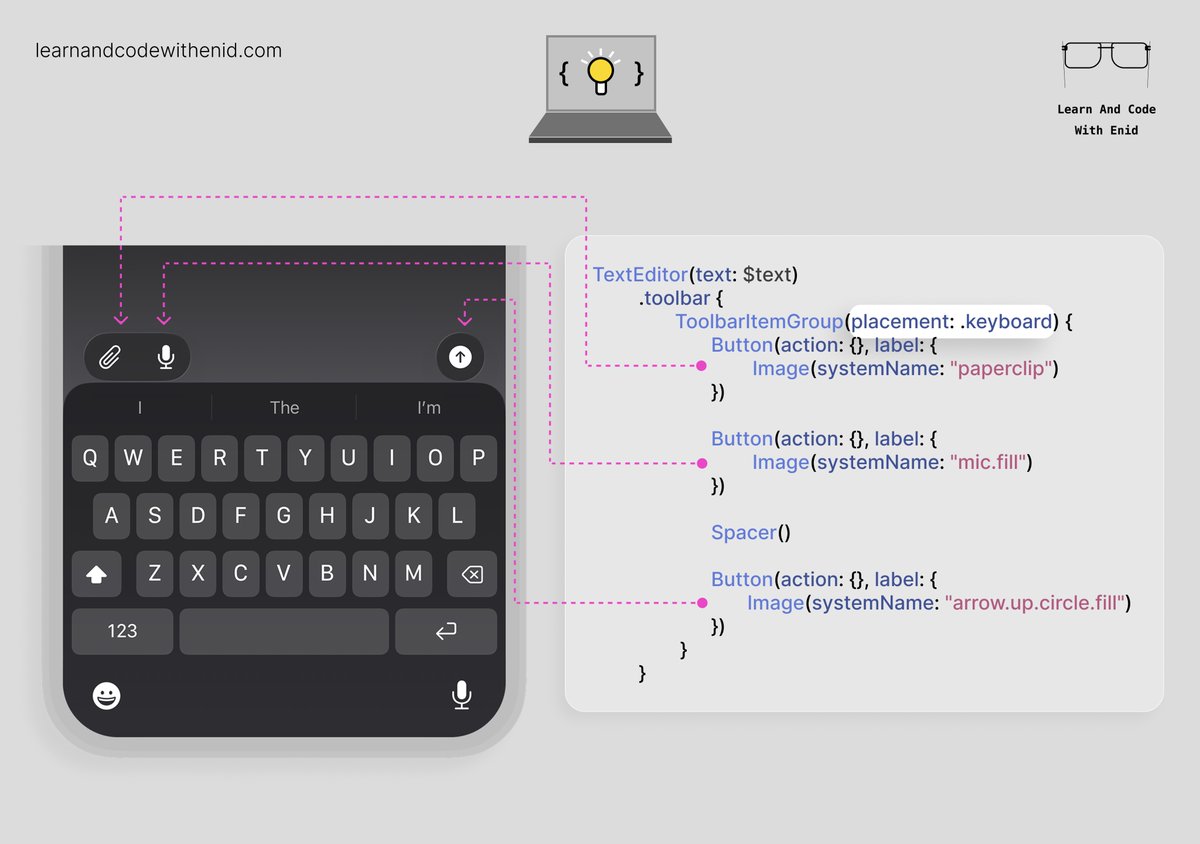
SwiftUI Tip 💡 You can place a toolbar with items above the keyboard by using the .keyboard placement. Perfect for AI chat apps, note-taking apps, and any interface with quick actions while typing. → learnandcodewithenid.com
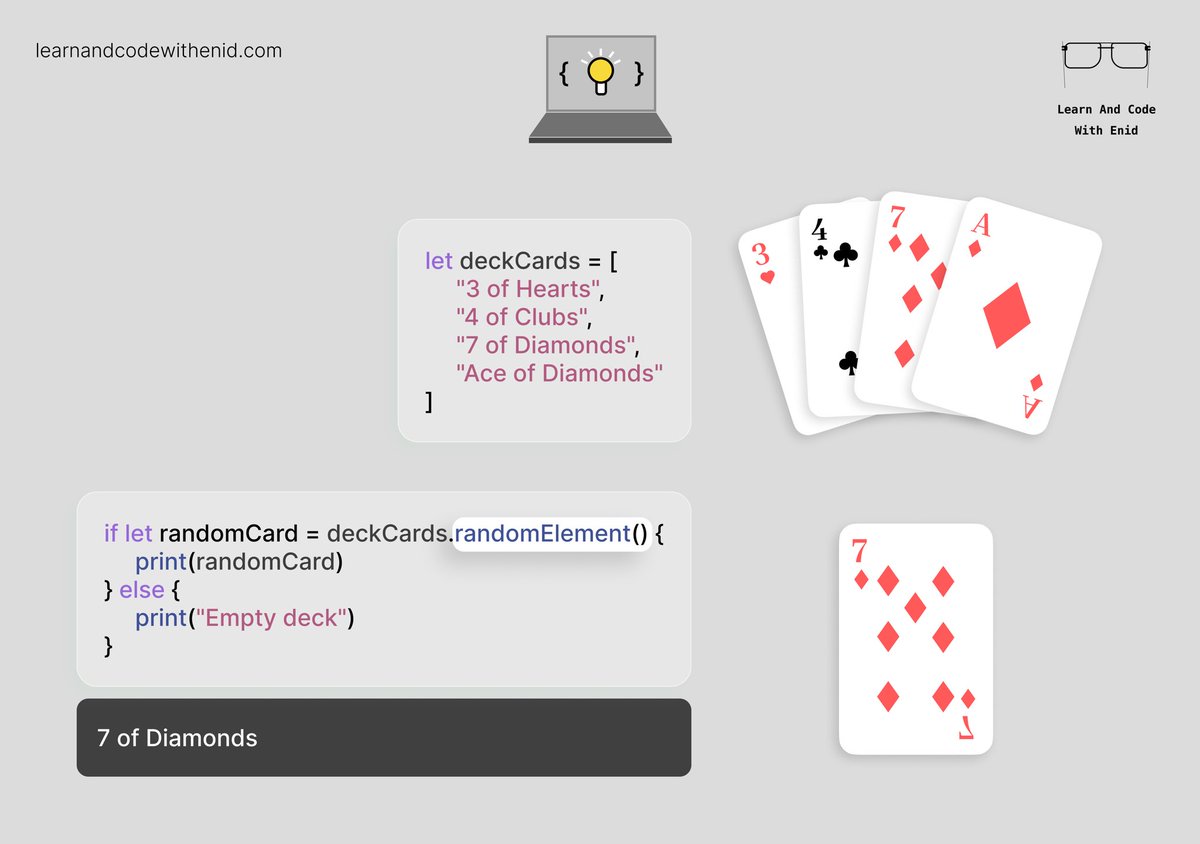
Swift Tip 💡 Use randomElement() to quickly pick a random item from any collection. Perfect for games, quizzes, or showing surprise content with almost no code. 🚀 → learnandcodewithenid.com
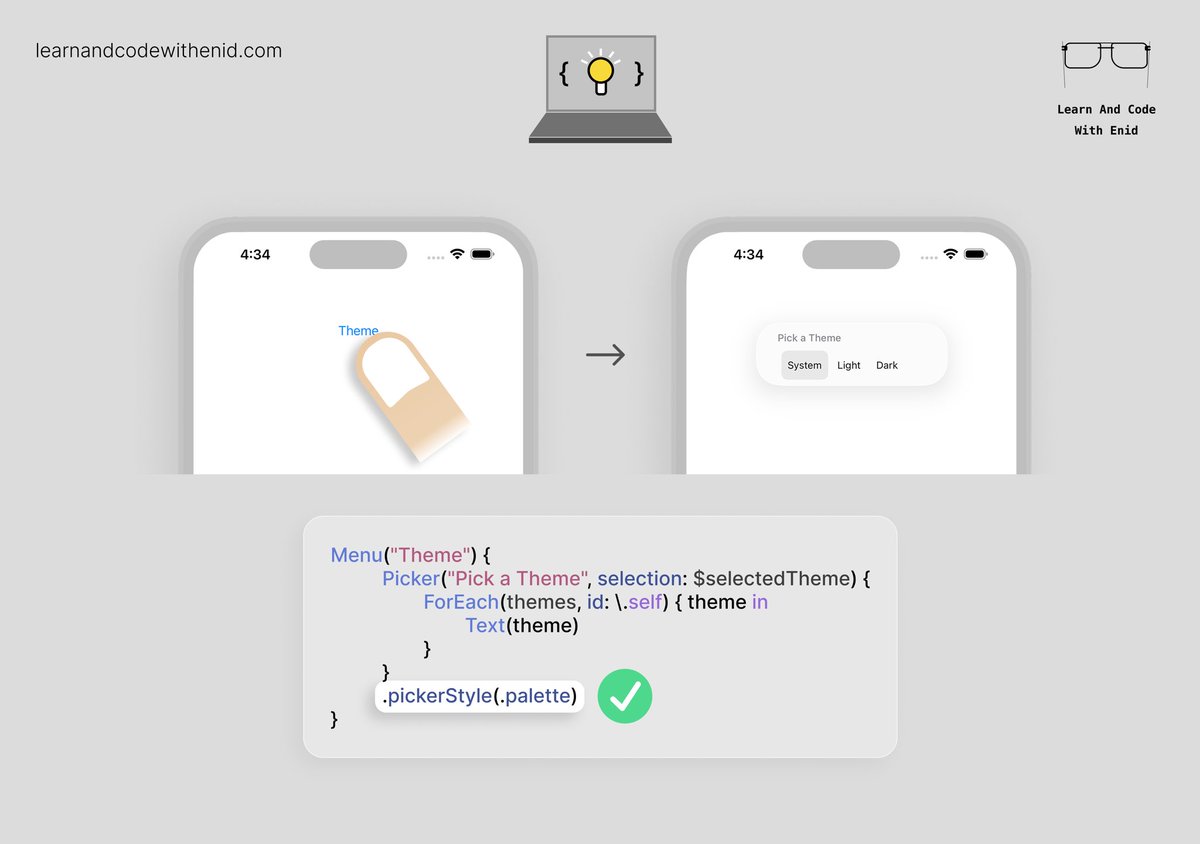
SwiftUI Tip 💡 In iOS 17.0+, use .pickerStyle(.palette) to display your picker as a horizontal palette of options. → learnandcodewithenid.com
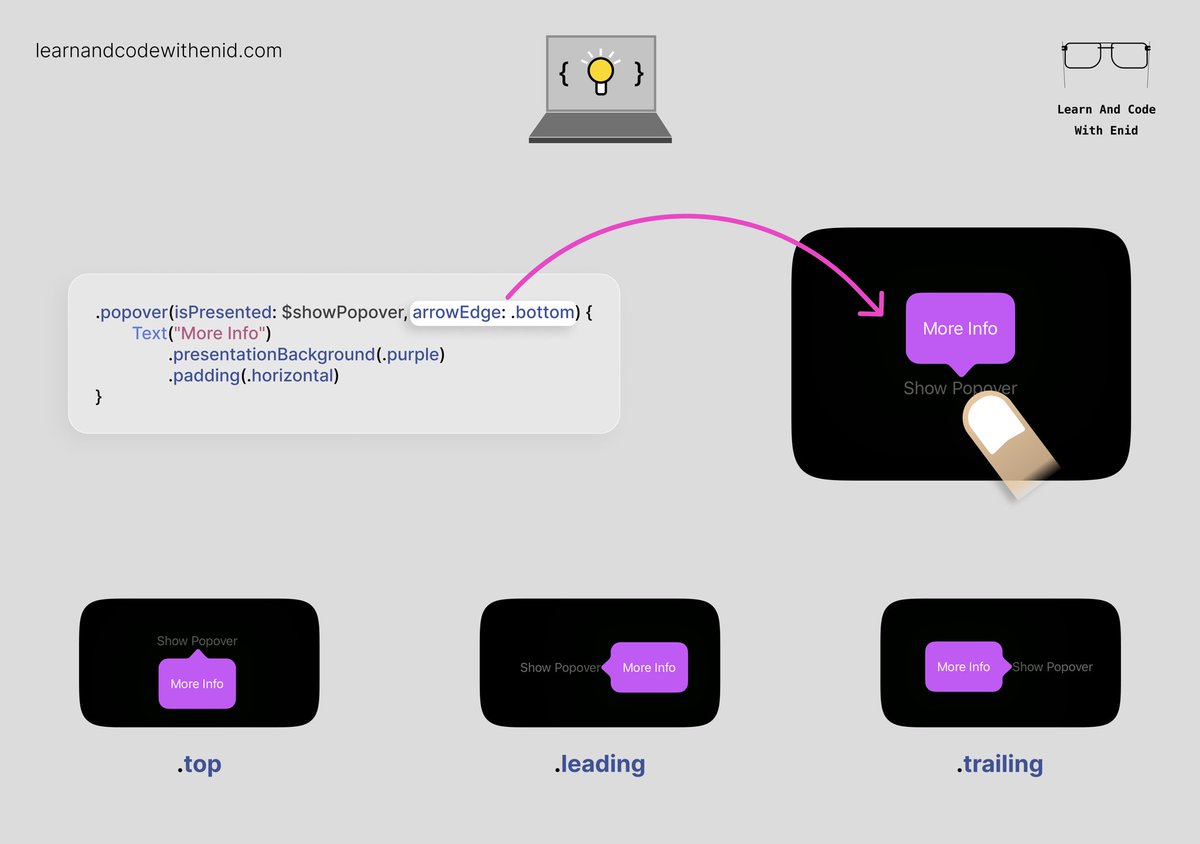
SwiftUI Tip 💡 You can control where the popover’s arrow appears - top, bottom, leading, or trailing - using the arrowEdge parameter. Perfect for creating context-aware popovers. → learnandcodewithenid.com
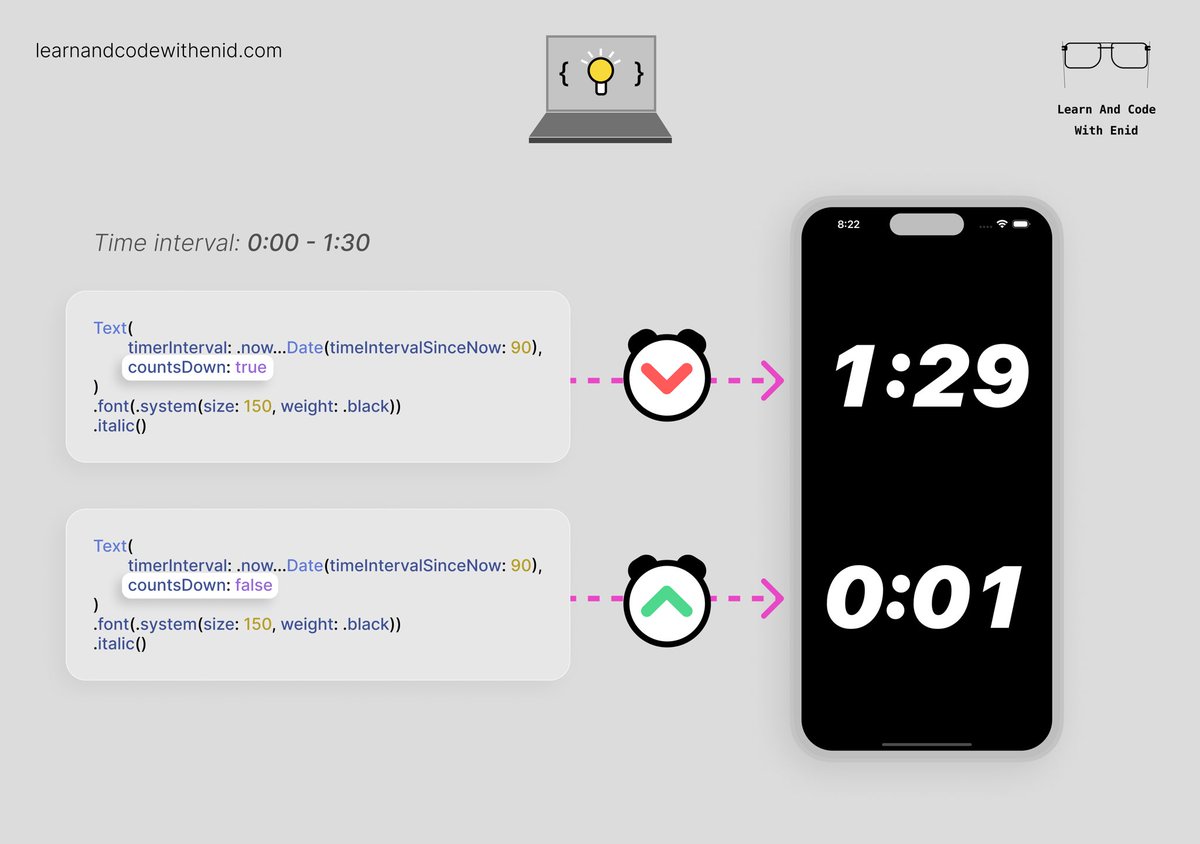
SwiftUI Tip 💡 Did you know? You can show a live timer - countdown or count-up - directly using a Text view. → learnandcodewithenid.com

Stanford’s CS193p course on Developing Apps for iOS is one of the best resources for pro devs who want to get into iOS development, and they’ve posted a brand new updated version. Highly recommended to all! #iosdev cs193p.stanford.edu
cs193p.stanford.edu
CS193p - Developing Apps for iOS
CS193p - Developing Apps for iOS


United States Xu hướng
- 1. Chris Paul 5,352 posts
- 2. Pat Spencer 2,610 posts
- 3. Kerr 5,550 posts
- 4. Podz 3,257 posts
- 5. Shai 15.4K posts
- 6. Jimmy Butler 2,624 posts
- 7. Seth Curry 4,771 posts
- 8. Hield 1,591 posts
- 9. Carter Hart 4,046 posts
- 10. #DubNation 1,419 posts
- 11. Pope 47.3K posts
- 12. Derek Dixon 1,285 posts
- 13. Kuminga 1,456 posts
- 14. The Clippers 8,993 posts
- 15. #SeanCombsTheReckoning 4,774 posts
- 16. Brandy 8,301 posts
- 17. Connor Bedard 2,402 posts
- 18. Caleb Wilson 1,181 posts
- 19. #AreYouSure2 129K posts
- 20. #ThunderUp N/A
Bạn có thể thích
-
 Sean Allen
@seanallen_dev -
 Paul Hudson
@twostraws -
 Vincent Pradeilles
@v_pradeilles -
 Sarun W.
@sarunw -
 Antoine v.d. SwiftLee
@twannl -
 Kavsoft
@_Kavsoft -
 Flo writes Code
@FloWritesCode -
 Donny Wals 👾
@DonnyWals -
 StewartLynch 🇨🇦
@StewartLynch -
 Karin Prater
@swiftyplace -
 Natascha Fadeeva
@tanaschita -
 Natalia Panferova
@natpanferova -
 iOSDevHappyHour
@iosdevhappyhour -
 Simon B. Støvring
@simonbs -
 Everton Carneiro
@everton_dev
Something went wrong.
Something went wrong.